Troubleshooting Assist
This section lists a few steps that may help you troubleshoot issues with Assist.
View debug information
- Go to Settings > Voice assistants.
- From the list of assistants, go to your assistant and select Debug in the dialog.
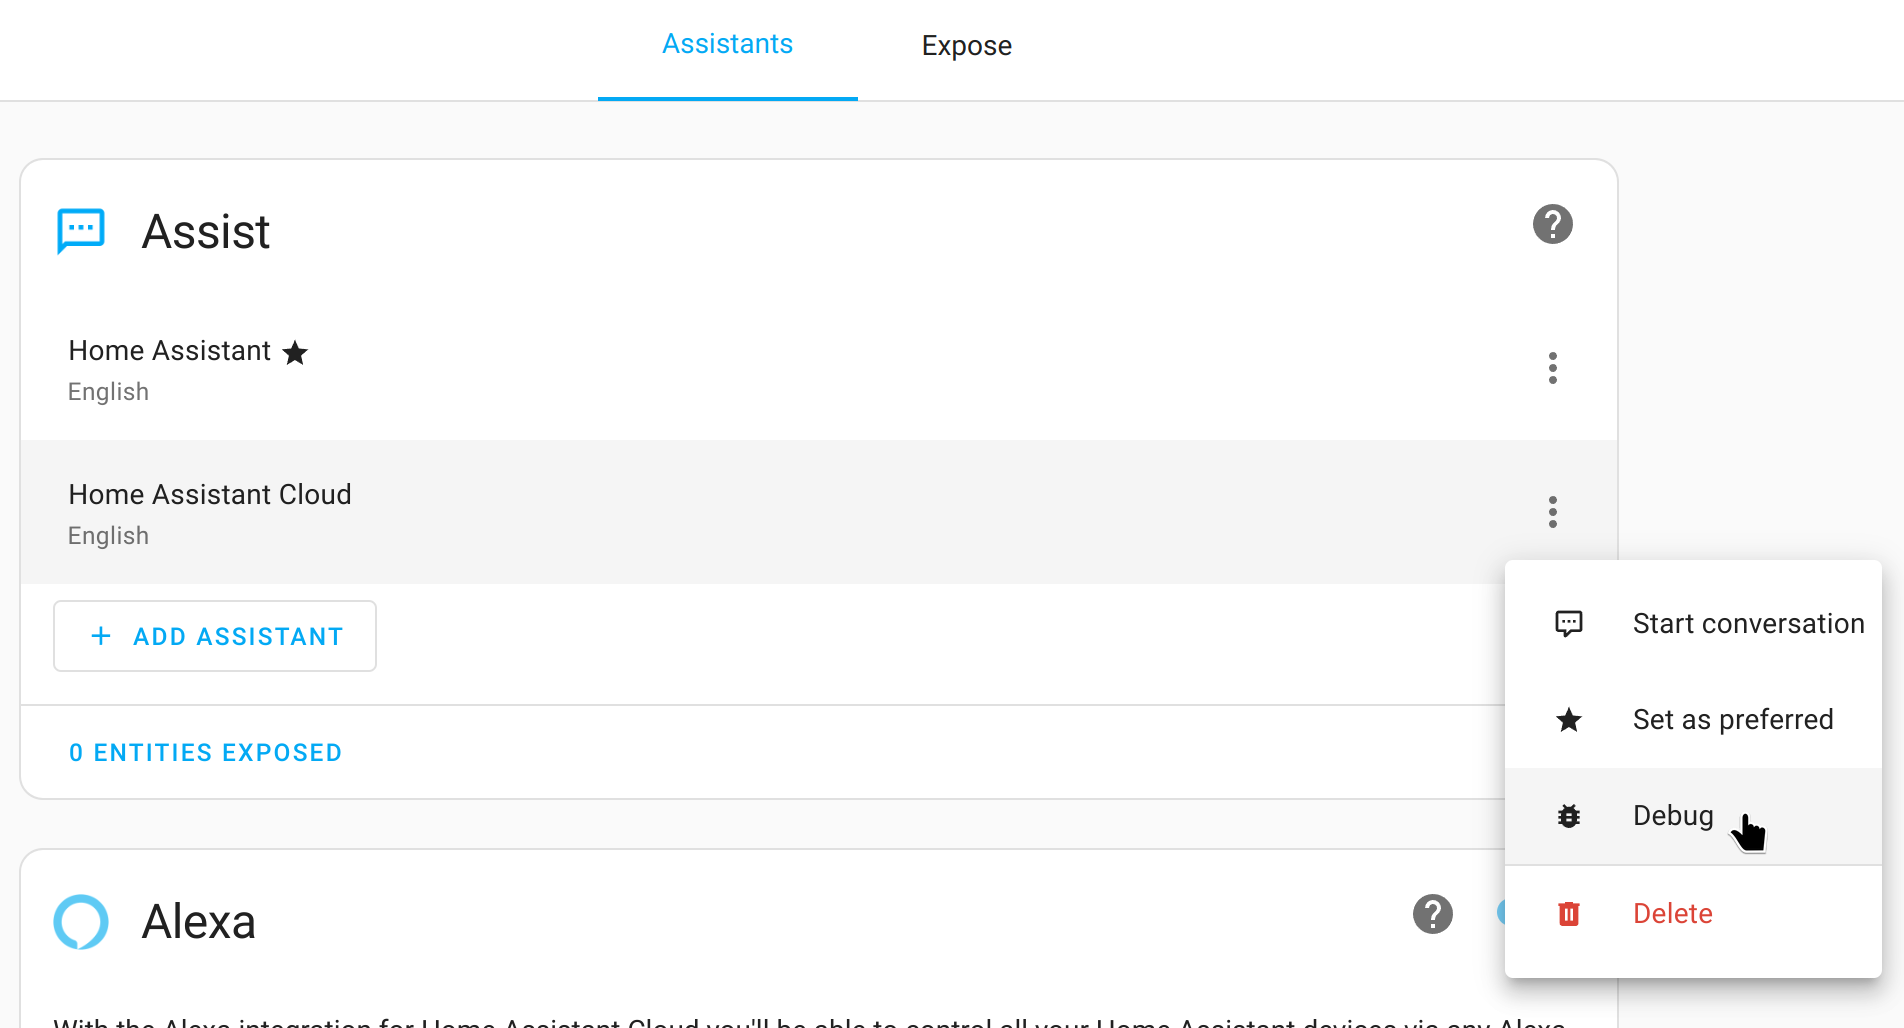
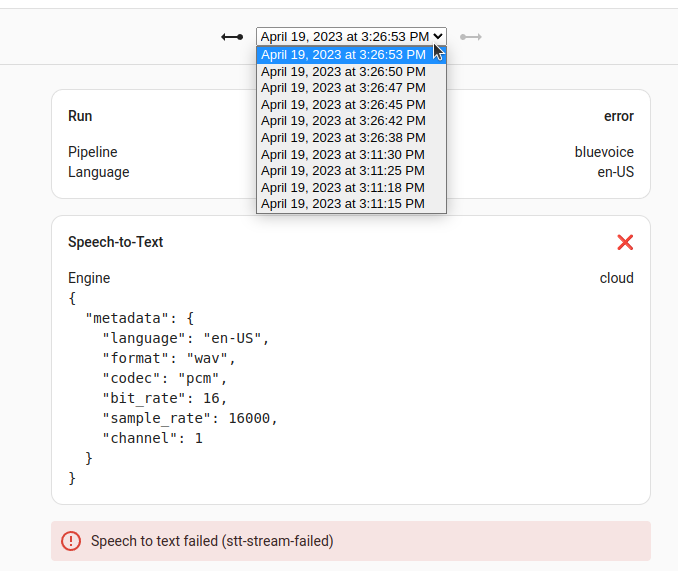
- At the top of the screen, from the dropdown menu, select the run you are interested in.
Test a sentence per language without voice: without executing commands
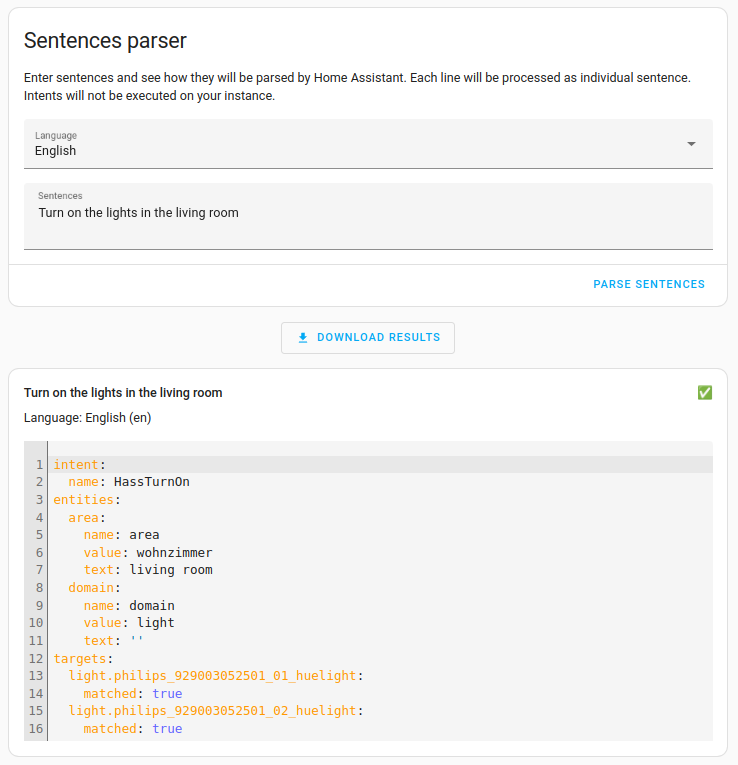
If you want to test if a sentence works in a specific language without actually executing the commands, use the sentence parser in the Developer tools.
- Go to Settings > Developer tools > Assist.
- In the sentence parser, select the language and enter the sentence you want to test.
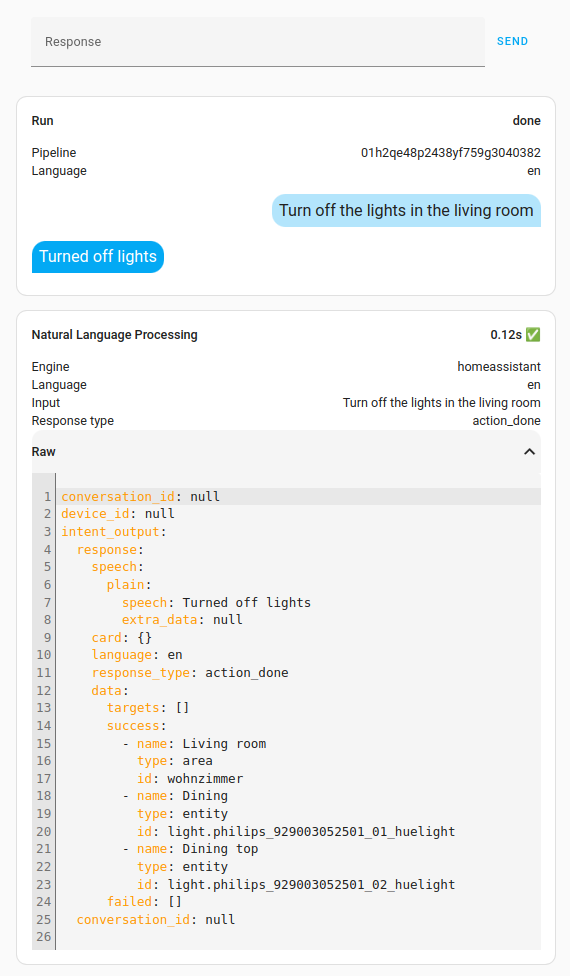
- The debug tool shows you the following:
- The intent triggered.
- The entities that were targeted.
- Which of the targeted entities were matched.
Test a sentence per assistant without voice: while executing the commands
If you want to test if a sentence works with a specific assistant while actively executing the commands, use the sentence parser in the Debug view.
- Open the debug view.
- In the top right corner, select the icon.
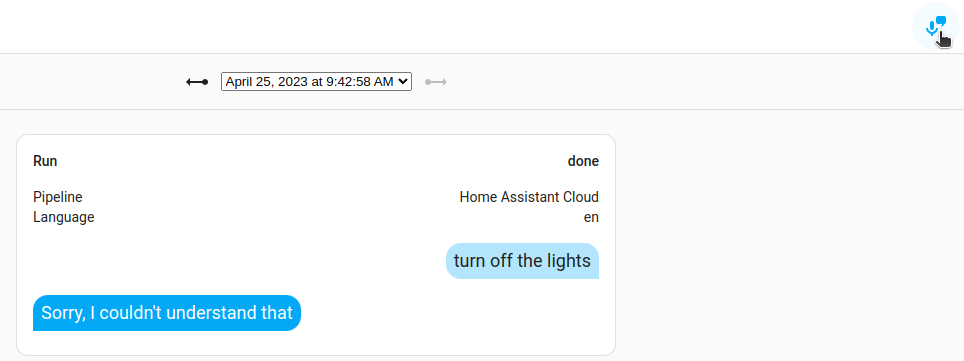
- Select the assistant you want to test.
- Select Run text pipeline.
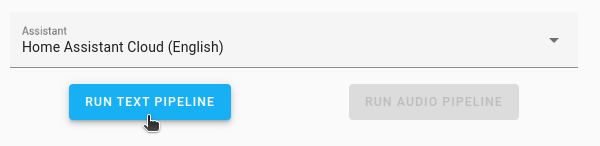
- Enter the phrase you want to test and select Run.

- Check if it worked.
- If the phrase does not work, try a variant. For example, if Turn off the light doesn’t work, try: Turn off the lights in the kitchen.
- Check if your phrase is supported.
- Make sure you are using the name of the area as it is defined in Home Assistant. If you have a room called bathroom, the phrase Turning on the lights in the bath won’t work.
I do not see any assistant
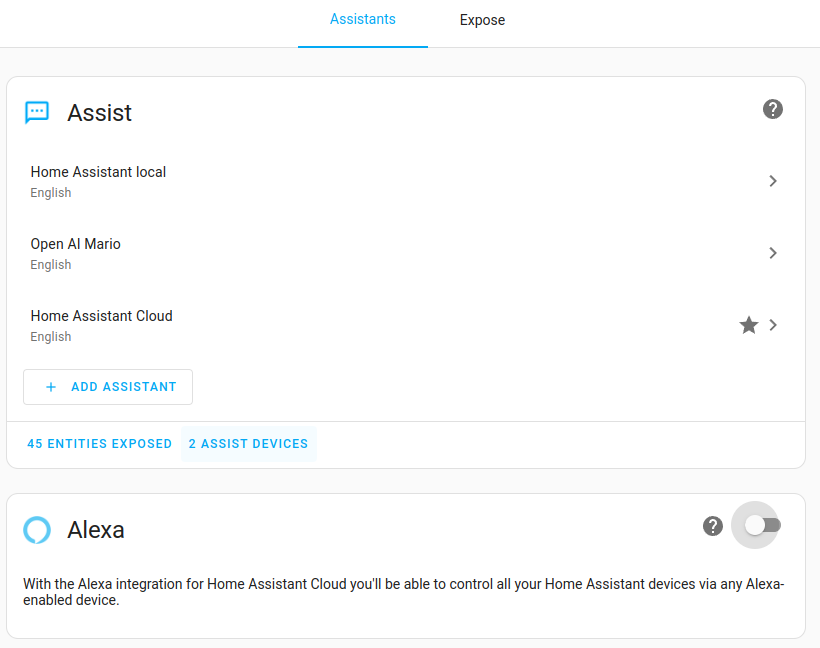
If under Settings > Voice assistants you do not see any assistants, you are not using the default configuration. The image below shows the Assist section.
If the Assist section is missing entirely, you need to add the following to your configuration.yaml file:
# Example configuration.yaml entry
assist_pipeline:
Assist does not understand my question about the weather forecast
The example below shows common pitfalls when enquiring about the weather. While some steps are specific to the weather, the general mechanics apply to other entities as well.
-
Make sure you have a weather service installed.
- By default, Met.no is installed.
-
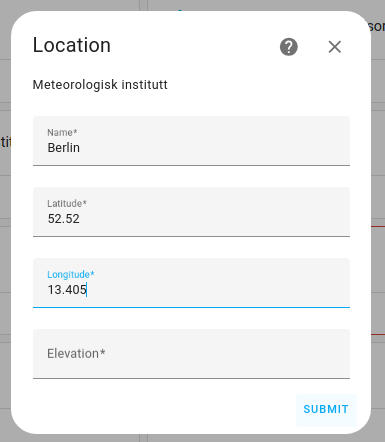
Make sure you have an entity set up for the location you are interested in.
-
For example, if you are interested in the weather in Berlin, add an entity for Berlin.
-
-
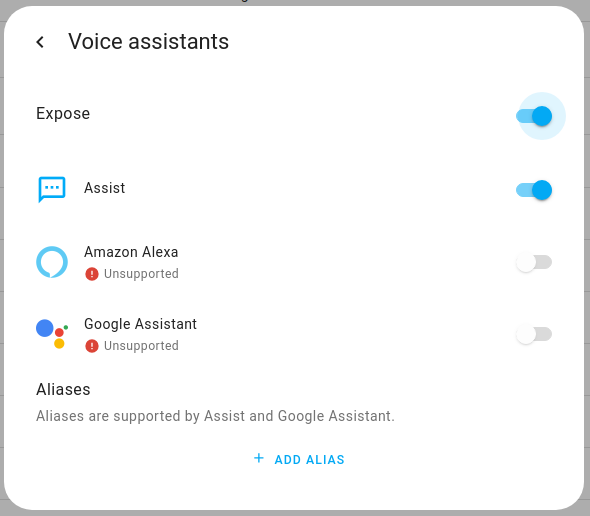
Make sure the entity is exposed to Assist:
-
Under Settings > Devices & services > Entities, select the weather entity for that location.
-
In the details view that opens, select the cogwheel
, then select Voice Assistant. 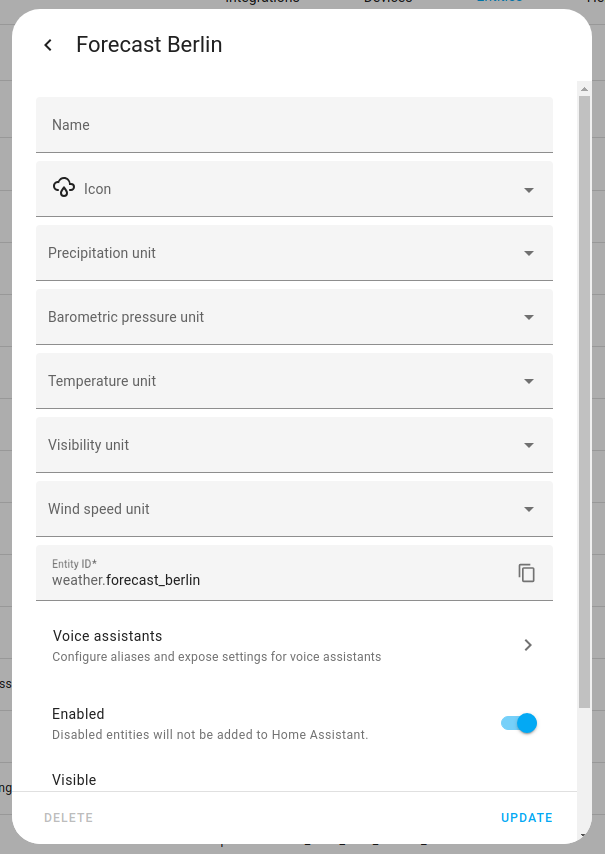
-
Make sure the entity is exposed to Assist.
-
-
Make sure you use the exact entity name when talking to Assist.
-
To view the entity name, check the list under Settings > Devices & services > Entities.
-
For example, if the entity is called Forecast Berlin, you have to say “What is the weather in forecast Berlin like”.
-
Assist would not recognize it if you ask “What is the weather in Berlin like”.
-
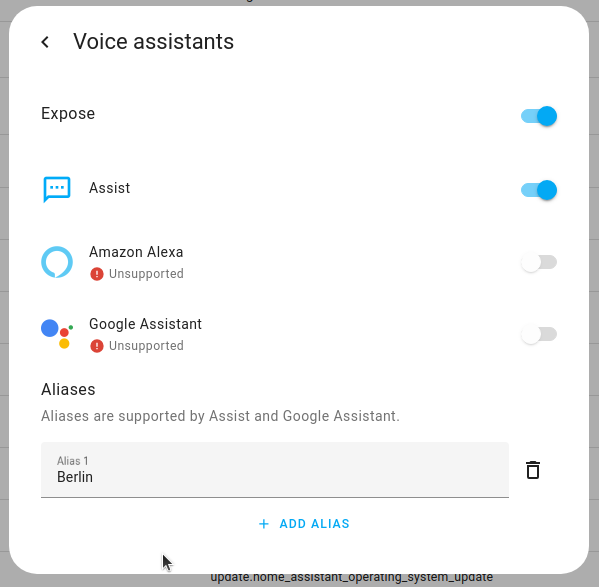
If you want to use Berlin instead of Forecast Berlin, you can create an entity name alias.
- You can create as many aliases as you like.
-
-
If you just ask “What is the weather” when you have forecast entities for multiple entities, Assist always returns the data for the place that was first added. Currently, there is no way to change that.
I don’t get a voice response
My voice assistant understands me and processes the command, but I don’t get a voice response.
The voice response is generated in Home Assistant by one of our supported text-to-speech (or TTSTTS (text-to-speech) allows Home Assistant to talk to you. [Learn more]) engines. The voice assistant device then fetches the audio file from Home Assistant and plays it back.
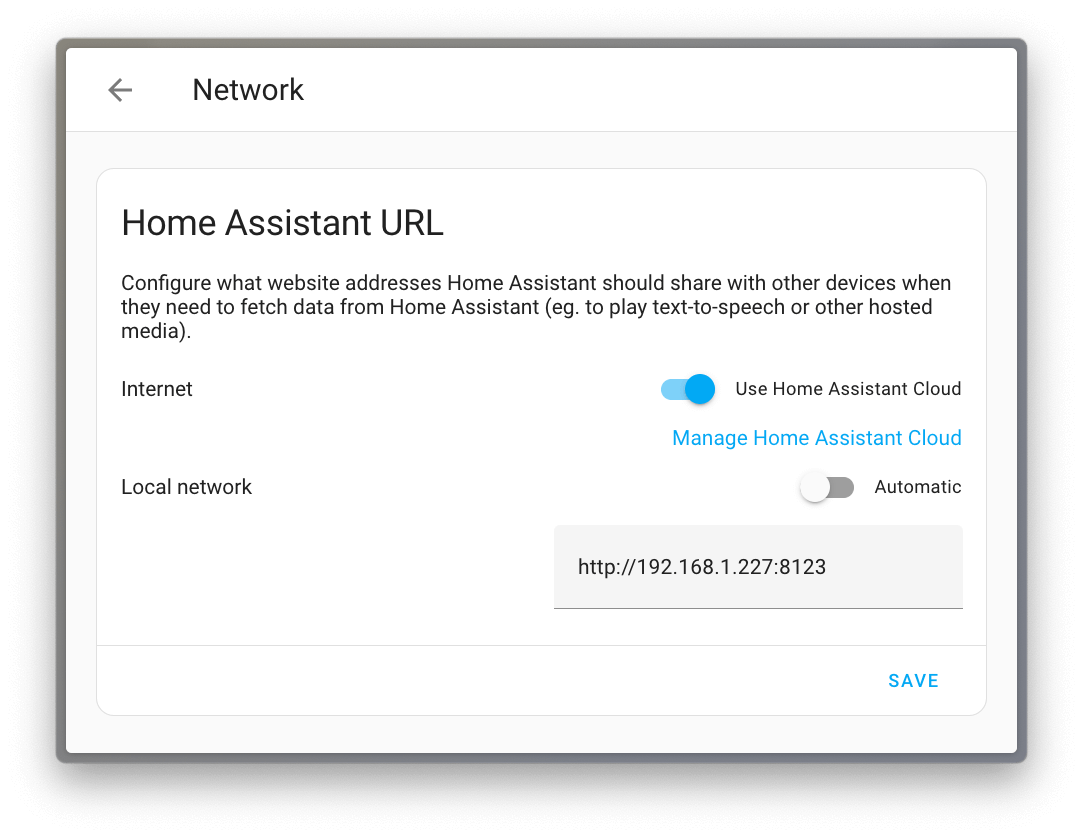
Local Network Settings
For this fetching process to work, Home Assistant must communicate its own URL to the device. If you have a complex network setup, or if you changed this setting in the past, the URL communicated could be wrong.
To fix the URL, follow these steps:
- In your user profile, enable Advanced Mode.
- Go to Settings > System > Network.
- Change your Local Network Home Assistant URL to a URL that can be reached locally and that points to Home Assistant
- For most users, the Automatic option works and is recommended.
Missing Media Source
If you are using YAML configuration and do not have default_config: make sure media_source: is present.
Tweaking the Assist audio configuration for your device
You think there is an issue with background noise or speaker volume? In some cases, it can help to tweak settings such as noise suppression and gain of your voice assistant device (such as the S32-S3-BOX-3).
To tweak the Assist audio configuration for your device
-
Make sure you have the ESPHome app (formerly known as an add-on) installed:
- Go to Settings > Apps > Install app.
- If you do not have the ESPHome app installed, install it.
-
Start the ESPHome app, and select Open Web UI.
-
Adopt your device to the ESPHome app:
- Once the ESPHome app is started, you see your device as Discovered.
- Select Adopt.
- When prompted, enter the Network credentials of your local 2.4 GHz Wi-Fi network and select Adopt.
-
If you see a notification that there is an update available for this device, select Update.
-
Make sure you have access to the configuration file.
- If you are unsure what method to use, install the File editor app.
- In the File Editor configuration, make sure the Enforce basepath option is disabled.
-
Edit the general configuration to enable debug mode:
-
Access the
configfolder and open theconfiguration.yamlfile. -
Enter the following text:
assist_pipeline:
   debug_recording_dir: /share/assist_pipeline
-
-
Save the changes and restart Home Assistant.
-
Navigate to
/share/assist_pipeline.- For each voice command you gave, you will find a subfolder with the audio file in
.wavformat.
- For each voice command you gave, you will find a subfolder with the audio file in
-
Listen to the audio file of interest.
-
Open the configuration file:
- In the ESPHome app, on your device, select Edit.
- This lets you edit the configuration file of that device.
-
To add a section to adjust noise suppression and volume, add the following lines:
voice_assistant: noise_suppression_level: 3 auto_gain: 31dBFS volume_multiplier: 10.0 -
Adjust the settings:
- If the audio is too noisy, increase the
noise_suppression_level(max. 4). - If the audio is too quiet, increase either the
auto_gain(max. 31) or thevolume_multiplier(no maximum, but a too high value will cause distortion eventually).
- If the audio is too noisy, increase the
-
Note: Collecting debug recordings impacts your disk space.
- Once you have found a configuration that works, delete the folder with the audio files.
- In the
configuration.yamlfile, delete theassist_pipelineentry and restart Home Assistant.