Adding a custom sentence to trigger an automation
You may add your own sentences to the intent recognizer by either extending an existing intent or creating a new one. You may also customize responses for existing intents.
Prerequisites
Prerequisites
You need a working Assist configuration. If you haven’t done so yet, check Assist’s starting page to get you ready with your setup.
To add a custom sentence to trigger an automation
This is the easiest method to get started with custom sentences for automations.
-
Under Settings > Automations & Scenes, in the bottom right corner, select Create automation.
-
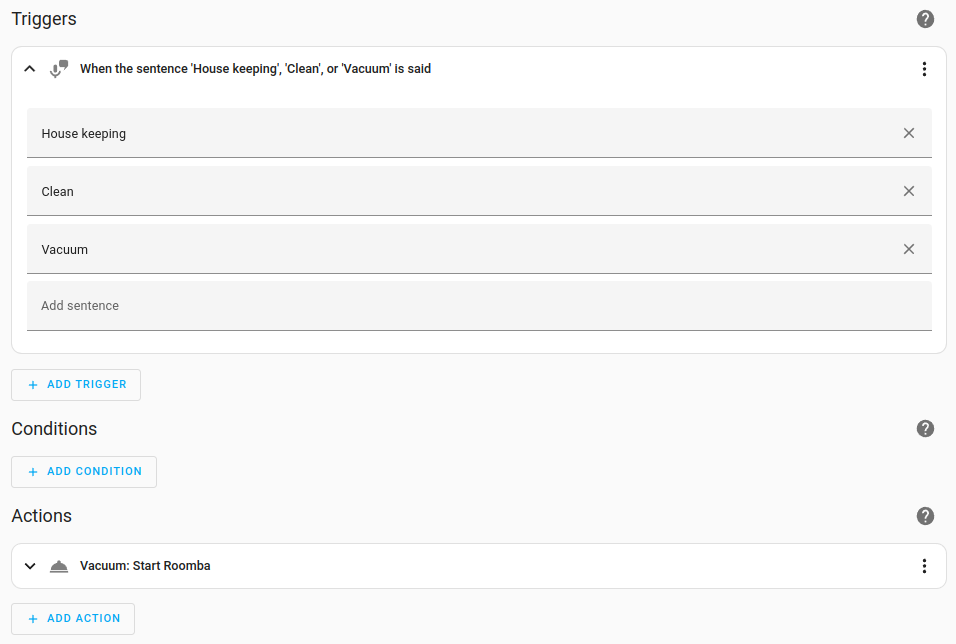
In the Trigger drop-down menu, select Sentence.
-
Enter one or more sentences that you would like to trigger an automation.
- Do not use punctuation.
- You can add multiple sentences. They will then all trigger that automation.

-
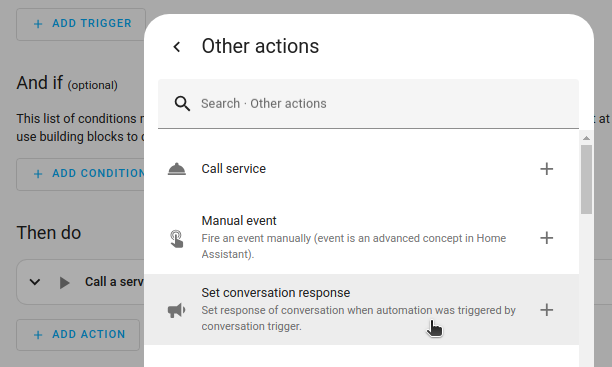
To add a custom response, select Add action. Scroll all the way down and select Other actions.
- Then, select Set conversation response.

- Then, select Set conversation response.
-
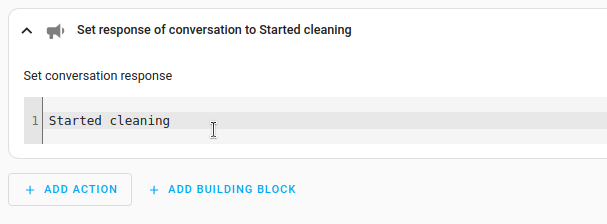
In the text field, enter the response you want to hear from Assist and select Save.

-
You can also use wildcards. For example, the trigger:
play {album} by {artist}could have the response:
Playing {{ trigger.slots.album }} by {{ trigger.slots.artist }} -
For more details, refer to conversation response script action.
-
-
To test the automation, go to Overview and in the top right corner, open Assist.
- Enter one of the sentences.
-
If it did not work out, checkout the troubleshooting section.
- One of the causes could be that the device you’re targeting has not been exposed to Assist.
-
Pick up your voice control device and speak the custom sentence.
- Your automation should now be triggered.
Setting up custom sentences in configuration.yaml
To set up custom sentences in your configuration file follow this tutorial.