Customize the S3-BOX-3
Customize the S3-BOX-3 with your own illustrations
This tutorial will show you how to replace the Home Assistant status illustrations on the Espressif ESP32-S3-BOX-3 with your own images.
You can either prepare your own illustrations or import some from a community repository.
ESP32-S3-BOX-3 voice assistant status illustrations
The ESP32-S3-BOX-3 voice assistant has 6 illustrations to indicate its state:
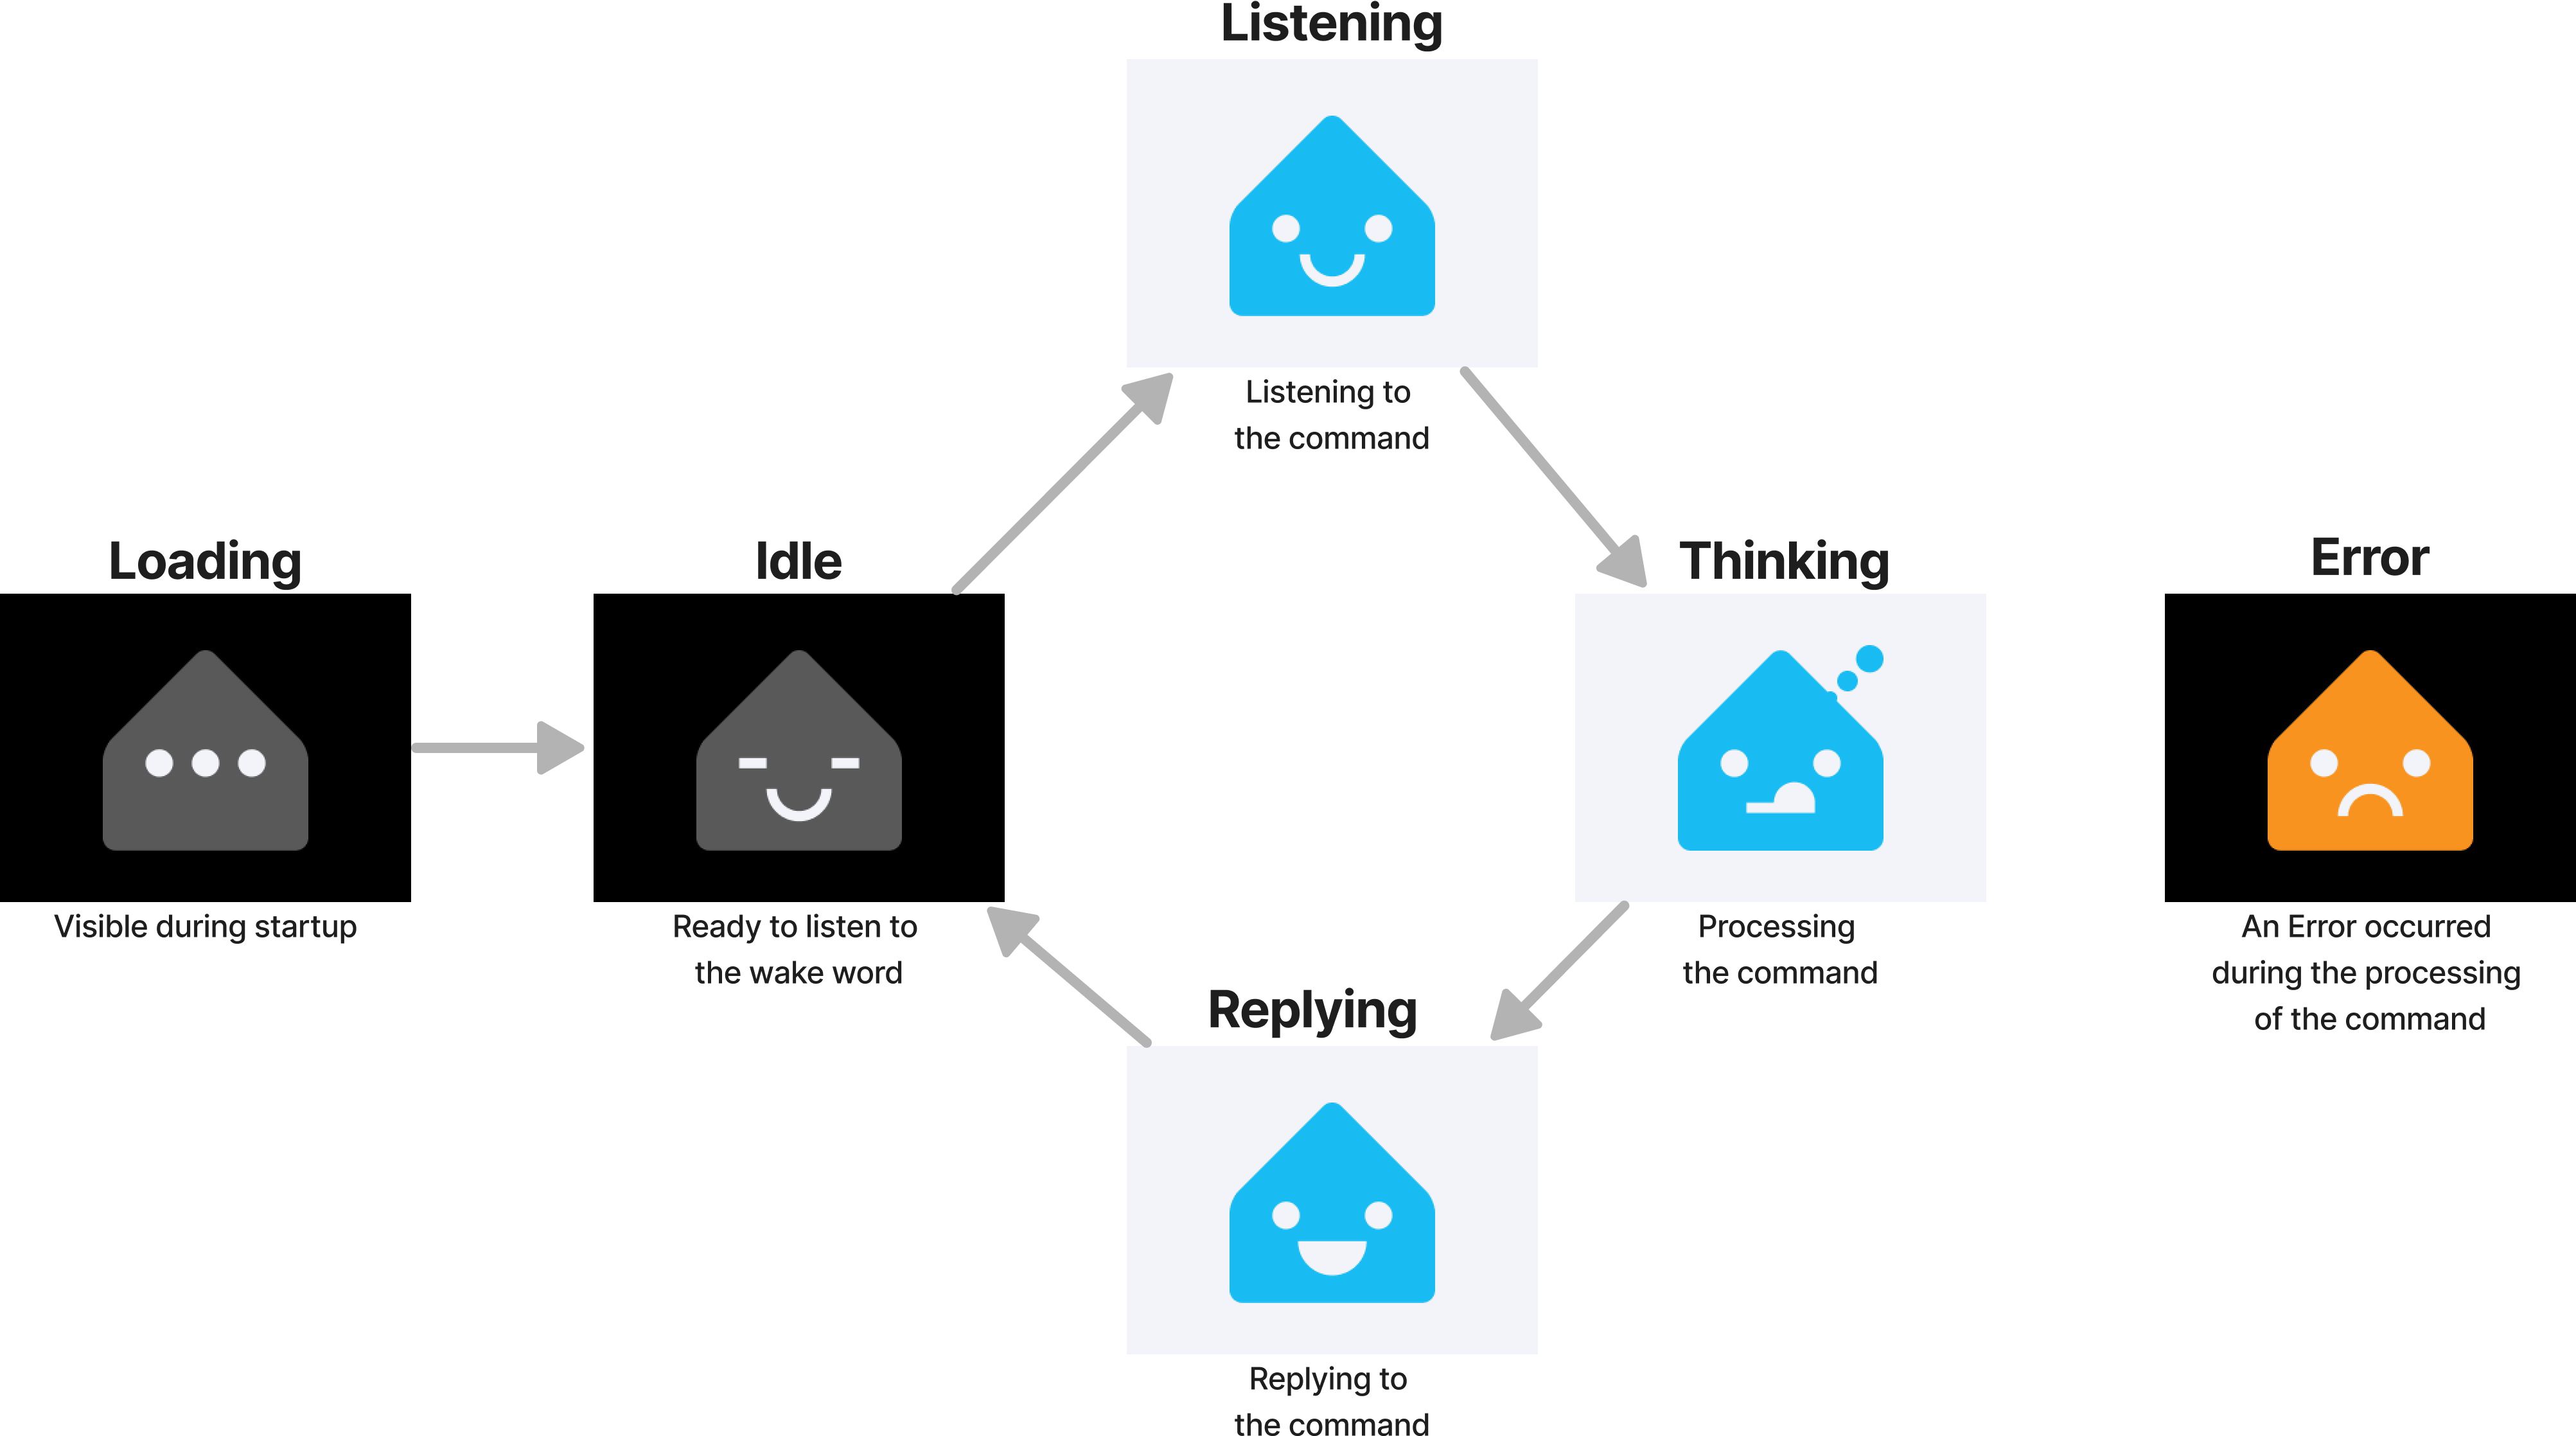 The ESP32-S3-BOX-3 states: loading, idle, listening, thinking, replying, error.
The chart shows the default illustrations. The next steps show you how to change those.
Prerequisites
- Latest version of Home Assistant, installed with the Home Assistant Operating System
- Home Assistant Cloud or a manually configured Assist Pipeline
- ESP32-S3-BOX-3. The ESP32-S3-BOX-Lite or the ESP32-S3-BOX also work, but they are not currently on the market.
- Successfully completed the ESP32-S3-BOX-3 voice assistant tutorial
Adopting the device in the ESPHome app
Before you can import new illustrations, you need to install the ESPHome app (formerly known as an add-on) and adopt the device in the app.
-
Make sure the ESP32-S3-BOX-3 is up and running and connected to your Wi-Fi.
-
Go to Settings > Apps and check if you have the ESPHome app installed.
- If you haven’t done so, go to Settings > Apps > ESPHome to install the app.
-
Start the app and select Open web UI.
-
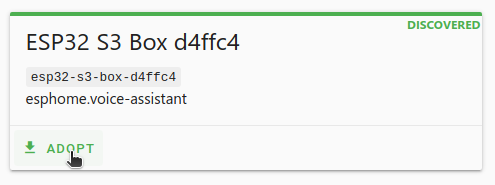
In the ESPHome app dashboard, on the ESP32-S3-BOX-3 card, select Adopt.
-
If you like, give it a new name. Then, select Adopt.
- Adopting an ESPHome device allows us to customize the existing software.
- Result: The status will change to Online.
-
Now that you have set up the ESPHome app, continue with one of the 2 different methods to add custom images:
Option 1: Using images from a community repository
If you want new images but don’t want to create your own, you can use images from the community. If you want to use your own images, skip this procedure and go to Option 2: Using your own images instead.
To use images from the community
-
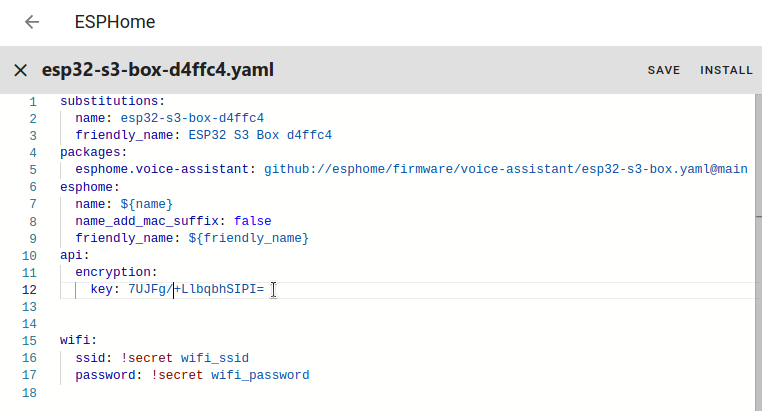
On the ESP32-S3-BOX-3 app, select edit.
- Result: An editor opens, showing the configuration file.
- Result: An editor opens, showing the configuration file.
-
For inspiration, we have prepared some images for you.
- Check them out in this repository.
-
For this tutorial, we will use some images of Frenck.
-
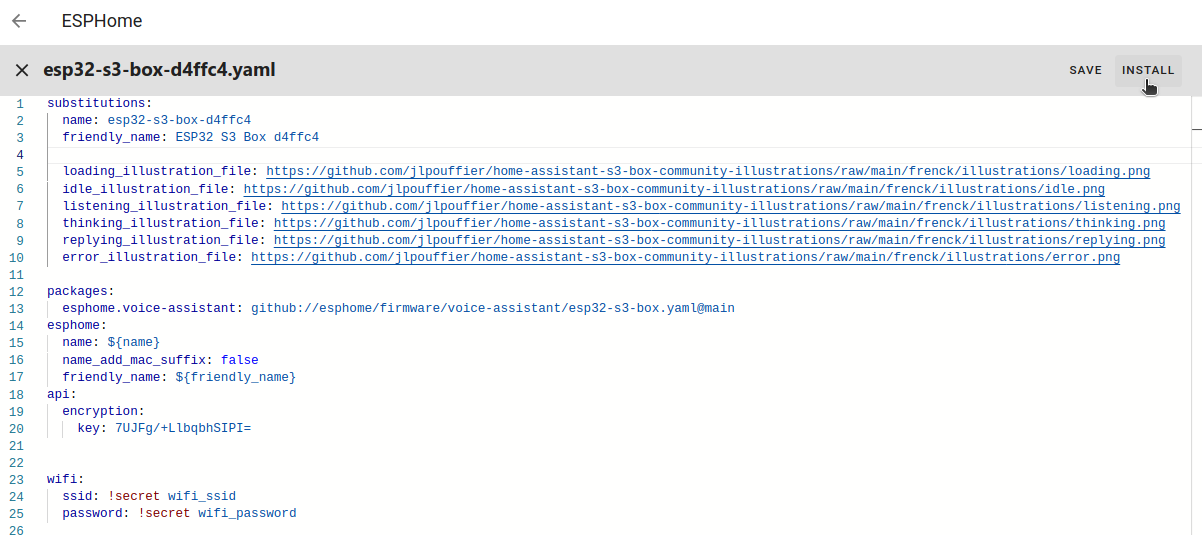
Add the following lines into the
substitutionsblock.substitutions: loading_illustration_file: https://github.com/jlpouffier/home-assistant-s3-box-community-illustrations/raw/main/frenck/illustrations/loading.png idle_illustration_file: https://github.com/jlpouffier/home-assistant-s3-box-community-illustrations/raw/main/frenck/illustrations/idle.png listening_illustration_file: https://github.com/jlpouffier/home-assistant-s3-box-community-illustrations/raw/main/frenck/illustrations/listening.png thinking_illustration_file: https://github.com/jlpouffier/home-assistant-s3-box-community-illustrations/raw/main/frenck/illustrations/thinking.png replying_illustration_file: https://github.com/jlpouffier/home-assistant-s3-box-community-illustrations/raw/main/frenck/illustrations/replying.png error_illustration_file: https://github.com/jlpouffier/home-assistant-s3-box-community-illustrations/raw/main/frenck/illustrations/error.png
-
-
Save the changes and select Install:
- Depending on your environment, the installation process can take a while.
- Depending on your environment, the installation process can take a while.
-
Once the installation is complete, you can see the new image on the ESP32-S3-BOX-3.
- Now, speak a command to test the new setting. For example, OK Nabu, turn off the living room lights.
Option 2: Using your own illustrations
There are 2 parts to this:
About the image specifications
Here’s what you need to know to get the best result on your ESP32-S3-BOX-3 screen.
Using light and dark image background
In the overview diagram, you can see that the default images use different background colors. This is to make it easier to recognize a state change when you look at your screen.
In your images, you could use 2 different background colors:
- For loading and idle: use a dark background
- For listening, thinking, and replying: use a light background
- For error: As you like
If your images have transparency, you can define the background color in the configuration. The procedure below shows how to change the background.
Image dimensions and file format
- Dimensions: The screen is 320 x 240 pixels. If the image you provide is not in a 4:3 ratio, the remaining area will be filled with background color.
- File format: PNG, JPEG, or SVG
To prepare your own images
- Create your own images according to the specifications defined in the section About the image specifications.
- You could even draw your own!
- There’s a template for it.
- Copy all 6 images into a folder. For example:
voice_assistant_gfx. - Make sure you have access to your configuration files.
- Install the Samba app.
- This allows you to copy multiple files at once.
- Copy your image folder into the configuration folder:
- Open the
configfolder and open theESPHomefolder. - Copy your image folder in there.
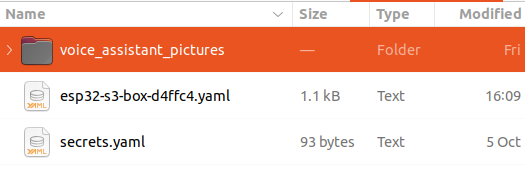
- Open the
To add your images to the configuration
-
In Home Assistant, go to Settings > Apps > ESPHome, and Open Web UI.
-
On the ESP32-S3-BOX-3 app, select edit.
- Result: An editor opens, showing the configuration file.
- Result: An editor opens, showing the configuration file.
-
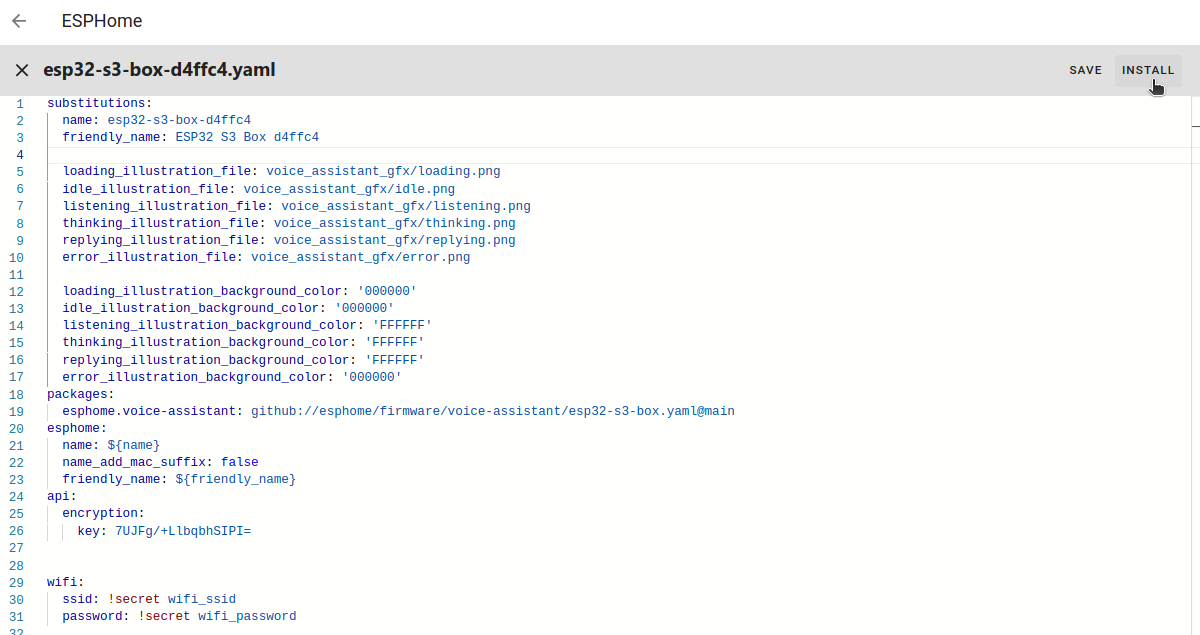
To add your images, add the following lines into the
substitutionsblock.substitutions: loading_illustration_file: voice_assistant_gfx/loading.png idle_illustration_file: voice_assistant_gfx/idle.png listening_illustration_file: voice_assistant_gfx/listening.png thinking_illustration_file: voice_assistant_gfx/thinking.png replying_illustration_file: voice_assistant_gfx/replying.png error_illustration_file: voice_assistant_gfx/error.png -
If you used transparency in your images and you want to change the background color, add the following lines into the
substitutionsblock:-
The
000000stands for black,FFFFFFstands for white in hexadecimal color code. -
If you want to use different colors, replace the corresponding color code.
-
To find the color code, you can use a tool like the Google color picker.
substitutions:
  ...
  loading_illustration_background_color: '000000'
  idle_illustration_background_color: '000000'
  listening_illustration_background_color: 'FFFFFF'
  thinking_illustration_background_color: 'FFFFFF'
  replying_illustration_background_color: 'FFFFFF'
  error_illustration_background_color: '000000'
-
-
Save the changes and select Install.
-
Save the changes.
- Depending on your environment, the installation process can take a while.
-
Once the installation is complete, you can see the new image on the S3-BOX.
- Now, speak a command to test the new setting. For example, OK Nabu, turn on the light.
To draw your own images
-
We prepared a template for you to draw your own status images.
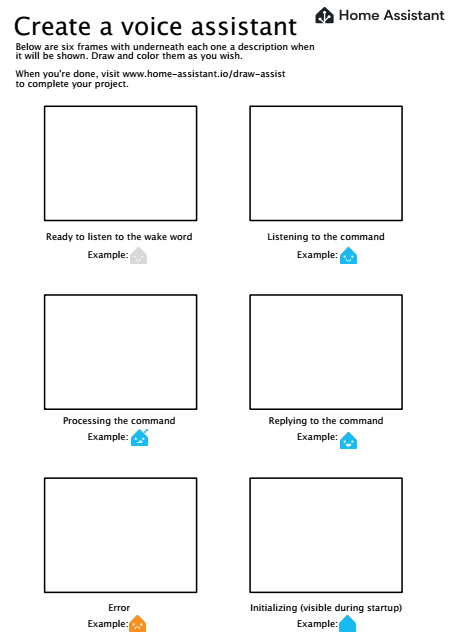
-
Download the file and start drawing!

-
When you are done:
- Snap a picture of each.
- Follow these steps to bring them onto your Voice Assistant.
Customizing on-device wake words (microWakeWord)
You can change the on-device wake word (microWakeWord) that is used on your S3-BOX-3.
Prerequisites
- Home Assistant 2024.2, installed with the Home Assistant Operating System. If you do not have Home Assistant installed yet, refer to the installation page for instructions.
- Successfully installed ESPHome on the S3-BOX-3
- ESPHome 2024.2 or later
- Home Assistant server with at least 2 GB of RAM free
- The firmware needs to be compiled on the server before it is installed on the S3-BOX-3.
- Compiling requires a bit of RAM.
- On-device wake word installed on your S3-BOX-3.
(It also works on the (now discontinued) S3-BOX and S3-BOX-Lite)
To customize the S3-BOX-3 with on-device wake words
-
If you haven’t done so already, adopt the device in the ESPHome app.
-
In Home Assistant, go to Settings > Apps > ESPHome, and Open Web UI.
-
On the ESP32-S3-BOX-3 entry, select edit.
- Result: An editor opens, showing the configuration file.
- Result: An editor opens, showing the configuration file.
-
To change the wake word, add the following line into the
substitutionsblock.-
Instead of
okay_nabu, you can also usealexaorhey_jarvis.substitutions: ... micro_wake_word_model: hey_jarvis
-
-
Save the changes and in the top right corner, select Install.
- Depending on your environment, the installation process can take a while.
- On Home Assistant Green, for example, it takes about 45 minutes.
-
Select the ESPHome integration. Under Devices, you should see the ESP32-S3-BOX listed.
-
On the ESP32-S3-BOX-3 entry, select Device to open the device page.
-
Under Wake word engine location, select On device.
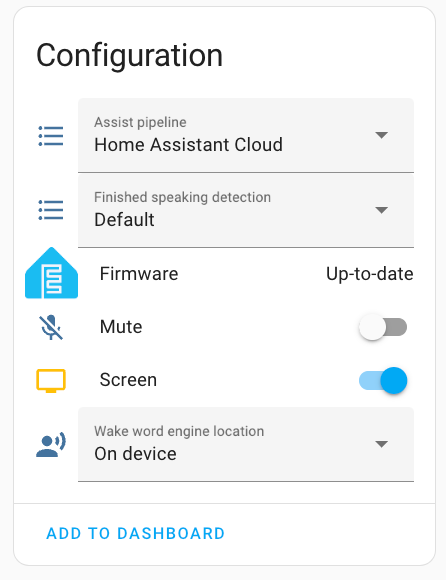
-
-
Now, speak a command to test the new setting. For example, Hey Jarvis, turn on the light.