Assist on Android
Assist on Android phones
Assist can be used on Android phones and tablets using the Home Assistant Companion App.
Prerequisites
- Home Assistant Companion App installed
- Have an Assistant set up: either cloud (recommended, more performant) or local.
- The devices you want to control with Assist are exposed to Assist and you have checked most of the best practices
Starting Assist in Home Assistant
- On your phone, open Home Assistant.
- In the top-right corner, select the three-dots menu and select Assist.
- Give a command.
Setting up Home Assistant Assist as default assistant app
To define Home Assistant Assist as default assistant app on your Android phone, follow these steps:
- On your Android phone, open the Home Assistant app.
- Go to Settings > Companion app.
- Select Assist for Android.
- Select Set as default.
- In the system settings that open, select Default digital assistant app.
- On some Android versions, this might be labeled Voice Assistant or Assist app.
- Select Home Assistant.
- Go back to the Home Assistant app. You should now see that Assist is your default assistant.
- Start Assist using the gesture to start an assistant. The gesture may differ depending on your Android version:
- Swipe from the bottom left corner.
- Long press the power button.
- Hold the home button (square button at the bottom).
- You can now also start Assist from your lock screen.
To activate Assist hands-free, enable wake word detection.
About wake word detection on Android
Wake word detection allows you to activate Assist hands-free by saying a wake word like “Hey Jarvis” or “Hey Nabu”. Your Android device uses microWakeWord to process wake words locally on the device, which means your audio stays private and no audio is sent to Home Assistant until after the wake word is detected.
Wake word detection continuously monitors audio for wake words, which has a noticeable impact on battery life. Consider disabling wake word detection when you don’t need it or control it remotely from Home Assistant to turn it on only when needed.
Wake word detection on Android uses more battery than “Ok Google” because Google Assistant has access to dedicated low-power hardware for wake word detection on supported devices. Unfortunately, Google does not make this specialized hardware accessible to third-party app developers, forcing apps like Home Assistant to rely on standard audio processing, which consumes more power by keeping the CPU on all the time. This platform limitation means third-party voice assistants cannot achieve the same battery efficiency as Google’s built-in assistant.
Wake word detection runs entirely on your Android device, which means it works without an active internet connection (though executing commands still requires connectivity to your Home Assistant instance). When multiple devices detect the same wake word simultaneously (like another Android phone or a Voice Preview Edition), only the first device to capture the wake word will keep the Assist session open while other devices automatically cancel their sessions.
Enabling wake word detection on Android
Wake word detection on Android is experimental.
If the app becomes unresponsive or stops opening as expected, disable Home Assistant as your default digital assistant to disable wake-word detection:
-
On your Android phone, go to Settings > Apps > Default apps > Digital assistant app and select a different assistant or None.
-
If you run into issues, please open an issue on GitHub so the team can look into it.
To enable wake word detection on your Android device, follow these steps:
Prerequisites
- Home Assistant Companion App version 2026.2.3 or later
- Assist set as the default assistant app
- Home Assistant Cloud or a manually configured local Assist pipeline
To enable wake word detection
- On your Android phone, open the Home Assistant app.
- Go to Settings > Companion app.
- Open Assist for Android.
- Enable Wake word detection.
- Select a wake word from the available options:
- Hey Nabu
- Hey Jarvis
- Hey Mycroft Result: Once enabled, wake word detection works even when your device is locked or the app is in the background.
- To use Assist on Android, say your chosen wake word, wait for the listening prompt, and then speak your command.
Controlling wake word detection from Home Assistant
You can turn wake word detection on or off remotely from Home Assistant. This is useful for automations that enable wake word detection only when you’re at home or during specific times to save battery.
Use the command_wake_word_detection command with turn_on or turn_off to control wake word detection. For details on how to send commands to the companion app, see the notification commands documentation.
Using Assist with multiple Home Assistant servers
Once Assist has been defined as the default digital assistant on your phone, you can use Assist with multiple servers. This can be useful for example, if you maintain a Home Assistant instance for someone else’s home.
-
Make sure you have a voice assistant set up on the Home Assistant servers.
-
Make sure the servers are added to the companion app.
- On the Android phone, go to Settings > Companion app and select Add server.
- From the list, select the additional server.
-
Start Assist using the gesture to start an assistant. The gesture may differ depending on the version.
- Swipe from the bottom left corner.
- Long press the power button.
- Hold the home button (square button at the bottom).
-
Open the assistant drop-down menu.
-
Select the assistant from the instance you want to speak to.
- Speak your command.
Using Assist via shortcut
- On your phone, open the Widgets panel.
- From the list, select Home Assistant.
- Long tap the Assist icon and drag it onto your home screen.
- Select the server and the assistant.
- If you want to be able to use voice control, enable the Start listening toggle.
- Repeat this procedure for each server you want to connect to, for example, if you support someone else’s home.
Assist on Wear OS
Assist is available on Wear OS using the Home Assistant Companion App for Android and “Assist” tile.
Setting up Assist on Wear OS
The way how Assist can be set up on your phone may differ depending on your version of Wear OS.
-
After installing the companion app on your watch and connecting it to your Home Assistant, Assist appears automatically on the Apps screen.

-
To add an Assist tile, in the Wear OS app, go to the Tiles area, select Add tile > Assist.
Adding Assist to the watch face
-
On your phone, open the Watch app and select Watch faces.
-
Make sure you select a watch face that supports complications (little shortcut icons).
-
Tap Edit.
-
In the Complications section, select one of the slots and choose Assist.
- If you just recently added the Home Assistant app, Assist may not be listed yet.
- After rebooting your watch, under Complications, there should be a section with Home Assistant icons.
-
Save your changes. You should now see Assist as a complication on your watch face.
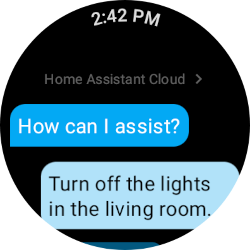
Using Assist on Wear OS
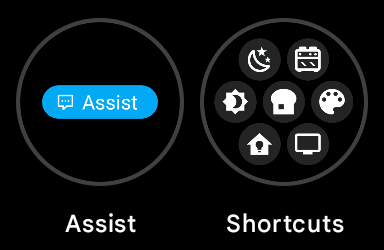
-
On your watch, open Assist.
- For example, swipe left until the Assist button is visible.

-
After tapping Assist, wait for How can I assist? to be displayed and the microphone to start pulsing.
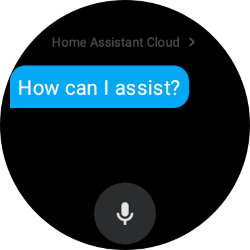
-
Speak your command.
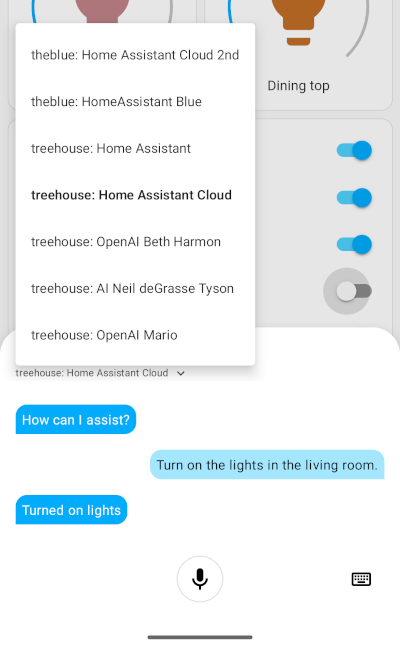
-
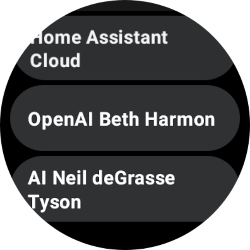
To change the assistant, tap the current assistant (Home Assistant Cloud in the screenshot above).
- Select the assistant from the list.
Setting up Home Assistant Assist as default assistant app on a Wear OS watch
This procedure was written using Wear OS version 4.0. The exact steps may vary depending on the watch and software version.
To define Home Assistant Assist as default assistant app, follow these steps:
- On the watch, navigate to the Apps screen and select the cogwheel
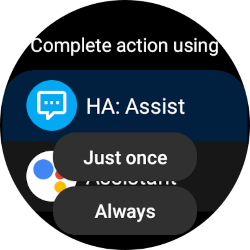
. - Go to Apps > Choose default apps > Digital assistant app.
- From the list, select Home Assistant.
- When you go back one step, under Default app, it now says HA: Assist.
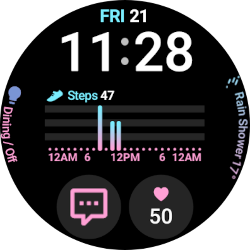
- On some watches, you can now start Assist by pressing the crown key.
- If this does not work, you can manually assign Assist to a button.
- Now, use your key and speak a command.
Assigning a button to Assist
Depending on your watch, you can assign Assist to a button so that you can start it directly with a long or double press.
- On your watch, go to Settings > Advances features > Customize keys.
- Assign a key:
-
To use double press, tap Home key > Double press. From the list of apps, select HA: Assist.
-
On a Galaxy watch, if Assist is set as the default, you can use long press. Tap Home key, then tap press and hold. Select Assistant.
- Then long press the home key, and from the selection, select HA: Assist.
- Select Always.
-
- Now, use your key and speak a command.