Edit the dashboard
Dashboards are customizable pages to display information about your smart home devices.
Dashboards, cards, and views
The screenshot shows an Overview dashboard with many cards to represent sensor values. For example, the status of some lights, a media player, and some temperature values. It also shows control elements. For example, you can change the ventilation, the color of the lights, or turn on a smart TV and start YouTube.
Views
The following screenshot shows a fully populated dashboard in masonry view layout. The icons in the blue menu bar on top each represent a different tab. Each tab contains a view.
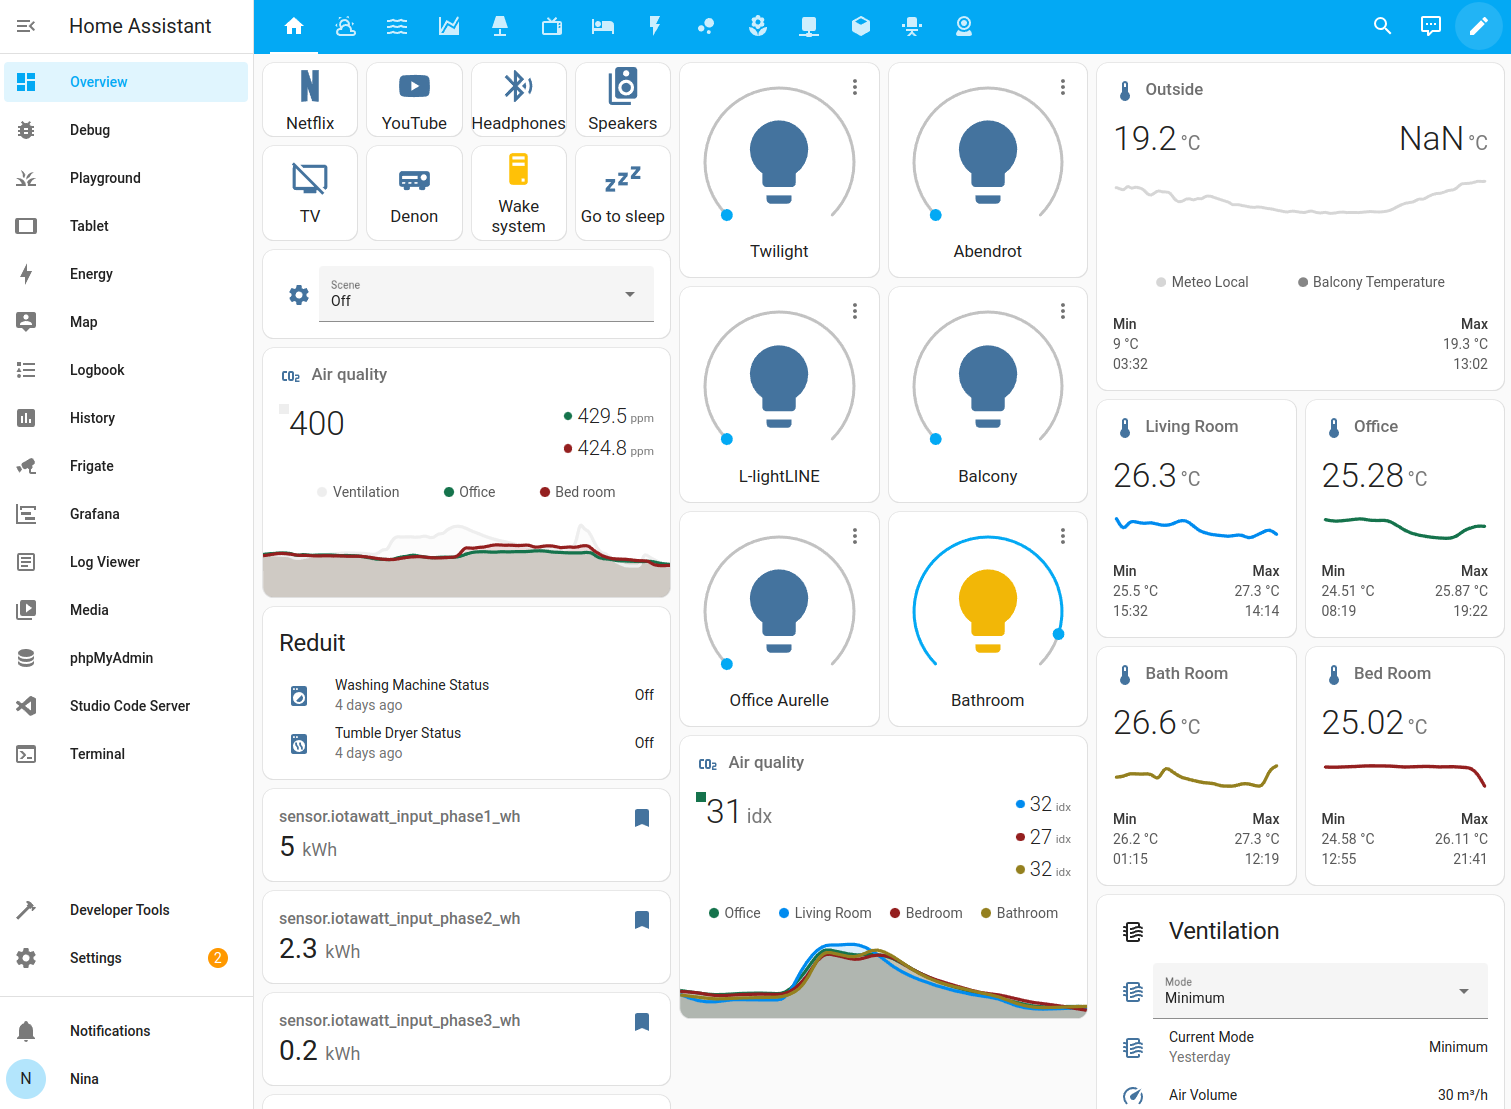 Screenshot of a populated Overview dashboard in masonry view layout.
The following screenshot shows a fully populated dashboard in sections view layout.
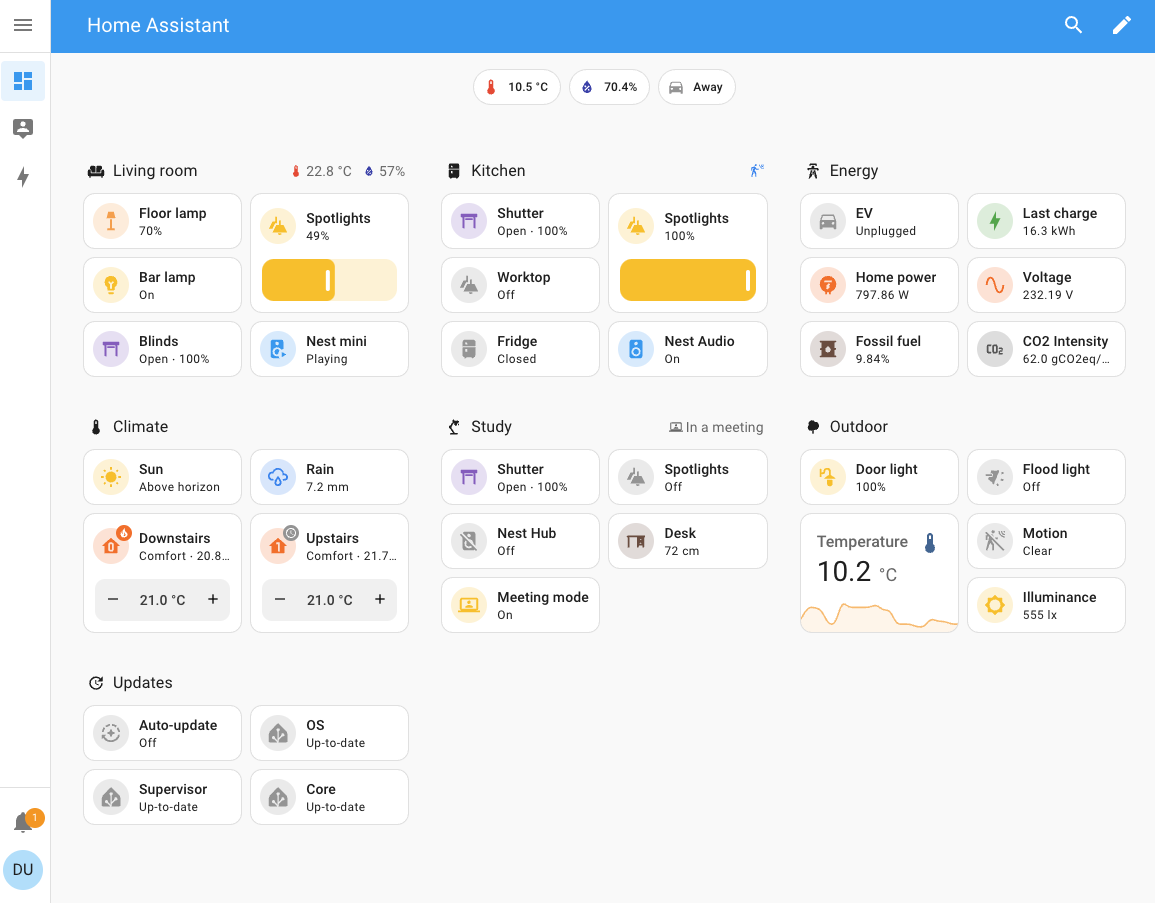 A fully populated dashboard in Sections view layout
Different dashboard types
In the sidebar on the left, you see the names of different dashboards. Home Assistant comes with different dashboard types out of the box.
- Overview
- Energy
- Map
- Activity
- History
- To-do lists
First contact with the Overview dashboard
The Overview dashboard is the first page you see after the onboarding process.
If you just onboarded, your dashboard will be nearly empty. It is using the masonry view layout and shows cards for devices that were detected automatically. Your dashboard may look quite different, depending on the devices that you have at home.
 Screenshot of a new Overview dashboard with Bluetooth devices.
Let’s take a look at the devices that were detected and which cards are used to represent them on the dashboard.
- 1 Sonos speaker: media control card
- 1 Person (away): entities card
- 1 Weather forecast: weather forecast card
- 2 temperature sensors: entities card
Sonos speaker
If you have a smart speaker connected to Wi-Fi, for example, this can be detected.
Person
After onboarding, the first person shown here is the Home Assistant owner. Next to the name, it claims the person is away. You can track whether a person is present or not and create automations based on that. For example, turn down the heating when everyone has left the home. For more information on presence based automations, start with presence detection.
Weather forecast
The weather forecast card is shown automatically if you provided a location during onboarding.
Temperature sensors
The temperature sensors are shown because the Home Assistant device used here (Raspberry Pi) has a built-in Bluetooth module. In Giulia’s home, there were 2 Bluetooth temperature sensors present. If your Home Assistant does not have a Bluetooth module (yet), Bluetooth devices in your home won’t be shown automatically.
If your Home Assistant has other controllers, such as a Zigbee or a Z-Wave controller, and you have Zigbee or Z-Wave devices, these could be detected and shown here. However, these devices usually need to be paired first.
Creating a new dashboard
The default Overview dashboard updates automatically when you add new devices. However, once you start editing the default dashboard, it no longer updates automatically. For this reason, we start here by adding a new dashboard. This lets us keep the default Overview dashboard.
Follow the steps in Creating a new dashboard.
Editing cards in a new dashboard
This section describes how to edit cards in a recently created dashboard, namely how to:
- Change the details of a weather forecast card.
- Add a new weather forecast card.
- Change the position of cards.
-
Open your new dashboard. It might not have much on it yet.
- If you have smart home devices in your home, some may have been connected automatically.
- Some cards are there by default, such as the weather forecast card, and a card for the person who set up the system.
-
To edit the weather forecast card, for example, select it and then select the cogwheel
. -
Change any of the units or other details, such as name and icon, if you like.
- Do not change the Entity ID.
- Once you are done, select Update.
-
For the next activities, you need to edit your dashboard. In the top right of the screen, select the
button. -
In the Edit dashboard dialog, go to the three dots
menu, and then select Take control. - Note that, by editing the dashboard, you are taking control over it. The dashboard will no longer update automatically when new entitiesAn entity represents a sensor, actor, or function in Home Assistant. Entities are used to monitor physical properties or to control other entities. An entity is usually part of a device or a service. [Learn more] or dashboard components are available. You can’t revert this. However, you can create a new default dashboard.
- Read the text in the dialog and if you agree, select Take control.
-
Now you can add a new card for this weather serviceThe term “service” in Home Assistant is used in the sense of an information service. For example, the municipal waste management service that provides entities for organic, paper, and packaging waste. In terms of functionality, the information service is like a device. It is called service to avoid confusion, as it does not come with a piece of hardware..
- Select the weather forecast card again, go to the three dots
menu, and then select Service info. - Under Sensors, select Add to dashboard.
- In the Choose a view dialog, select your dashboard from the dropdown list, and then select Next.
- In the suggestion dialog, select Pick different card.
- Select the weather forecast card again, go to the three dots
-
On the By card tab of the dialog, select the Weather forecast card.
-
In the Weather forecast card configuration dialog:
- Select the details to be shown on the card, and then select Save.
- Go back to the edit window, and select Done.
- Result: You see the new weather forecast card on the dashboard.
-
If you want to delete the other weather forecast card from the dashboard:
- In the top right corner, select the
button to go back to the edit mode. - Do not select the card. Go to the three dots
menu in the lower right corner of the card, and then select Delete.
- In the top right corner, select the
-
Finally, to move the weather forecast card to the top left corner:
- On the bottom of the card, select the number or use the minus button to enter
1. - Change the number on the other cards, if you want to move them around.
- When you are done, in the top right corner, select Done.
- On the bottom of the card, select the number or use the minus button to enter
-
If you want to change the configuration of another card, select the
button again, and then select Edit on the card.
Congratulations! You have completed your first dashboard customization.
Learning more about dashboards
If you want to learn more about dashboards, views, and cards, take a look at these topics:
- Take a look at the introduction to dashboards and learn about dashboard types.
- Learn more about view types
- Learn how to add cards to a view.
Next step: integrations
To continue with this tutorial, select the button below to learn about integrationsIntegrations connect and integrate Home Assistant with your devices, services, and more. [Learn more].