Adding integrations
Let’s start by adding your first integrationIntegrations connect and integrate Home Assistant with your devices, services, and more. [Learn more]. In this tutorial, we will use the Workday integration. It can be used to automate based on workdays, days off, or holidays. No smart device is needed for this tutorial.
Prerequisites
This tutorial assumes that you have installed Home Assistant and have at least completed the onboarding steps.
Adding integrations
-
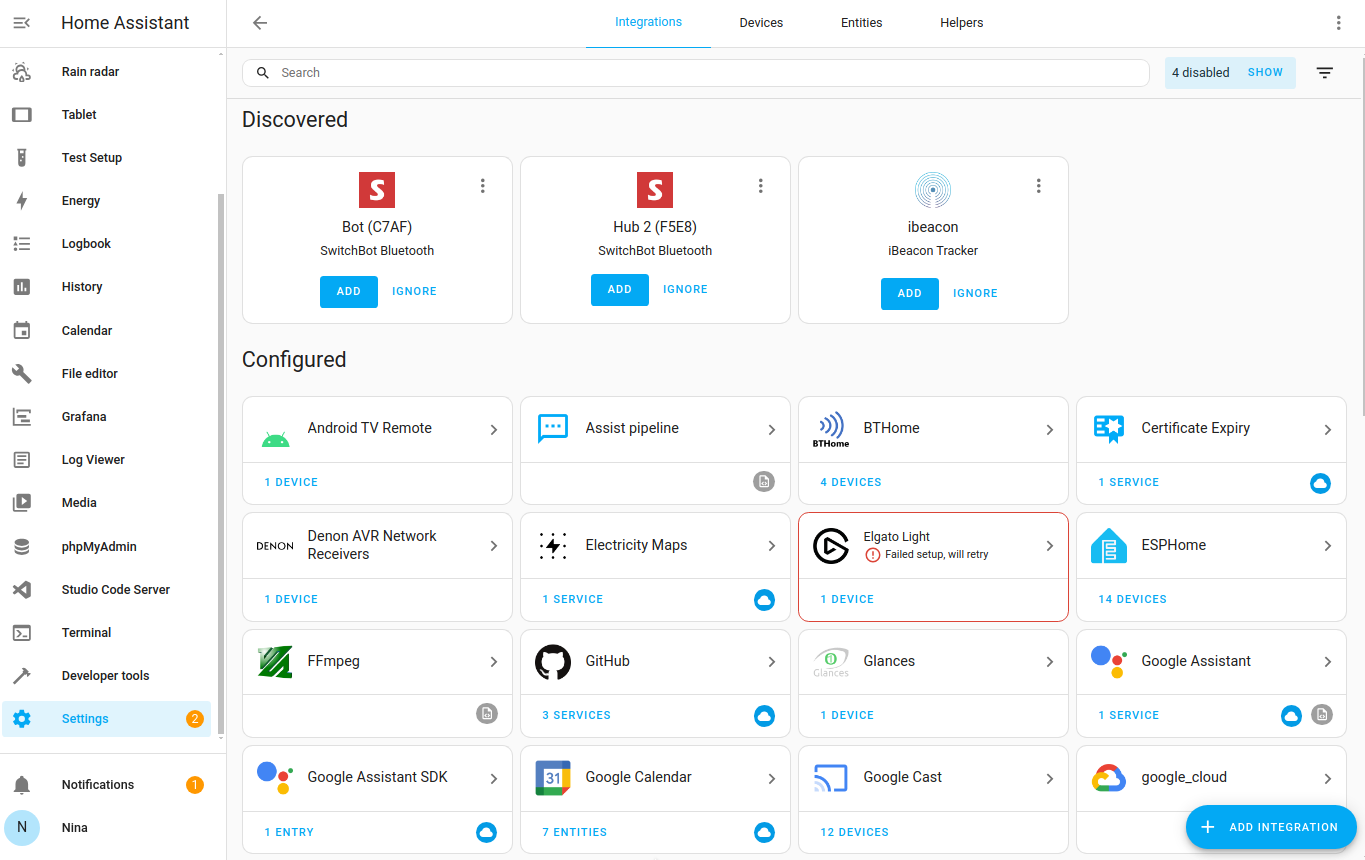
Go to Settings > Devices & services.
- The integrations page shows all the integrations you have already installed. Some of them were installed automatically.
- If devices were discovered in your network, you will see them in the Discovered section.

-
If there are any devices discovered for you, you can add them now.
- Under Discovered, on the integration, select Add.
- Follow the steps in the UI if additional configuration is required.
- If no devices were discovered, don’t worry, we will add an integration in the next step.
-
In the bottom-right corner, select Add integration.
-
Type
workdand select the Workday integration.
-
Give it a name, for example
Workday tomorrow, and select the country.- The country is used to determine the local Holidays.
- Select Submit, then Finish.
-
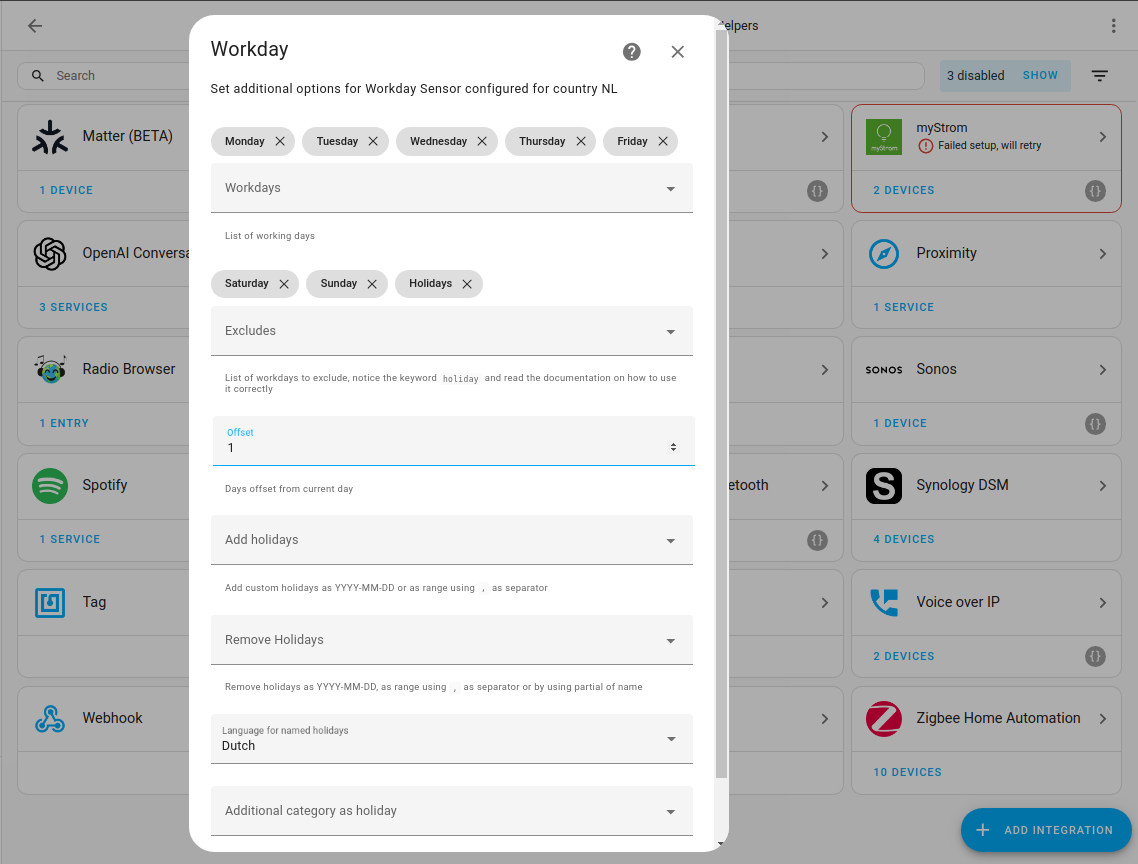
Configure the options.
- For example, if Monday is not a workday for you, select the “x” to remove it.
- To check if tomorrow is workday, under Offset, enter
1. - Fill in all other options as needed. At a minimum, define the Holidays and Language.
- Select Submit.

-
Select the areaAn area in Home Assistant is a logical grouping of devices and entities that are meant to match areas (or rooms) in the physical world: your home. For example, the
living roomarea groups devices and entities in your living room., for example, office, and select Finish. -
You now see the Workday integration in the list.
-
Congratulations! You’ve added your first integration. Job done.

-
Looking at integration details
-
Select the integration.

- This opens the integration details page.
- We see that this integration has one serviceThe term “service” in Home Assistant is used in the sense of an information service. For example, the municipal waste management service that provides entities for organic, paper, and packaging waste. In terms of functionality, the information service is like a device. It is called service to avoid confusion, as it does not come with a piece of hardware. [Learn more] and one entityAn entity represents a sensor, actor, or function in Home Assistant. Entities are used to monitor physical properties or to control other entities. An entity is usually part of a device or a service. [Learn more].
- Documentation opens the documentation page of this integration.
-
Known issues opens the GitHub issue tracker, filtered for issues related to this integration.
- This allows you to see if other users reported issues related to that integration.
- Enable debug logging lets you activate the debug logs for that integration.

-
Select Service, to open the service info page.
- In the Logbook, you can see the timeline of that sensorSensors return information about a thing, for instance the level of water in a tank. [Learn more].
- Under Sensors, you can see all the sensors an integration provides. Here, we have only one, but if you have a climate device, for example, you might see temperature, humidity, and battery status here.
- You can also see that Workday is not used (yet) in any automationsAutomations in Home Assistant allow you to automatically respond to things that happen in and around your home. [Learn more], scriptsScripts are components that allow users to specify a sequence of actions to be executed by Home Assistant when turned on. [Learn more], or scenesScenes capture the states you want certain entities to be. For example, a scene can specify that light A should be turned on and light B should be bright red. [Learn more].

-
Select the back button
. Then, select Entity to open the list of entitiesAn entity represents a sensor, actor, or function in Home Assistant. Entities are used to monitor physical properties or to control other entities. An entity is usually part of a device or a service. [Learn more]. - Although your Home Assistant already has many entities, you see only 1 entry in the entities table.
- This is because it is filtered.
- You see the entity ID, which consist of the domain (a technical term for device type) and the entity name, in the following format:
domain.entity_name.

Modifying the integration
-
To change the name, select the three dots
menu, and select Rename. 
-
You can also add another Workday sensorSensors return information about a thing, for instance the level of water in a tank. [Learn more]. For example, if you want to know when your colleagues have a holiday.
- Select Add entry, give it a name and define your options.
- Select the country of interest.
-
That’s it!
-
You have gained an overview of the integrations page and know where to find the integration details page, the sensor info page, and the entities table. -
You have learned to rename, modify, and delete an integration. - If you want to find more integrations, checkout the integration documentation.
- We are now ready to use Workday in an automation.
-