Onboarding Home Assistant
After Home Assistant has been installed on your device, there are 5 steps to complete setting up Home Assistant. The entire onboarding takes only a few minutes and is done in your browser, so no command-line or coding is required.
-
Enter the following URL into the browser’s address bar: http://homeassistant.local:8123/.
- Result: You now see the Preparing Home Assistant page. Depending on your hardware and internet connection, preparation may take a while.
- Home Assistant downloads the latest version of Home Assistant (about 700 MB).
- If you ran into issues with this step, refer to the installation troubleshooting.
- Once preparation is finished, the welcome screen is shown.
- Result: You now see the Preparing Home Assistant page. Depending on your hardware and internet connection, preparation may take a while.
-
You can either create a new installation or recover an existing installation from a backup:
-
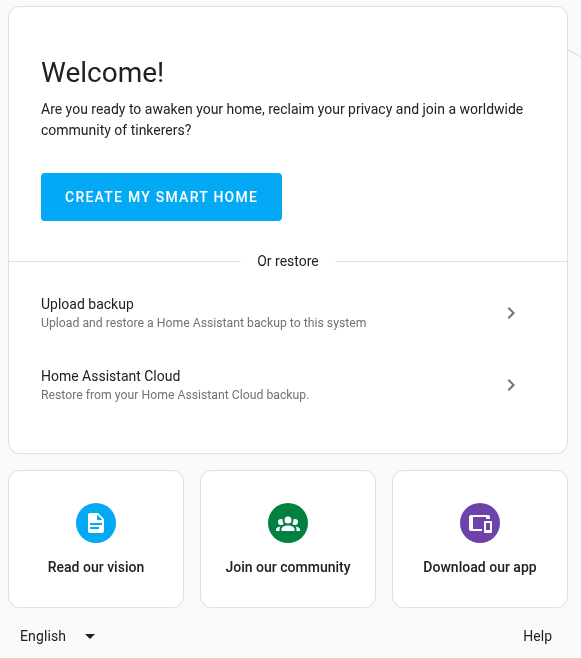
Option 1: new installation: If this is your initial installation, we will now create the owner’s account of Home Assistant.
-
This account is an administrator account. It will always be able to change everything. -
Select Create my smart home.
-
Enter a name, username, and password.
- Make sure the username is lowercase and contains no whitespace.
-
Info: The Name is the name of the person that is shown in the UI. The username is used for login.

-
Store the name, username, and password somewhere safe. There is no way to recover the owner credentials.
-
Select Create account.
-
-
Option 2: restore from backup: If you want to restore a backup of a previous installation, follow the steps on restoring from backup.
- If you have a Home Assistant Yellow, follow the Yellow documentation on restoring from backup.
- If you have a Home Assistant Green, follow the Green documentation on restoring from backup.
-
-
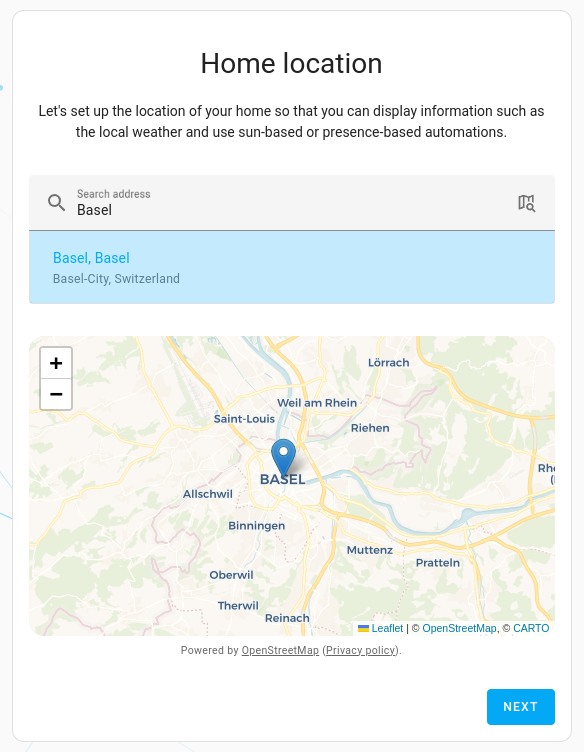
Enter the location of your home.
- The home location is used to configure the time zone, unit system, and currency.
- It is also used to create the home zone, which designates the area of your home with a default radius of 100 m.
- You can always change this information later in the settings.
- This home zone can be used for automations such as showing the weather, opening the shades at sunrise, or starting the vacuum when you leave the home.
- After finding your location, select Next.
-
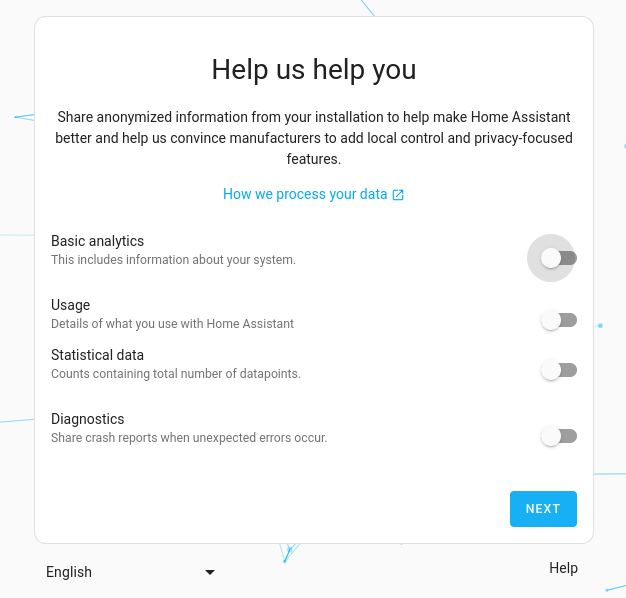
Select which information you are willing to share.
- Sharing is disabled by default. However, we would like to encourage you to share some of this data.
- This information helps us find out which platforms we need to support and where to focus our efforts.
- The data is anonymized and aggregated. To see the charts we generate out of this data, take a look at our analytics page.
- To confirm, select Next.
-
You’ve now got Home Assistant up and running. - Press Finish and you now see the default dashboard.