Raspberry Pi
Suggested hardware
We will need a few things to get started with installing Home Assistant.
- Raspberry Pi 5 or Raspberry Pi 4 with power supply (make sure to choose a model with at least 2 GB of RAM).
-
Micro SD Card.
- Ideally get one that is Application Class 2. Check for the label A2 on the card. Application Class 2 cards perform better especially on small read and write operations and are better suited to host applications.
- Make sure to use a card that provides at least 32 GB.
- SD Card reader. This is already part of most laptops, but you can purchase a standalone USB adapter if you don’t have one. The brand doesn’t matter, just pick the cheapest.
- Ethernet cable. Required for installation. After installation, Home Assistant can work with Wi-Fi, but an Ethernet connection is more reliable and highly recommended.
Remember to ensure you’re using an appropriate power supply with your Raspberry Pi. Mobile chargers may not be suitable, since some are designed to only provide the full power with that manufacturer’s handsets. USB ports on your computer also will not supply enough power and must not be used.
Install Home Assistant Operating System
This guide shows how to install the Home Assistant Operating SystemHome Assistant OS, the Home Assistant Operating System, is an embedded, minimalistic, operating system designed to run the Home Assistant ecosystem on single board computers (like the Raspberry Pi) or Virtual Machines. It includes Home Assistant Core, the Home Assistant Supervisor, and supports apps. Home Assistant Supervisor keeps it up to date, removing the need for you to manage an operating system. Home Assistant Operating System is the recommended installation type for most users. onto your Raspberry Pi using Raspberry Pi Imager.
Write the image to your SD card
- Download and install the Raspberry Pi Imager on your computer as described under https://www.raspberrypi.com/software/.
- Troubleshooting: If Raspberry Pi Imager is not supported by your platform, you can download the Home Assistant image and use another imaging tool, such as Balena Etcher.
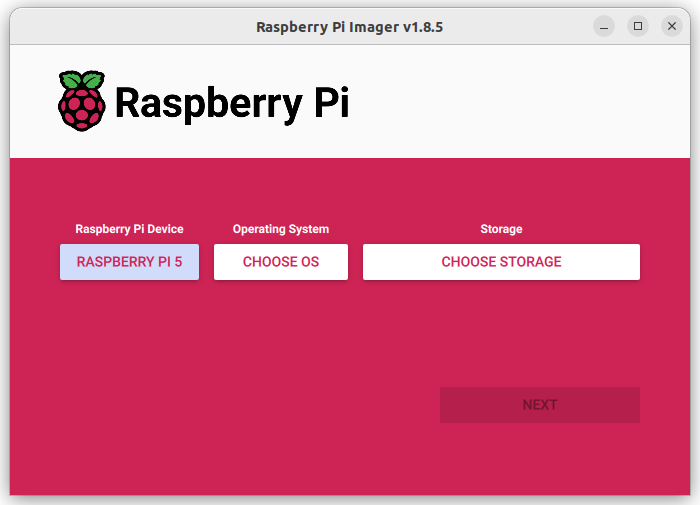
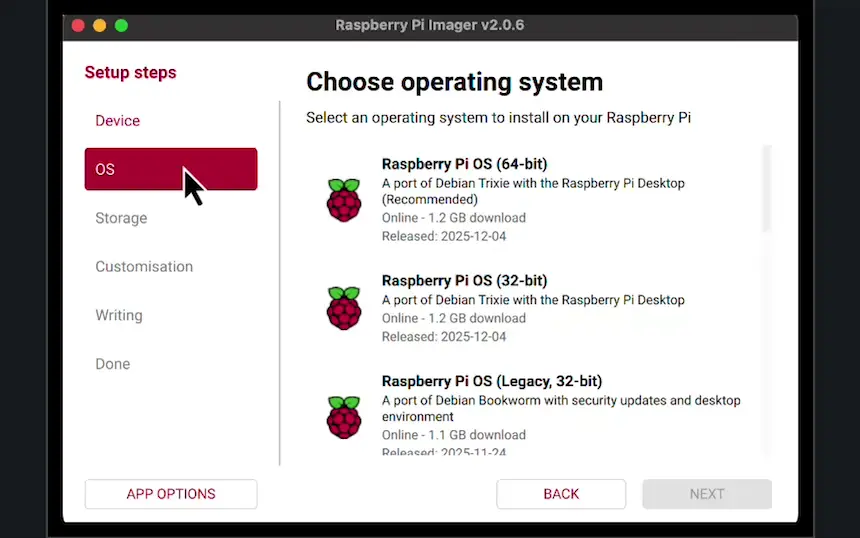
- Open the Raspberry Pi Imager and select OS.
- Choose the operating system type:
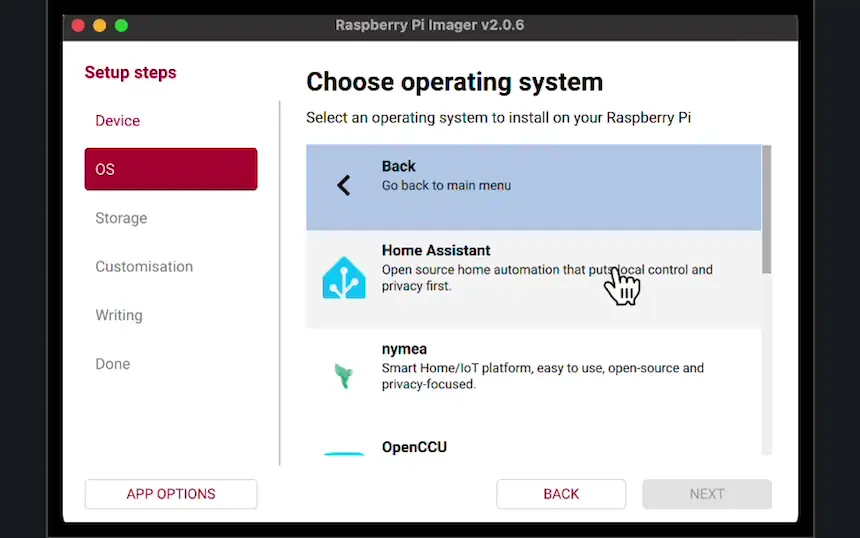
- Select Other specific-purpose OS > Home automation > Home Assistant.
- Select Other specific-purpose OS > Home automation > Home Assistant.
- Choose the Home Assistant OS that matches your hardware (RPi 4 or RPi 5).
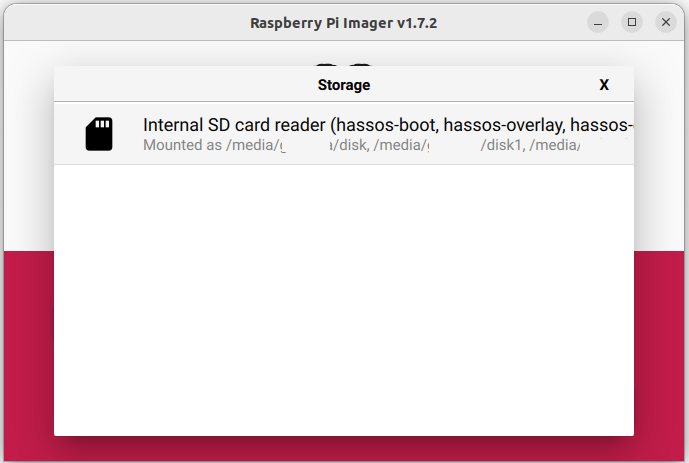
- Choose the storage:
- Insert the SD card into the computer. Note: the contents of the card will be overwritten.
- Select your SD card.
- Write the installer onto the SD card:
- To start the process, select Next, then choose Write.
- Wait for the Home Assistant OS to be written to the SD card.
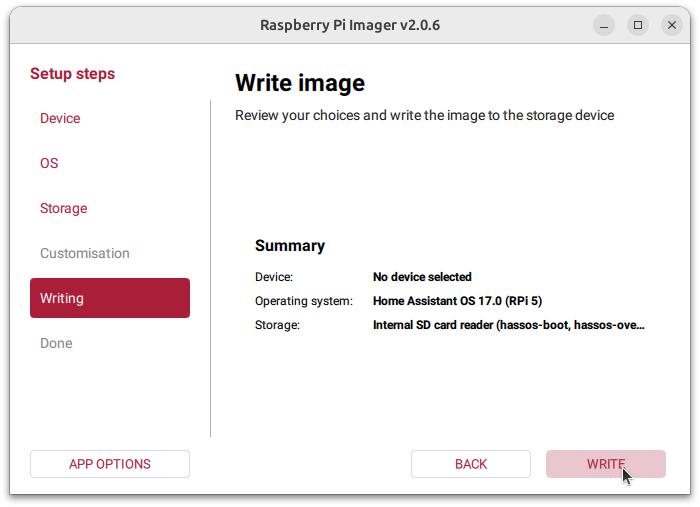
- Select Finish and eject the SD card.
Start up your Raspberry Pi
- Insert the SD card into your Raspberry Pi.
- Plug in an Ethernet cable and make sure the Raspberry Pi is connected to the same network as your computer and is connected to the internet.
- Connect the power supply to start up the device.
Access Home Assistant
Within a few minutes after connecting the Raspberry Pi, you will be able to reach your new Home Assistant.
- In the browser of your desktop system, enter homeassistant.local:8123.
If you are running an older Windows version or have a stricter network configuration, you might need to access Home Assistant at homeassistant:8123 or http://X.X.X.X:8123 (replace X.X.X.X with your Raspberry Pi’s IP address).
- The time it takes for this page to become available depends on your hardware. On a Raspberry Pi 4 or 5, this page should be available within a minute.
- If it does not show up after 5 minutes on a Pi 4 or 5, maybe the image was not written properly.
- Try to flash the SD card again, possibly even try a different SD card.
- If this did not help, view the console output on the Raspberry Pi.
- To do this, connect a monitor via HDMI.
- If it does not show up after 5 minutes on a Pi 4 or 5, maybe the image was not written properly.
Congratulations! You finished the Raspberry Pi setup!
Downloading the Home Assistant image
If Raspberry Pi Imager is not supported by your platform, you can download the Home Assistant image and use another imaging tool, such as Balena Etcher.
To download the image to your computer, copy the correct URL for the Raspberry Pi 4 or 5 (Note: there are two different links below!):
https://github.com/home-assistant/operating-system/releases/download/17.3/haos_rpi5-64-17.3.img.xz
https://github.com/home-assistant/operating-system/releases/download/18.0/haos_rpi4-64-18.0.img.xz
With the Home Assistant Operating System installed and accessible, you can now continue with onboarding.
We get commissions for purchases made through links in this post.