Labels
Labels in Home Assistant allow grouping elements irrespective of their physical location or type. Labels can be assigned to areas, devices, entities, automations, scenes, scripts, and helpers. Labels can be used in automations and scripts as a target for actions and services. Labels can also be used to filter data.
For example, you can filter the list of devices to show only devices with the label heavy energy usage or turn these devices off when there is not a lot of solar energy available.
Creating a label
Follow these steps to create a new label from the Labels view.
-
Go to Settings > Areas, labels & zones and on top, select the Labels tab.
-
Select the Create label button.
-
In the dialog, enter the label details:
- Give the label a Name (required).
- Add an icon (We use Material icons
). - Add a Color.

-
Select Create.
Result: A new label is created.
Applying labels
Follow these steps to apply a label
-
To apply a label to an area:
- Go to Settings > Areas, labels & zones.
- On the area card, select the pencil icon.
- Select one or more labels or select Add new label to create a new one.
-
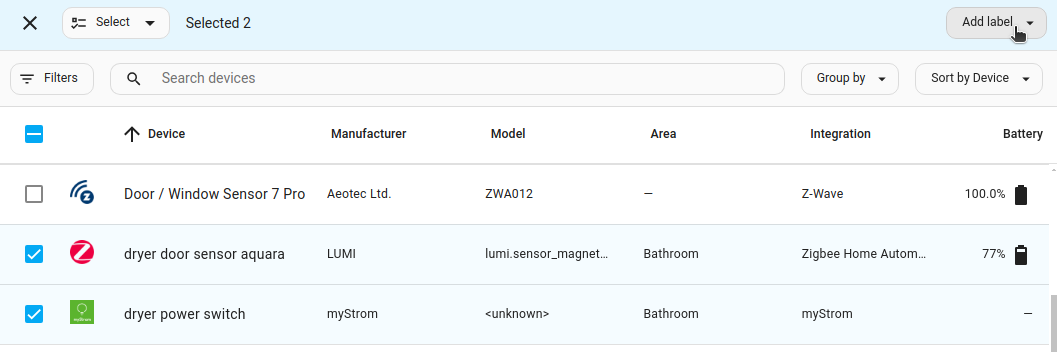
To apply a label to a device, entity, or helper:
- Go to Settings > Devices & Services and open the respective tab.
- Select the
button. - From the list, select all the list entries to which you want to apply a label.
- In the top right corner, select Add label. Then, select the labels from the list.
-
To apply a label to an automation, scene, or script:
- Go to Settings > Automations & Scenes and open the respective tab.
- Select the
button. - From the list, select all the list entries to which you want to apply a label.
- In the top right corner, select the three dots
menu, then select Add label. Then, select the labels from the list.
Deleting a label
Follow these steps to delete a label. It will be removed from all the list entries it was applied to. If you used this label in automations or script as targets, you need to adjust those.
- Go to Settings > Areas, labels & zones and on top, select the Labels tab.
- In the list of labels, find the label you want to delete and select the three dots
menu. - Select Delete.
- If you used this label in automations or script as targets, you need to adjust those.
Removing labels
- Go to the data table that contains the element from which you want to remove the label:
- Go to Settings > Devices & Services and open the respective tab.
- Or, go to Settings > Automations & Scenes and open the respective tab.
- Select the
button. - From the list, select all the items from which you want to remove a label.
- In the top right corner, select the three dots
menu, then select Add label. - Then, deselect the checkbox for the label you want to remove.