ONVIF
The ONVIF integrationIntegrations connect and integrate Home Assistant with your devices, services, and more. [Learn more] allows you to use an ONVIF Profile S conformant device in Home Assistant. This requires the ffmpeg integration to be already configured.
Configuration
To add the ONVIF device to your Home Assistant instance, use this My button:

ONVIF can be auto-discovered by Home Assistant. If an instance was found, it will be shown as Discovered. You can then set it up right away.
If it wasn’t discovered automatically, don’t worry! You can set up a manual integration entry:
-
Browse to your Home Assistant instance.
-
In the bottom right corner, select the
Add Integration button. -
From the list, select ONVIF.
-
Follow the instructions on screen to complete the setup.
It is recommended that you create a user on your device specifically for Home Assistant. For all current functionality, it is enough to create a standard user.
Configuration notes
Most of the ONVIF devices support more than one audio/video profile. Each profile provides different image quality, or in the case of an NVR, separate connected cameras. This integration will add entities for all compatible profiles with the video encoding set to H.264. Usually, the first profile has the highest quality and it is the profile used by default. However, you may want to use a lower quality image. You may disable unwanted entities through the Home Assistant UI.
Options
To define options for ONVIF, follow these steps:
-
In Home Assistant, go to Settings > Devices & services.
-
If multiple instances of ONVIF are configured, choose the instance you want to configure.
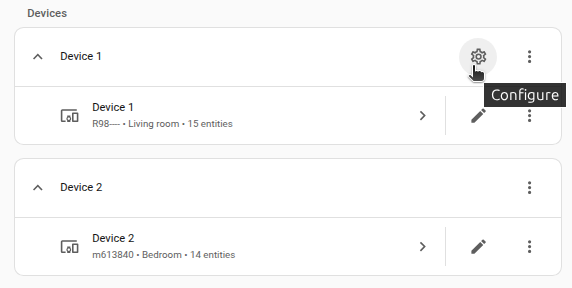
-
On the card, select the cogwheel
. - If the card does not have a cogwheel, the integration does not support options for this device.
-
Edit the options, then select Submit to save the changes.
| Option | Description |
|---|---|
| RTSP transport mechanism | RTSP transport protocols. The possible options are: tcp, udp, udp_multicast, http. |
| Extra FFmpeg arguments | Extra options to pass to ffmpeg, e.g., image quality or video filter options. More details in ffmpeg integration. |
| Use wallclock as timestamps | Rewrite the camera timestamps. This may help with playback or crashing issues from Wi-Fi cameras or cameras of certain brands (e.g., EZVIZ). |
| Enable Webhooks | If the device supports notifications via a Webhook, the integration will attempt to set up a Webhook. Disable this option to force falling back to trying PullPoint if the device supports it. |
Snapshots
Some cameras will not produce usable snapshots with larger stream sizes.
By default, the integration will only enable the camera entity for the first H264 profile. If you are unable to get a working snapshot:
- If additional camera entities are available for other profiles, try enabling those entities.
- Set the
Extra FFmpeg argumentsto-pred 1 -ss 00:00:05 -frames:v 1to cause the snapshot to be taken 5 seconds into the stream.
Supported sensors
This integration uses the ONVIF pullpoint subscription API to process events into sensors that will be automatically added to Home Assistant. Below is a list of currently supported event topics along with the entities they create.
To help with development of this integration, enable info level logging for homeassistant.components.onvif and create an issue on GitHub for any messages that show “No registered handler for event”.
| Topic(s) | Entity Type | Device Class | Description |
|---|---|---|---|
| Motion alarm | Binary sensor | Motion | Generic motion alarm. |
| Field detection | Binary sensor | Motion | Polygonal field detection determines if each object in the scene is inside or outside the polygon. |
| Cell motion detection | Binary sensor | Motion | Cell based motion detection determined by placing a grid over the video source and determining changes. |
| Human shape detection | Binary sensor | Motion | Detection of human shapes by on-camera recognition algorithm. |
| Motion region detector | Binary sensor | Motion | Detects any motion against the specified motion region. The rule is configured for an area defined by a polygon. |
| Detected sound | Binary sensor | Sound | Device detected sound. |
| Digital input | Binary sensor | None | A digital input was triggered on the device. Amcrest is known to use this as a doorbell button press on the AD410. |
| Relay triggered | Binary sensor | None | Device relay output was triggered. |
| Image too blurry | Binary sensor | Problem | Device reports blurry image. |
| Image too dark | Binary sensor | Problem | Device reports dark image. |
| Image too bright | Binary sensor | Problem | Device reports bright image. |
| Global scene change | Binary sensor | Problem | Device reports a large portion of the video content changing. The cause can be tamper actions like camera movement or coverage. |
| Tamper detector | Binary sensor | Problem | Detects any kind of tampering to the image sensor. |
| Storage failure | Binary sensor | Problem | Storage failure on device. |
| Recording job state | Binary sensor | None | Whether or not the device is actively recording. |
| Processor usage | Sensor | Percent | Device processor usage. |
| Last reboot | Sensor | Timestamp | When the device was last rebooted. |
| Last reset | Sensor | Timestamp | When the device was last reset. |
| Last Clock Synchronization | Sensor | Timestamp | When the device clock was last synchronized. |
| Last Backup | Sensor | Timestamp | When the last backup of the device configuration has been retrieved. |
If you are running into trouble with this sensor, please refer to the Troubleshooting section.
Supported switches
This integration uses the ONVIF auxiliary command and imaging service to send certain settings and information to the camera via switch entities. Below is a list of currently supported switches.
| Name | Entity Name | Description |
|---|---|---|
| IR lamp | ir_lamp |
Turn infrared lamp on and off via IrCutFilter ONVIF imaging setting. |
| Autofocus | autofocus |
Turn autofocus on and off via AutoFocusMode ONVIF imaging setting. |
| Wiper | wiper |
Turn on the lens wiper on and off via the Wiper ONVIF auxiliary command. |
List of actions
The ONVIF integrationIntegrations connect and integrate Home Assistant with your devices, services, and more. [Learn more] provides the following actions. Each link below opens a dedicated page with examples, parameters, and a step-by-step UI walkthrough.
-
PTZ (
onvif.ptz) Pans, tilts, or zooms an ONVIF camera.
For an overview of every action across all integrations, see the actions reference.
Troubleshooting
Symptom: Error message: “No usable cameras were found”
The ONVIF integration shows an error message “No usable cameras were found”.
Resolution
Update the camera configuration to output at least one video stream in H.264 format rather than H.265. One option for doing this is to set a secondary stream to H.264 while leaving the primary stream at the default H.265.
Cause
Many newer cameras, particularly those with higher resolutions that benefit from H.265’s improved video coding, support H.265 (HEVC) by default, while the ONVIF integration looks for H.264 (AVC) video streams to find cameras.