Synology DSM
The Synology DSM integrationIntegrations connect and integrate Home Assistant with your devices, services, and more. [Learn more] provides access to various statistics from your Synology NAS (DSM 5.x and higher), as well as cameras from the Surveillance Station and will allow you to use the File Station as a backupHome Assistant has built-in functionality to create files containing a copy of your configuration. This can be used to restore your Home Assistant as well as migrate to a new system. The backup feature is available for all installation types. [Learn more] location.
Configuration
To add the Synology DSM device to your Home Assistant instance, use this My button:

Synology DSM can be auto-discovered by Home Assistant. If an instance was found, it will be shown as Discovered. You can then set it up right away.
If it wasn’t discovered automatically, don’t worry! You can set up a manual integration entry:
-
Browse to your Home Assistant instance.
-
In the bottom right corner, select the
Add Integration button. -
From the list, select Synology DSM.
-
Follow the instructions on screen to complete the setup.
This sensor will wake up your Synology NAS if it’s in hibernation mode.
The default polling interval is 15 minutes. You can also define a custom polling interval if needed.
Having cameras or the Home mode toggle from Surveillance Station will fetch every 30 seconds. Disable those entities if you don’t want your NAS to be fetched as frequently.
When SSDP is activated on a NAS with two or more NICs with different IP addresses on the same subnet an adoption loop will occur. The NAS will be detected several times with different IP addresses and the integration will adopt the “newly” detected IP causing a reload. To resolve this either deactivate SSDP on the NAS or use NIC bonding so that only one IP address is present.
Separate User Configuration
You must grant the user administrator rights, as the basic functions of this integration require them due to the structure of the Synology DSM API.
When creating the user, it is possible to deny access to all locations and applications. By doing this, the user will not be able to log in to the web interface or view any of the files on the Synology NAS. It is still able to read the utilization and storage information using the API.
If you want to add cameras from Surveillance Station, the user needs application permission for Surveillance Station.
If you want to use a shared folder from the File Station as backupHome Assistant has built-in functionality to create files containing a copy of your configuration. This can be used to restore your Home Assistant as well as migrate to a new system. The backup feature is available for all installation types. [Learn more] location, the user needs application permission for File Station and read/write permissions on the specific shared folder.
If you utilize 2-Step Verification or Two Factor Authentication (2FA) with your Synology NAS
If you have the “Enforce 2-step verification for the following users” option checked under Control Panel > Security > Account > 2-Factor Authentication, you’ll need to configure the 2-step verification/one-time password (OTP) for the user you just created before the credentials for this user will work with Home Assistant.
Make sure to log out of your “normal” user’s account and then log in with the separate user you created specifically for Home Assistant. DSM will walk you through the process of setting up the one-time password for this user which you’ll then be able to use in Home Assistant’s frontend configuration screen.
If you denied access to all locations and applications it is normal to receive a message indicating you do not have access to DSM when trying to log in with this separate user. As noted above, you do not need access to the DSM and Home Assistant will still be able to read statistics from your NAS.
Backup location
The NAS can also be used as a backupHome Assistant has built-in functionality to create files containing a copy of your configuration. This can be used to restore your Home Assistant as well as migrate to a new system. The backup feature is available for all installation types. [Learn more] location, without the need to add the NAS as a network drive to Home Assistant (this requires DSM 6.0 and higher). For this you need to set up the correct permissions for the user (see Separate User Configuration above), afterwards, you will be able to select the shared folder and define a relative path to be used as a backup location in the integration options (Settings > Devices & services > Synology DSM > select the instance > Configure)
Don’t manually delete or rename the files in the backup path on the NAS. This could result in the backups no longer being able to be read or restored.
Example
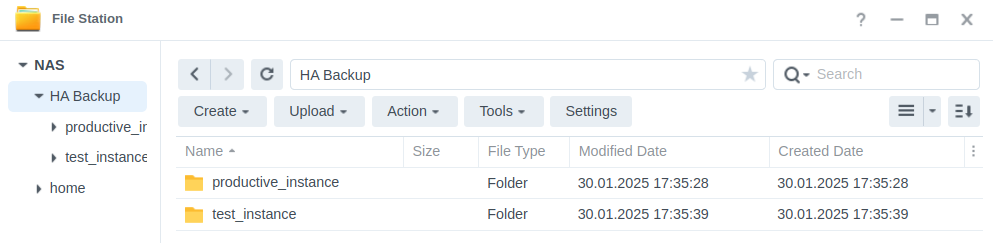
Assume there is a shared folder called HA Backup, with two directories in it productive_instance and test_instance.
Use an existing path
- Select
HA Backupas shared folder. - Define
productive_instanceas backup path (without trailing slash).-
Result: The existing
productive_instancewill be used as backup location.
-
Result: The existing
Use a non-existing path
- Select
HA Backupas a shared folder. - Define
cottage_instanceas backup path (without trailing slash).-
Result: A new directory
cottage_instancewill be created on the shared folderHA Backupduring the first backup.
-
Result: A new directory
Sub-directories in the backup path need to be separated by the regular slash /. For example: home-assistant/prod_instance.
Sensors
CPU utilization sensors
Entities reporting the current and combined CPU utilization of the NAS. There are sensors that report the current CPU load separated by User, System, and others. By default only the User sensor is enabled.
There are also combined CPU load sensors. These report the total CPU load for the entire NAS. Available as current, 1min, 5min and 15min load sensors. By default the 1min load sensor is disabled.
Memory utilization sensors
Entities reporting the current and combined memory and swap utilization of the NAS. These sensors include the total installed amount, the currently free amount, and the % of memory used.
Network sensors
Entities reporting the current network transfer rates of the NAS. Both upload and download sensors are available.
General sensors
Entities reporting the internal temperature and the uptime of the NAS. The uptime sensor is disabled by default.
Disk sensors
Entities reporting the internal temperature, status (as shown in Synology DSM) and SMART status for each drive inside the NAS. The SMART status sensor is disabled by default.
Volume sensors
Entities reporting status, total size (TB), used size (TB), % of volume used, average disk temperature and maximum disk temperature for each volume inside the NAS. By default the total size and maximum disk temperature sensors are disabled.
Binary sensors
General sensors
Entity reporting the security status of the NAS.
The security status corresponds with the analysis of the DSM Security Advisor. For example, an outOfDate state for the Update attribute not only reflects the update status of the installed DSM version but also the status of the installed DSM packages.
Disk sensors
Similar to the normal disk sensors, there are binary sensors reporting each drive’s status. These sensors report if a drive has exceeded the maximum threshold for detected bad sectors and if a drive has dropped below the threshold for its remaining life.
Switch
A switch is available to enable/disable the Surveillance Station Home mode.
Cameras
For each camera added in Surveillance Station a camera will be created in Home Assistant.
Buttons
Button reboot
Reboot the NAS.
Button shutdown
Shutdown the NAS.
Selects
Fan speed mode
-
Fan speed mode
- Description: The mode of the system fan speed, if your NAS supports it.
- Options: Low-Power mode (only supported on some devices), Quiet mode, Cool mode, Full-speed mode.
Media source
A media source is provided for your Synology Photos.
The media source URIs will look like media-source://synology_dsm/<unique_id>/<album_id>/<image>.
This media browser supports multiple Synology Photos instances. <unique_id> is the Home Assistant ID for the NAS (usually the serial number of the NAS). You can find this id when using the media browser by hovering over the NAS name. It will show the simple name followed by the unique id ex: 192.168.0.100:5001 - 18C0PEN253705.
To find the <album_id> you need to go to the album in your photos instance, and the id will be in the URL ex: https://192.168.0.100:5001/#/album/19, where 19 is the album id. An <album_id> of 0 will contain all images.
For performance reasons, a maximum of 1000 images will be shown in the Media Browser.
UPS support
This integration does not directly support the UPS systems connected to the NAS, but it can be achieved with the Network UPS Tools (NUT) integration. You need to enable UPS support in your NAS settings, as described in the official Synology UPS documentation, and then integrate the NAS as a UPS server via the NUT integration. Here is a rough step-by-step guide:
- Activate Enable UPS support in the NAS settings under Control Panel > Hardware & Power > UPS.
- Activate Enable network UPS server.
- Select Permitted Synology NAS Devices and add the IP address of your Home Assistant instance.
- Set up the Network UPS Tools (NUT) integration.
- Host: the IP address or hostname of your NAS.
- Port: keep the default (3493).
- Username and Password: keep empty as the NAS doesn’t support credentials for the NUT server.
Troubleshooting
In any case, when reporting an issue, please enable debug logging, restart the integration, and as soon as the issue re-occurs stop the debug logging again (download of debug log file will start automatically). Further if still possible, please also download the diagnostics data. If you have collected the debug log and the diagnostics data, provide them with the issue report.
“Transmission failed” error
Unforeseen conditions may occur on the NAS, resulting in a “Transmission failed” error. In most cases, this error can be resolved by restarting the NAS.
Remove the integration
To remove an integration instance from Home Assistant
- Go to Settings > Devices & services and select the integration card.
- From the list of devices, select the integration instance you want to remove.
- Next to the entry, select the three dots
menu. Then, select Delete.
If you don’t use the separate created user anymore (see Separate User Configuration above), then remove it from the NAS under Control Panel > User & Group > User. Don’t forget to back up any data from the user’s home directory, if you want to keep it (for example, Home Assistant backups).