Model Context Protocol Server
The Model Context Protocol is an open protocol that standardizes how applications provide context to LLMs. The Model Context Protocol Server (MCP) integration enables using Home Assistant to provide context for MCP LLM Client Applications. For example, you can control your lights from Claude Desktop, or expose your Google Tasks to-do list as a tool.
Controlling Home Assistant is done by providing MCP clients with access to Home Assistant’s Assist API. You can control what devices and entities it can access from the exposed entities page, and your MCP client can also read a real-time snapshot of that context. This gives your AI assistant a clear picture of your home’s current state.
Prerequisites
- You need an MCP client LLM Application such as Claude for Desktop.
- If your client does not support remote servers, you need an additional local MCP server remote gateway.
For detailed configuration instructions, refer to the Client configuration section.
Configuration
To add the Model Context Protocol Server service to your Home Assistant instance, use this My button:

If the above My button doesn’t work, you can also perform the following steps manually:
-
Browse to your Home Assistant instance.
-
In the bottom right corner, select the
Add Integration button. -
From the list, select Model Context Protocol Server.
-
Follow the instructions on screen to complete the setup.
Configuration options
The integration provides the following configuration options:
If MCP clients are allowed to control Home Assistant. Clients can only control or provide information about entities that are exposed to it.
Architecture overview
This integration can provide similar functionality as other LLM-based conversation agents (for example Anthropic, Google Generative AI, Ollama, Open AI). In those conversation agents, Home Assistant is the client and prepares the available tools and passes them into the LLM with a prompt.
The Model Context Protocol follows a different pattern: An LLM application acts as a client and can connect to multiple MCP servers to provide context. See the Model Context Protocol Introduction for more details.
The Home Assistant Model Context Protocol Server integration implements the Streamable HTTP protocol allowing client-to-server communication using the stateless protocol. Some MCP clients only support stdio transport, and directly run an MCP server as a local command line tool. You can use an MCP proxy server like mcp-proxy to act as a gateway to the Home Assistant MCP SSE server.
Client configuration
The Model Context Protocol specification has recently defined standards for authorization and connecting to remote servers. The standards are a work in progress and so some clients may not support the latest functionality, and the specification will likely continue to evolve.
The Home Assistant MCP server is exposed as /api/mcp and requires the
client to provide an authentication token.
Access control
OAuth
The Model Context Protocol supports OAuth for Authorization and is fully supported by Home Assistant’s Authentication API. MCP Clients that support OAuth can use this to allow you to give the client access to your Home Assistant MCP server.
Home Assistant has adopted IndieAuth and does not require you to pre-define an OAuth Client ID. Instead, the Client ID is the base URL of the client application making the request.
-
Client ID: This is the base URL of the LLM application configuring the connector (for example,
https://claude.aifor Claude, orhttps://chatgpt.comfor ChatGPT). It should not be your Home Assistant server’s URL. - Client Secret: This is not used by Home Assistant. If the client strictly requires a value, you can put any random text or leave it blank.
Long-Lived Access Tokens
Some MCP clients may not support OAuth, but may support access tokens. You may create a Long-lived access token to allow the client to access the API.
-
Visit your account profile settings, under the Security tab.
 .
. -
Create a Long-lived access token
-
Copy the access token to use when configuring the MCP client LLM application.
For more information about Authentication in Home Assistant, refer to the Authentication documentation.
Example: Claude for Desktop
Claude for Desktop can connect to Home Assistant using either a cloud-based remote connector or a local MCP proxy server.
Option 1: Remote connector (requires public Home Assistant URL)
When using a remote custom connector in Claude for Desktop, the connection is brokered through Anthropic’s cloud infrastructure. This means your Home Assistant instance must be publicly accessible from the internet.
-
Download Claude for Desktop and log in.
-
Select Customize from the side menu, and then Connectors.
-
Select + in the Connectors pane, and then select Add Custom Connector.
-
Enter the following details:
- Name: “Home Assistant” (or any more descriptive name you prefer)
-
Remote MCP Server URL:
https://<your_home_assistant_external_url>/api/mcp - Under advanced settings:
-
OAuth Client ID:
https://claude.ai - OAuth Client Secret: Leave this blank
-
OAuth Client ID:
-
Select Add. Then select Connect next to the entry created with the name you provided above.
-
Log in to your Home Assistant instance and allow the redirect back to Claude Desktop.
-
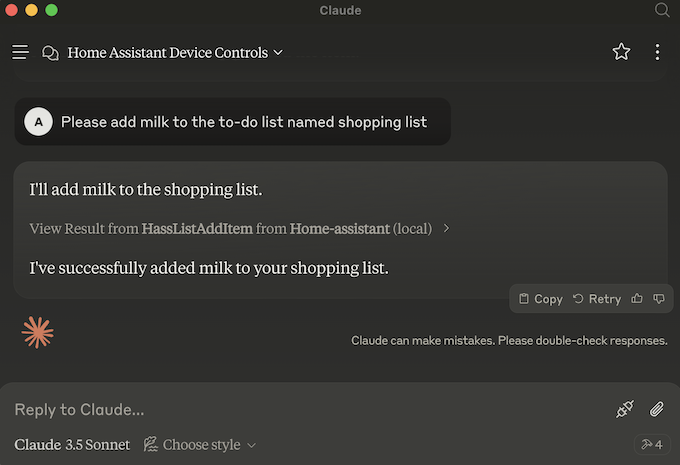
You can now enable tools from Home Assistant when chatting with Claude, allowing you to control Home Assistant in a similar way to how you control it through the Voice Assistant. Claude will ask you for permission before calling any tools.
Option 2: Local MCP proxy server (for internal/local Home Assistant URLs)
If your Home Assistant instance is only accessible on your local network (for example, http://homeassistant.local:8123 or http://192.168.1.10:8123) or behind a VPN, you can use a local MCP proxy. This allows Claude Desktop to connect directly from your computer without routing through Anthropic’s cloud.
-
Make sure you have a Long-lived access token from your Home Assistant account.
-
Install
mcp-proxyfollowing the instructions in the README. For example:uv tool install git+https://github.com/sparfenyuk/mcp-proxy. -
Locate your Claude Desktop configuration file (for example,
~/Library/Application Support/Claude/claude_desktop_config.jsonon macOS or%APPDATA%\Claude\claude_desktop_config.jsonon Windows). -
Add the following to your
mcpServersconfiguration:{ "mcpServers": { "Home Assistant": { "command": "mcp-proxy", "args": [ "--transport=streamablehttp", "--stateless", "http://<your_local_home_assistant_ip_or_url>:8123/api/mcp" ], "env": { "API_ACCESS_TOKEN": "<your_access_token_here>" } } } } -
Restart Claude for Desktop to connect.
Example: ChatGPT
ChatGPT supports connecting to remote Model Context Protocol servers for Plus, Pro, Business, and Enterprise/Edu users. ChatGPT currently only supports remote connections, which means your Home Assistant instance must be publicly accessible from the internet.
- Log in to ChatGPT. Ensure developer mode is enabled for your account (this can be toggled in Settings > Apps > Advanced Settings).
- Navigate to Workspace settings (or user settings), select Apps, and select Create.
- Enter the following details:
- Name: “Home Assistant” (or any name you prefer).
-
MCP Server URL:
https://<your_home_assistant_external_url>/api/mcp - Select OAuth for the authentication mechanism. ChatGPT will attempt to auto discover OAuth settings. If this does not work you will need to manually enter the settings under Advanced OAuth Settings > User defined oauth client:
- Under Client registration:
-
OAuth Client ID:
https://chatgpt.com - OAuth Client Secret: Enter any random text (it is not used by Home Assistant, but the ChatGPT configuration form may require a value).
-
Token endpoint auth method:
client_secret_post
-
OAuth Client ID:
- Under OAuth endpoints:
-
Auth URL:
https://<your_home_assistant_external_url>/auth/authorize -
Token URL:
https://<your_home_assistant_external_url>/auth/token -
Authorization server base:
https://<your_home_assistant_external_url>
-
Auth URL:
- Under Client registration:
- Select Create. Once created, the app will appear in your Enabled Apps.
- Begin a new chat in ChatGPT, open the apps menu, and select your newly created Home Assistant app. ChatGPT will prompt you to authenticate, which will redirect you to Home Assistant to log in and authorize the connection.
Example: Claude Code
Claude Code supports remote MCP servers, making it easy to connect to your Home Assistant instance:
-
Install Claude Code and log in.
-
In your shell, run the following command:
claude mcp add-json "HA" '{ "type": "http", "url": "https://<your_home_assistant_url>/api/mcp", "oauth": { "clientId": "http://localhost:12345", "callbackPort": 12345 } }' --client-secretThe name
"HA", the URL"https://<your_home_assistant_url>", and the callback port"12345"are examples; adjust them to match your setup. (Note:clientId: "http://localhost:12345"is correct for the Claude Code CLI’s internal local callback server. Do not change this to your Home Assistant URL.) -
Start
claudeand type/mcp. Navigate to your MCP listing (for example, HA) and press Enter. Select Authenticate to open a web browser to your Home Assistant login page. -
After you authenticate to your Home Assistant server, Home Assistant will tell you that you can close the web browser.
-
You can now enable tools from Home Assistant when chatting with Claude, allowing you to control Home Assistant in a similar way to how you control it through the Voice Assistant. Claude will ask you for permission before calling any tools.
Example: Cursor
-
Download and install Cursor.
-
Install
mcp-proxyfollowing the instructions in the README. For example,uv tool install git+https://github.com/sparfenyuk/mcp-proxy. -
Open the main Cursor Settings and select MCP.
-
Select Add new global MCP server and add the Home Assistant server configuration:
{ "mcpServers": { "Home Assistant": { "command": "mcp-proxy", "args": [ "--transport=streamablehttp", "--stateless", "http://<your_local_home_assistant_ip_or_url>:8123/api/mcp" ], "env": { "API_ACCESS_TOKEN": "<your_access_token_here>" } } } } -
Save your
mcp.jsonfile. You can also find this file in the$HOME/.cursor/mcp.jsondirectory. -
Restart Cursor and return to the MCP settings. You should see the Home Assistant server in the list. The indicator should be green.
-
In chat agent mode (Ctrl+I), ask it to control your home and the tool should be used.

Example: Antigravity CLI
-
Install the Antigravity CLI if you haven’t already. You can find installation instructions at https://antigravity.google.
-
Open the Antigravity CLI MCP configuration file,
mcp_config.json. This is usually located at~/.gemini/antigravity-cli/mcp_config.json. For more details, refer to the Antigravity CLI MCP server documentation. -
Add the following to your
mcpServersconfiguration:{ "mcpServers": { "homeassistant": { "serverUrl": "https://<your_home_assistant_url>/api/mcp", "headers": { "Authorization": "Bearer ${HOMEASSISTANT_TOKEN}" } } } } -
Replace
<your_home_assistant_url>with the URL of your Home Assistant instance. -
Set the
HOMEASSISTANT_TOKENenvironment variable to a Long-Lived Access Token from your Home Assistant instance. -
Save the file. You can now use Home Assistant tools within the Antigravity CLI.
Supported functionality
Tools
MCP Tools enable LLMs to perform actions through Home Assistant. The tools used by the configured LLM API are exposed.
Prompts
The MCP Prompts provided inform LLMs how to call the tools. The tools used by the configured LLM API are exposed.
Resources
When the configured LLM API includes the GetLiveContext tool, Home Assistant
also exposes a read-only MCP Resource
named homeassistant://assist/context-snapshot.
This resource returns a plain-text snapshot that matches the existing
GetLiveContext tool output. It is intended for inspection, debugging, and
explanation workflows where a static snapshot is useful. If the configured LLM
API does not expose GetLiveContext, this resource is not available.
Known limitations
The Home Assistant Model Context Protocol integration currently only supports a subset of MCP features:
- Prompts: Supported
- Tools: Supported
- Resources: Supported (Assist only)
- Sampling: Not supported
- Notifications: Not supported
Troubleshooting
This section has troubleshooting information for Claude for Desktop since it is the primary client. Also see Debugging in Claude Desktop.
LLM client cannot connect to Home Assistant MCP server
Symptom: Failed to start MCP server: Could not start MCP server Home Assistant
When trying to configure a client like Claude for Desktop to talk to Home Assistant, the app shows a message like “Failed to start MCP server: Could not start MCP server Home Assistant”
Description
This means that the local MCP server mcp-proxy could not start.
Resolution
Verify the command line arguments in the claude_desktop_config.json are correct. You may try to run
the command manually to verify that the command can be found.
Symptom: “MCP server Home Assistant disconnected” or “Could not attach to MCP server Home Assistant”
When trying to configure a client like Claude Desktop to talk to Home Assistant, the app shows a message like “MCP server Home Assistant disconnected” or “Could not attach to MCP server Home Assistant”.
Description
This means the MCP server has started, however the MCP server is having trouble communicating with Home Assistant, or the MCP server in Home Assistant is not configured.
Resolution
To understand the root cause, first check debug logs on the client. For example in Claude for Desktop:
- Select Settings….
- Select Developer.
- Select the Home Assistant MCP server.
- Select Open Logs Folder.
- View
mcp-server-Home Assistant.log. These are known problems and their resolution:-
Client error '404 Not Found' for URL 'http://<your_local_home_assistant_ip_or_url>:8123/api/mcp': this means the MCP Server integration is not configured in Home Assistant. -
Client error '401 Unauthorized' for URL 'http://<your_local_home_assistant_ip_or_url>:8123/api/mcp': this means that the long-lived access token is not correct. …
-
Repeated OAuth failures
Symptom: Unable to access Home Assistant after several failed login attempts
If authentication keeps failing during the OAuth setup flow, the most likely cause is that one or more OAuth details are incorrect, like the client ID, client secret, or Home Assistant URL.
Resolution
Review the OAuth configuration in your client and enter the details again. Make sure the client ID, client secret, and Home Assistant URL exactly match the values you configured for the MCP server in Home Assistant.
If you have explicitly enabled IP bans in Home Assistant and repeated failed sign-in attempts caused a ban, check the ip_bans.yaml file in your Home Assistant configuration directory. If your computer’s IP address or the client’s IP address is listed there, remove it, restart Home Assistant, and then try authenticating again.
Removing the integration
This integration can be removed by following these steps:
To remove an integration instance from Home Assistant
- Go to Settings > Devices & services and select the integration card.
- From the list of devices, select the integration instance you want to remove.
- Next to the entry, select the three dots
menu. Then, select Delete.