Liebherr
The Liebherr integrationIntegrations connect and integrate Home Assistant with your devices, services, and more. [Learn more] allows you to control and monitor Liebherr
Use case: Monitor food storage temperatures, send alerts when thresholds are exceeded, optimize energy consumption, and automatically adjust cooling settings when you’re away from home.
Supported devices
The following appliances are supported by the integration:
- Liebherr SmartDevice refrigerators and freezers with Wi-Fi connectivity
Prerequisites
Before setting up the integration, you need to obtain an API key from the Liebherr SmartDevice app:
-
Connect your appliance: Download the SmartDevice app
and connect your Liebherr appliance to your home WiFi network. Follow the setup instructions to complete the initial configuration. -
Get your API key:
- Open the SmartDevice app.
- Go to Settings.
- Select Become a beta tester.
- Activate the Beta testing HomeAPI.
- Select Generate new key.
- Copy the API key. The API key can only be copied once from the app.
-
Verify connectivity: Only appliances that are connected to the internet via the SmartDevice app can be accessed through the HomeAPI. Appliances that are only registered but not actively connected will not appear in Home Assistant.
Configuration
To add the Liebherr hub to your Home Assistant instance, use this My button:

Liebherr can be auto-discovered by Home Assistant. If an instance was found, it will be shown as Discovered. You can then set it up right away.
If it wasn’t discovered automatically, don’t worry! You can set up a manual integration entry:
-
Browse to your Home Assistant instance.
-
In the bottom right corner, select the
Add Integration button. -
From the list, select Liebherr.
-
Follow the instructions on screen to complete the setup.
The integration can be automatically discovered when your appliances are on the same network. If automatic discovery does not work, you can manually add the integration.
Changing the temperature unit
The temperature unit displayed in Home Assistant is controlled by your Home Assistant system settings, not by the integration or the appliance settings.
To change between Celsius and Fahrenheit:
- Go to Settings > System > General.
- Under Unit system, select either:
- Metric for Celsius (°C)
- Imperial for Fahrenheit (°F)
- The temperature entities will automatically update to display in your chosen unit.
The Liebherr appliances operate based on the temperature unit selected on the device itself. Home Assistant displays temperatures in the unit system you configure in your Home Assistant settings, automatically converting between Celsius and Fahrenheit as needed.
Supported functionality
The Liebherr integration provides temperature monitoring and control for refrigerator and freezer zones in your SmartDevice appliances.
Numbers
The integration creates number entities for controlling the setpoint temperature of each cooling zone.
- Setpoint: The target temperature for the cooling zone. Adjust this value to change the desired temperature.
The temperature range and unit depend on your appliance’s capabilities and settings.
For appliances with multiple cooling zones (like a fridge-freezer combination), a separate number entity is created for each zone:
- Top zone setpoint: Target temperature for the uppermost compartment
- Middle zone setpoint: Target temperature for the middle compartment (if present)
- Bottom zone setpoint: Target temperature for the lowermost compartment (if present)
Sensors
The integration creates temperature sensors for each cooling zone in your appliance.
- Zone temperature: The current temperature measured inside the cooling zone.
For appliances with multiple cooling zones (like a fridge-freezer combination), a separate sensor is created for each zone:
- Top zone: The uppermost cooling compartment
- Middle zone: The middle compartment (if present)
- Bottom zone: The lowermost cooling compartment (if present)
Selects
The integration creates select entities for special features available on your appliance. Not all selects may be available depending on your appliance model and its capabilities. For appliances with multiple cooling zones, a separate select entity is created for each zone.
- IceMaker: Controls the automatic ice maker. Options are Off, On, and MaxIce (if supported by the appliance). MaxIce temporarily increases ice production for occasions when you need more ice.
- HydroBreeze: Controls the HydroBreeze misting system that keeps fruits and vegetables fresh by periodically spraying a fine mist. Options are Off, Low, Medium, and High.
- BioFresh-Plus: Controls the BioFresh-Plus compartment temperature setting. Options represent temperature combinations for the two BioFresh-Plus drawers (for example 0|0, 0|-2, -2|-2, -2|0), allowing you to optimize storage conditions for different types of fresh food.
Switches
The integration creates switch entities for special operating modes available on your appliance. Not all switches may be available depending on your appliance model and its capabilities.
Zone-based switches
These switches apply to individual cooling zones. For appliances with multiple zones, a separate switch is created for each zone:
- SuperCool: Rapidly lowers the refrigerator compartment temperature to +2°C for up to 12 hours. Designed to quickly cool large amounts of newly stored food or drinks, preventing the interior temperature from rising and ensuring optimal food preservation.
- SuperFrost: Quickly lowers the freezer temperature to -32°C (-26°F), creating cold reserves for vitamin-preserving freezing. The function automatically returns to normal mode once the freezing process is complete, after 65 hours at the most, helping to save electricity.
Device-wide switches
These switches apply to the entire appliance:
- PartyMode: A 24-hour convenience setting that prepares the appliance for entertaining by maximizing cooling performance. It automatically activates SuperCool for rapid chilling of drinks and SuperFrost for freezing food, while boosting ice production if available.
- NightMode: Optimizes kitchen tranquility by silencing all appliance sounds, halting the IceMaker, and dimming interior LED lighting to a soft glow.
Automations
Examples of automations you can create using the Liebherr integration.
Night mode schedule
Schedule your Liebherr appliance to automatically enable night mode at bedtime and disable it in the morning for quieter overnight operation.
Example YAML configuration
alias: "Liebherr Night Mode Schedule"
description: >-
  Automatically enable night mode at bedtime and disable it in the morning for
  quieter overnight operation.
triggers:
  - trigger: time
    at: "22:00:00"
    id: night_mode_on
  - trigger: time
    at: "07:00:00"
    id: night_mode_off
actions:
  - choose:
      - conditions:
          - condition: trigger
            id: night_mode_on
        sequence:
          - action: switch.turn_on
            target:
              entity_id: switch.my_fridge_night_mode
      - conditions:
          - condition: trigger
            id: night_mode_off
        sequence:
          - action: switch.turn_off
            target:
              entity_id: switch.my_fridge_night_mode
mode: single
Data updates
The Liebherr integration pollsData polling is the process of querying a device or service at regular intervals to check for updates or retrieve data. By defining a custom polling interval, you can control how frequently your system checks for new data, which can help optimize performance and reduce unnecessary network traffic. [Learn more] data from the SmartDevice HomeAPI cloud service every 1 minute.
If you have more than 2 devices, it is recommended to increase the polling interval to avoid hitting API rate limits.
Defining a custom polling interval
If you want to define a specific interval at which your device is being polled for data, you can disable the default polling interval and create your own polling automation.
To add the automation:
- Go to Settings > Devices & services, and select your integration.
- On the integration entry, select the
. - Then, select System options and toggle the button to disable polling.
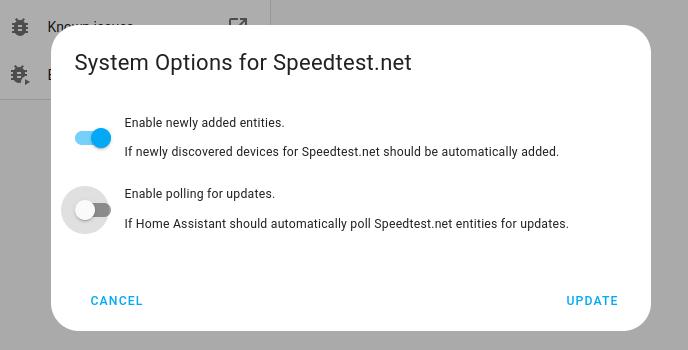
- Then, select System options and toggle the button to disable polling.
- To define your custom polling interval, create an automation.
- Go to Settings > Automations & scenes and create a new automation.
- Define any trigger and condition you like.
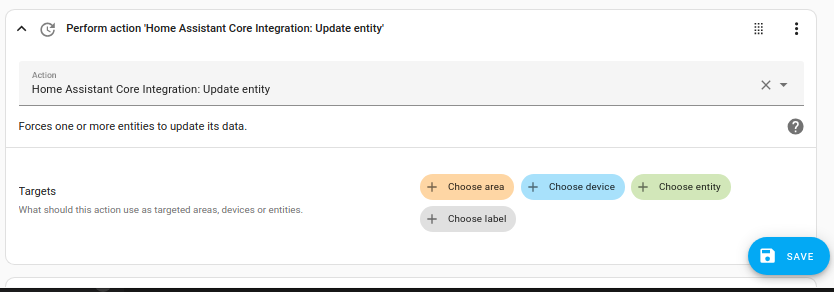
- Select Add action, then, select Other actions.
- Select Perform action, and from the list, select the
homeassistant.update_entityaction. - Choose your targets by selecting the Choose area, Choose device, Choose entity, or Choose label buttons.
- Save your new automation to poll for data.
Known limitations
- Cloud dependency: The integration requires internet connectivity to communicate with the Liebherr SmartDevice HomeAPI cloud service. If your internet connection is down, you won’t be able to control your appliances through Home Assistant.
- Beta API: The SmartDevice HomeAPI is currently in beta. Features and functionality may change as Liebherr continues to develop the API.
- API key limitations: The API key can only be copied once from the SmartDevice app. If you lose it, you’ll need to generate a new one.
- Connected devices only: Only appliances that are actively connected to the internet via Wi-Fi appear in Home Assistant. Registered but disconnected appliances are not accessible.
Troubleshooting
Connection error during setup
Symptom: Configuration flow shows a connection error
When trying to set up the integration, Home Assistant cannot establish a connection to the Liebherr SmartDevice HomeAPI cloud service.
To resolve this issue, try the following steps:
-
Check internet connectivity:
- Ensure your Home Assistant instance has an active internet connection.
- Verify that you can access
https://home-api.smartdevice.liebherr.comfrom your network.
-
Verify the API key:
- Double-check that you copied the complete API key from the SmartDevice app.
- Ensure there are no extra spaces or characters.
-
Check the API status:
- The SmartDevice HomeAPI is a beta service and may occasionally be unavailable.
- Wait a few minutes and try again.
-
Regenerate the API key (if needed):
- If you suspect the API key is invalid, generate a new one in the SmartDevice app (Settings > Become a beta tester > Generate new key).
Invalid or expired API key
Symptom: “Invalid authentication” error during setup, or integration shows “Requires reconfiguration” status
The API key is incorrect, expired, or was regenerated in the SmartDevice app. This can also happen if there was a service-side change that invalidated your credentials.
To resolve this issue, generate a new API key and update the integration:
- In the SmartDevice app, go to Settings > Become a beta tester > Generate new key.
- Copy the new API key immediately (you can only copy it once).
- Go to Settings > Devices & services.
- Find the Liebherr integration and select Reconfigure.
- Enter the new API key and select Submit.
Generating a new API key in the SmartDevice app will invalidate your previous key. Make sure to update Home Assistant immediately after generating a new key.
No devices found after setup
Symptom: Setup completes but no devices appear
The API key is valid, but no appliances are currently connected to the Liebherr SmartDevice cloud service.
-
Check appliance connectivity:
- Open the SmartDevice app and verify your appliances are shown as connected (not just registered).
- Ensure your appliances have an active WiFi connection.
-
Reconnect appliances:
- If your appliances show as disconnected in the app, reconnect them to your WiFi network.
- Follow the setup instructions
to reconnect.
-
Wait for synchronization:
- After reconnecting appliances, wait a few minutes for them to synchronize with the cloud service.
- Try setting up the integration again.
Appliances become unavailable
Symptom: Entities show as unavailable
The integration loses connection to the Liebherr cloud service. This can happen due to internet connectivity issues, API service interruptions, or appliance offline status.
-
Check for API rate limiting:
- If you performed many actions in quick succession, the API may temporarily rate limit your requests.
- Wait a few minutes for the rate limit to reset, and the appliances should become available again.
-
Check internet connectivity:
- Ensure your Home Assistant instance has a stable internet connection.
- Verify your appliances are connected to Wi-Fi and online in the SmartDevice app.
-
Check the API service status:
- The SmartDevice HomeAPI is a beta service and may occasionally be unavailable.
- Wait a few minutes for the service to recover.
-
Restart the integration:
- Go to Settings > Devices & services.
- Select the Liebherr integration.
- Select the three-dot menu
and choose Reload.
Removing the integration
This integration follows standard integration removal. No extra steps are required.
To remove an integration instance from Home Assistant
- Go to Settings > Devices & services and select the integration card.
- From the list of devices, select the integration instance you want to remove.
- Next to the entry, select the three dots
menu. Then, select Delete.
After removing the integration, your API key remains active in the SmartDevice app. To revoke access, generate a new API key in the app, which will invalidate the old one.