Home Assistant Demo
If you are planning to host a Home Assistant meetup or doing a talk, then you probably want to show Home Assistant to an audience. You could use a Wireless router, bulbs, switches, and a single board computer to do a realistic demo. For a workshop, this is what I usually do because I think that working with physical hardware is more fun for the participants. The issue is that you need time to set up, power and space. For a talk or in a location, where you only have a beamer and a table or a lectern, the physical hardware approach is not very convenient.
The simplest way to show Home Assistant to others is the online demo at /demo/
 Home Assistant's online demo
--demo-mode and Demo platform
To be safe for your talk, you don’t want to depend on an internet connection. The demo mode --demo-mode allows you to run a demo locally including the latest features. Make sure that you have a backup of your configuration.
hass --demo-mode
If you already have a configuration.yaml file in place then you will get a combination of your setup with all available demo platforms. This can be overwhelming for the audience. The suggestion is that you tailor the demo to your needs by only showing a few selected platforms. For example:
sensor:
  - platform: demo
binary_sensor:
  - platform: demo
switch:
  - platform: demo
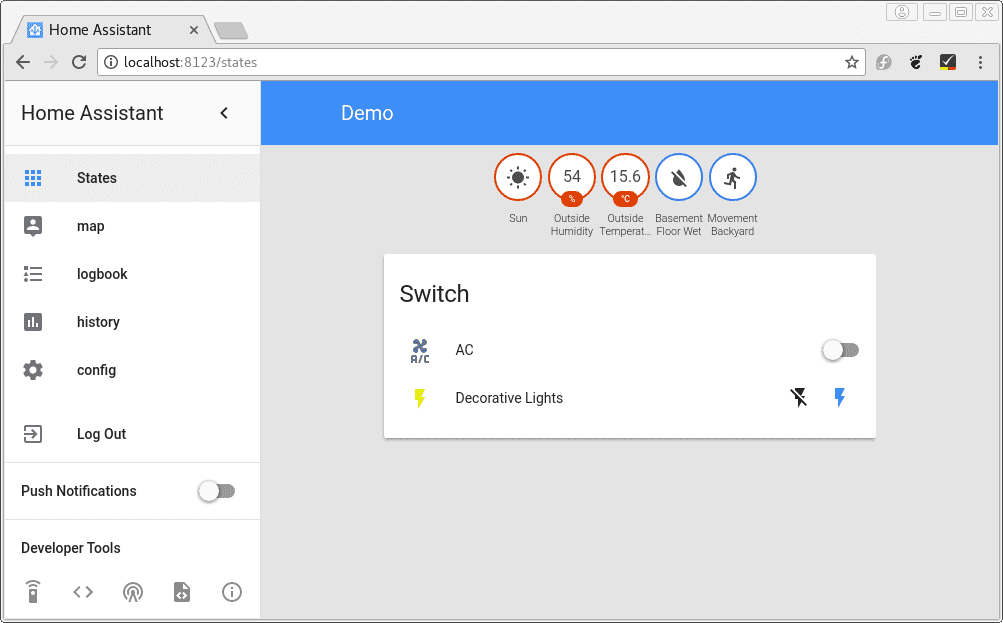 Home Assistant's demo platforms
random platforms
Till now the frontend is static. Nothing is changing over time. Starting with 0.57 we ship a random binary sensor platform in addition to the already available random sensor.
By adding those platform to your configuration.yaml file, your demo will become more interactive.
sensor:
  - platform: demo
    name: Temperature
    unit_of_measurement: "°C"
binary_sensor:
  - platform: random
    name: Front Door
  - platform: random
    name: Back Door
    scan_interval: 5
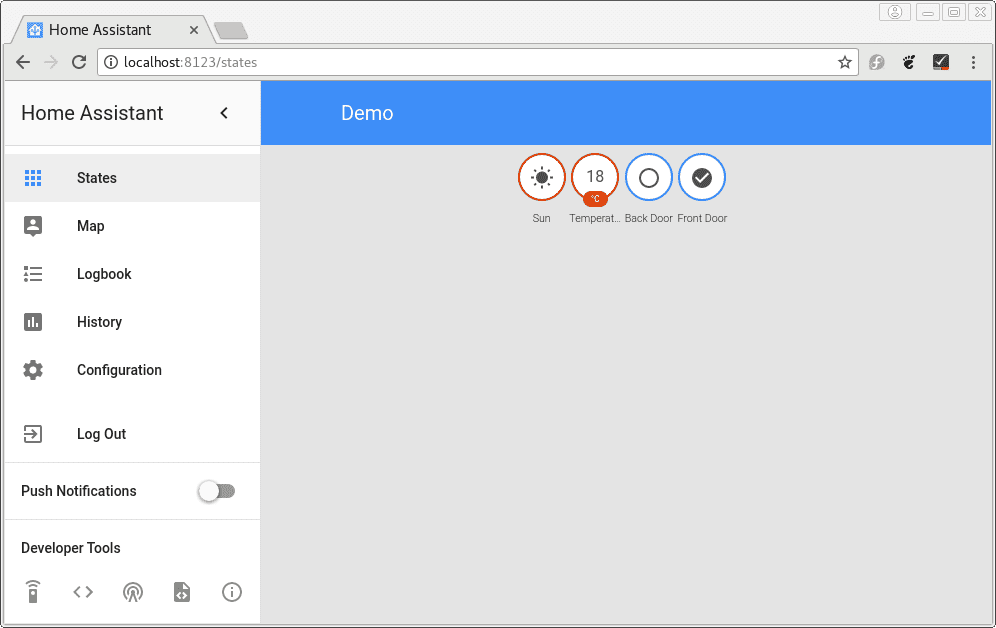 Demo with `random` platforms
The random and the demo platforms can, of course, be used together. With a little work and some of the template platforms or the input_* components it would even be possible to simulate a complete apartment or a house. For a hint check the sample below:
input_boolean:
  on_off:
    name: On or off
binary_sensor:
  - platform: template
    sensors:
      on_tester:
        value_template: "{{ states.input_boolean.on_off.state == 'on' }}"
        friendly_name: "Movement"
        device_class: motion
MQTT Discovery
This is a section for advanced users as it will require to run a separate script. Instead of adding demo platforms to the configuration this setup make use of MQTT discovery. Simply add MQTT to your configuration.yaml file with discovery:
mqtt:
  host: YOUR_MQTT_HOST
  discovery: true
Download the sample script. It depends on paho-mqtt. If you run the script inside your Home Assistant’s virtual environment then you are good to go as the dependency should be present if you have used MQTT before. Otherwise, install it with $ pip3 install paho-mqtt.
(ha)[ha-demo]$ python3 ha-mqtt-demo.py
Demo is running... -> CTRL + C to shutdown
It will create sensors, a light, and a switch and update the states as long the script is running. It possible to stop and restart script without losing the entities.
Some users share their slides and other documents in our assets repository. Also, take a look at that repository if you need a logo for your slides.