Shelly
Integrate Shelly devices into Home Assistant.
Configuration
To add the Shelly device to your Home Assistant instance, use this My button:

Shelly can be auto-discovered by Home Assistant. If an instance was found, it will be shown as Discovered. You can then set it up right away.
If it wasn’t discovered automatically, don’t worry! You can set up a manual integration entry:
-
Browse to your Home Assistant instance.
-
In the bottom right corner, select the
Add Integration button. -
From the list, select Shelly.
-
Follow the instructions on screen to complete the setup.
Options
To define options for Shelly, follow these steps:
-
In Home Assistant, go to Settings > Devices & services.
-
If multiple instances of Shelly are configured, choose the instance you want to configure.
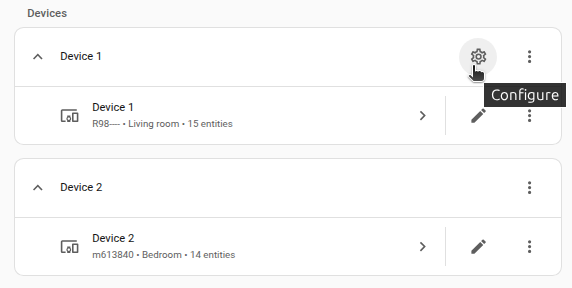
-
On the card, select the cogwheel
. - If the card does not have a cogwheel, the integration does not support options for this device.
-
Edit the options, then select Submit to save the changes.
Pick how the Shelly scans for Bluetooth devices.
Auto is recommended for most setups. The Shelly listens passively and only briefly switches to active scanning when needed, saving around 95% of the scan related battery drain on your Bluetooth devices while still discovering devices and updates quickly.
Active continuously asks devices for full information. Updates are the fastest, but it uses more battery on the devices around you.
Passive only listens; never asks devices for extra information. Uses the least battery on your devices, but some details may be missing because some integrations need active scanning to work.
Disabled turns the Shelly Bluetooth scanner off.
Shelly device generations
There are four generations of devices and all generations are supported by this integration. There are some differences in how devices should be configured and in the naming of entities and devices between generations.
Shelly BLU series devices (e.g. Shelly BLU H&T) are not supported; please use BTHome integration to configure such devices with Home Assistant. The exception to this is Shelly BLU TRV, which is supported by this integration via Shelly BLU Gateway Gen3.
Data updates
Shelly devices push updates to Home Assistant upon changes for all main functions of the device. For push updates to work correctly, some devices need additional configuration:
Shelly device configuration (generation 1)
Generation 1 devices use the CoIoT protocol to communicate with the integration. CoIoT must be enabled in the device settings. Navigate to the local IP address of your Shelly device, Internet & Security > ADVANCED - DEVELOPER SETTINGS and check the box Enable CoIoT.
We recommend using unicast for communication. To enable this, enter the local IP address of the Home Assistant server and port 5683 into the CoIoT peer field and push SAVE button. This is mandatory for battery operated devices (even if USB connected). After changing the CoIoT peer, the Shelly device needs to be manually restarted.
Home Assistant will display a repair issue for the Shelly device if push updates from this device do not reach the Home Assistant server.
The list below will help you diagnose and fix the problem:
- Check if your Shelly devices have a properly configured
CoIoT peer. - If you can’t find the
CoIoT peersettings in the device’s web panel, it’s probably using an ancient firmware version, and you should update it to the current one. - If Shelly devices are in a different subnet than the Home Assistant server, you should ensure communication on
UDPport5683between these subnets. - If Home Assistant is running as a virtual machine or service on an operating system other than Home Assistant OS, you should open
UDPport5683on the device’s firewall and/or ensure that communication from this port is redirected to the Home Assistant service. - The missing push updates may be related to the WiFi network range. If using a WiFi network with several access points, enable Internet & Security >> WiFi Client AP Roaming option. Consider moving Shelly device closer to the WiFi access point. Consider adding another WiFi access point, which will improve the connection quality with the device.
- If you think your Shelly devices are working correctly and don’t want to change your network/configuration, you can ignore the repair issue. Still, you must know you are giving up the best experience of using first-generation Shelly devices with Home Assistant.
Shelly device configuration (generation 2+)
Generation 2+ devices use the RPC protocol to communicate with the integration. Battery-operated devices (even if USB connected) may need manual outbound WebSocket configuration if Home Assistant cannot correctly determine your instance’s internal URL or the outbound WebSocket was previously configured for a different Home Assistant instance. In this case, navigate to the local IP address of your Shelly device, Settings >> Connectivity >> Outbound WebSocket and check the box Enable Outbound WebSocket, under server enter the following address:
ws:// + Home_Assistant_local_ip_address:Port + /api/shelly/ws (for example: ws://192.168.1.100:8123/api/shelly/ws), click Apply to save the settings.
In case your installation is set up to use SSL encryption (HTTPS with certificate), an additional s needs to be added to the WebSocket protocol, too, so that it reads wss:// (for example: wss://192.168.1.100:8123/api/shelly/ws).
Integration is communicating directly with the device; cloud connection is not needed.
Shelly entities that poll data from the device (generation 1)
The following disabled by default entities pollData polling is the process of querying a device or service at regular intervals to check for updates or retrieve data. By defining a custom polling interval, you can control how frequently your system checks for new data, which can help optimize performance and reduce unnecessary network traffic. [Learn more] data from the device every 60 seconds:
- Cloud connected sensor
- RSSI sensor
- Uptime sensor
- Firmware update
Shelly entities that poll data from the device (generation 2+)
The following disabled by default entities pollData polling is the process of querying a device or service at regular intervals to check for updates or retrieve data. By defining a custom polling interval, you can control how frequently your system checks for new data, which can help optimize performance and reduce unnecessary network traffic. [Learn more] data from the device every 60 seconds:
- Device temperature sensor
- RSSI sensor
- Uptime sensor
Bluetooth Support
Shelly Gen 2 and newer devices (excluding battery-powered models) can act as Bluetooth proxies, forwarding advertisement data. You can enable either active or passive listening through the device’s options flow.
Shelly devices do not support proxying active (GATT) connections.
For more details, see Remote Adapters in the Bluetooth integration.
Range Extender Support
Shelly generation 2+ devices that are not battery-powered can act as a Range Extender. Devices of the same generations can be configured via those Range Extenders specifying a custom TCP port during the configuration flow. Currently, only static IP or DHCP reserved IP are supported for the main device.
Entity naming (generation 1)
The integration uses the following strategy to name its devices and entities if the device has only one relay (channel) or no relays at all:
- If a
Device Nameis set in the device, the integration will use it to generate the device name and entity names. - If a
Device Nameis not set, the integration will use theDevice IDto generate the device name and entity names.
The integration creates a sub-device for every relay and uses the following strategy to name its entities if the device has more than one relay:
- If a
Device Nameis set in the device, the integration will use it to generate the main device name and entity names assigned to the main device. - If a
Device Nameis not set, the integration will use theDevice IDto generate the main device name and entity names assigned to the main device. - If a
Channel Nameis set in the device, the integration will use it to generate the sub-device name and entity names assigned to this sub-device (channel/relay). - If a
Channel Nameis not set in the device, the integration will use the device name and channel/relay number to generate the sub-device name and entity names assigned to this sub-device (channel/relay).
Examples:
| Device Name | Channel Name | Main Device Name | Sub-device Name | Entity Name |
|---|---|---|---|---|
Not set |
Not Set |
shellyswitch25-ABC123 | shellyswitch25-ABC123 Channel 1 | shellyswitch25-ABC123 Channel 1 |
Not set |
Kids Room Bulb | shellyswitch25-ABC123 | Kids Room Bulb | Kids Room Bulb |
| Kitchen | Not Set |
Kitchen | Kitchen Channel 1 | Kitchen Channel 1 |
| Bedroom | Round Bulb | Bedroom | Round Bulb | Round Bulb |
Names are set from the device web page:
- Device name can be set in Settings >> DEVICE NAME
- Channel name for single-channel devices can be set in Settings >> CHANNEL NAME
- Channel name for multi-channel devices can be set in Settings >> CHANNEL NAME after selecting the channel, by clicking on the channel name.
Entity naming (generation 2+)
The integration uses the following strategy to name its devices and entities if the device has only one relay (channel) or no relays at all:
- If a
Device Nameis set in the device, the integration will use it to generate the device name and entity names. - If a
Device Nameis not set, the integration will use theDevice IDto generate the device name and entity names. - If a
Channel Nameis set in the device, the integration will add it as a suffix to the entity names.
Examples:
| Device Name | Channel Name | Integration Device Name | Entity Name |
|---|---|---|---|
Not set |
Not Set |
shelly1gen3-aabbccddeeff | shelly1gen3-aabbccddeeff |
Not set |
Kids Room Bulb | shelly1gen3-aabbccddeeff | shelly1gen3-aabbccddeeff Kids Room Bulb |
| Kitchen | Not Set |
Kitchen | Kitchen |
| Bedroom | Round Bulb | Bedroom | Bedroom Round Bulb |
The integration creates a sub-device for every relay (channel) and uses the following strategy to name its devices and entities if the device has more than one relay:
- If a
Device Nameis set in the device, the integration will use it to generate the main device name and entity names assigned to the main device. - If a
Device Nameis not set, the integration will use theDevice IDto generate the main device name and entity names assigned to the main device. - If a
Channel Nameis set in the device, the integration will use it to generate the sub-device name and entity names assigned to this sub-device (channel/relay). - If a
Channel Nameis set to the default value in the device, the integration will use the device name and this default channel name to generate the sub-device name and entity names assigned to this sub-device (channel/relay).
Examples:
| Device Name | Channel Name | Main Device Name | Sub-device Name | Entity Name |
|---|---|---|---|---|
Not set |
Not Set |
shelly2pmgen3-aabbccddeeff | shelly2pmgen3-aabbccddeeff Switch 1 | shelly2pmgen3-aabbccddeeff Switch 1 |
Not set |
Kids Room Bulb | shelly2pmgen3-aabbccddeeff | Kids Room Bulb | Kids Room Bulb |
| Kitchen | Not Set |
Kitchen | Kitchen Switch 1 | Kitchen Switch 1 |
| Bedroom | Round Bulb | Bedroom | Round Bulb | Round Bulb |
Cover entities
Shelly 2PM Gen3 supports tilt for cover entities. To enable this feature, you need to configure the device:
- Change the device profile to
Cover(Settings > Device profile) - Calibrate the cover (Home > Cover > Calibration > Start)
- Enable and configure Slat control (Home > Cover > Slat control)
Binary input sensors
Binary input sensors (generation 1)
Depending on how a device’s button type is configured, the integration will create binary sensors corresponding to those inputs. binary sensors are not created when the button type is momentary or momentary_on_release, for these types you need to use events for your automations.
Binary input sensors (generation 2+)
For generation 2+ hardware, it’s possible to select if a device’s input is connected to a button or a switch. Binary sensors are created only if the Input Mode is set to Switch. When the Input Mode is set to Button you need to use events for your automations.
Media player entities
Wall Display devices with firmware 2.2 or newer can function as media players. The integration creates media player entities for them.
The Wall Display media player can play the following audio formats:
- Local audio files uploaded to the Wall Display media library
- Internet radio stations added to your favorites
These audio files and your favorite radio stations are visible in the Home Assistant media browser.
Play media using the media_player.play_media action
This action will start playing your favorite radio station with ID 2:
action: media_player.play_media
data:
  media:
    media_content_id: 2
    media_content_type: radio
target:
  entity_id: media_player.shelly_wall_display
This action will start playing your audio file with ID 15:
action: media_player.play_media
data:
  media:
    media_content_id: 15
    media_content_type: audio
target:
  entity_id: media_player.shelly_wall_display
Event entities
Event entities (generation 1)
If the BUTTON TYPE of the switch connected to the device is set to Momentary or Detached Switch, the integration creates an event entity for this switch. You can use this entity in your automations.
Event entities (generation 2+)
If the Input Mode of the switch connected to the device is set to Button, the integration creates an event entity for this switch. You can use this entity in your automations.
Each script which generates events using Shelly.emitEvent() also gets an corresponding event entity. This entity is disabled by default. After changing a script, it’s required to manually reload the device before new event types show up.
To avoid increased startup time, only the first 5 KB of the script is downloaded and analyzed. If your script exceeds 5 KB, place the event emitting function at the beginning to ensure it is processed.
For example, the following script will emit an event every time an input (button or switch) on the device is changed.
// Example shelly script
function eventHandler(event, userdata) {
  if (
    typeof event.component === "string" &&
    event.component.substring(0, 5) === "input"
  ) {
    let id = Number(event.component.substring(6));
    Shelly.emitEvent("input_event", { id: id });
  }
}
Shelly.addEventHandler(eventHandler);
Events
The integration fires events under the type shelly.click when the switch is used if:
- The BUTTON TYPE of the switch connected to the device is set to
MomentaryorDetached Switch– for generation 1 devices. - The Input Mode of the switch connected to the device is set to
Button– for generation 2+ devices.
You can use these events in your automations.
Also, some devices do not add an entity for the button/switch. For example, the Shelly Button1 has only one entity for the battery level. It does not have an entity for the button itself. To trigger automations based on button presses, use the shelly.click event.
Listening for events
You can subscribe to the shelly.click event type in Developer tools/Events to examine the event data JSON for the correct parameters to use in your automations. For example, shelly.click returns event data JSON similar to the following when you press the Shelly Button1.
Event 0 fired 9:53 AM:
{
    "event_type": "shelly.click",
    "data": {
        "device_id": "e09c64a22553484d804353ef97f6fcd6",
        "device": "shellybutton1-A4C12A45174",
        "channel": 1,
        "click_type": "single",
        "generation": 1
    },
    "origin": "LOCAL",
    "time_fired": "2021-04-28T08:53:12.755729+00:00",
    "context": {
        "id": "e0f379706563aaa0c2c1fda5174b5a0e",
        "parent_id": null,
        "user_id": null
    }
}
The generation value indicates the generation of the device that is the source of the event.
Automations
The simplest way to create automations is to use the Home Assistant automation editor. For example, to set an automation triggered by a double press of a particular Shelly Button1:
- In the Triggers section of the automation, set Trigger Type to
Device. - In the Device dropdown menu. find the Shelly Button1.
- In the Trigger dropdown menu, select
Button double clicked. - Set any conditions and actions to complete your automation.
You can also create automations using YAML, for example:
- alias: "Toggle living room light"
  triggers:
    - trigger: event
      event_type: shelly.click
      event_data:
        device: shellyswitch25-AABBCC
        channel: 1
        click_type: single
  actions:
    - action: light.toggle
      target:
        entity_id: light.living_room

- alias: "Toggle living room lamp"
  triggers:
    - trigger: event
      event_type: shelly.click
      event_data:
        device: shellyswitch25-AABBCC
        channel: 2
        click_type: long
  actions:
    - action: light.toggle
      target:
        entity_id: light.lamp_living_room
Possible values for click_type
| Shelly input event | Click Type |
|---|---|
S |
single |
SS |
double |
SSS |
triple |
L |
long |
SL |
single_long |
LS |
long_single |
Generation 2 and 3 devices use the values btn_down, btn_up, single_push, double_push, triple_push and long_push as click_type.
Not all devices support all input events. You can check on Shelly API Reference website what types of Shelly input events your device supports.
Appliance type (generation 1)
Shelly device relays are added to Home Assistant by default as switch entities. A relay can be added as a light entity if Settings >> APPLIANCE TYPE value in the WebUI of the device is set to light.
Consumption type (generation 2+)
Shelly device relays are added to Home Assistant by default as switch entities. A relay can be added as a light entity if EXTERNAL CONSUMPTION TYPE value in the WebUI of the device is set to light.
Light transition
Shelly lights supporting light transition:
- Shelly Bulb RGBW
- Shelly DUO
- Shelly Dimmer
- Shelly Dimmer 2
- Shelly RGBW2
- Shelly Vintage
The firmware limits the transition time to 5 seconds.
Device actions
The integration offers device actions which can be triggered by a configuration button.
OTA firmware update
Trigger device OTA firmware update.
Update entities
- Firmware update
- triggers the OTA firmware update process to the latest stable version
- Beta firmware update (disabled by default)
- triggers the OTA firmware update process to the latest beta version
Reboot
Trigger reboot of device.
Buttons
- Reboot
- triggers the reboot
List of actions
The Shelly integrationIntegrations connect and integrate Home Assistant with your devices, services, and more. [Learn more] provides the following actions. Each link below opens a dedicated page with examples, parameters, and a step-by-step UI walkthrough.
-
Get Shelly KVS value (
shelly.get_kvs_value) Reads a value from a Shelly device’s Key-Value Storage. -
Set Shelly KVS value (
shelly.set_kvs_value) Stores a value in a Shelly device’s Key-Value Storage.
For an overview of every action across all integrations, see the actions reference.
Shelly Thermostatic Radiator Valve (TRV)
Shelly TRV generates 2 entities that can be used to control the device behavior: climate and number.
The first will allow specifying a temperature, the second instead of a percentage of the valve position.
Note: that if you change the valve position then automatic temperature control will be disabled. As soon as you change the temperature, it gets enabled again.
Shelly Gas with Valve add-on
If you have the Valve add-on connected to Shelly Gas, the integration will create two entities for the valve. The valve entity allows you to control the valve, the sensor entity shows exact states of the valve.
CoAP port (generation 1)
In some cases, it may be needed to customize the CoAP UDP port (default: 5683) your Home Assistant instance is listening to.
To change it, add the following key to your configuration.yamlThe configuration.yaml file is the main configuration file for Home Assistant. It lists the integrations to be loaded and their specific configurations. In some cases, the configuration needs to be edited manually directly in the configuration.yaml file. Most integrations can be configured in the UI. [Learn more]:
# Example configuration.yaml entry
shelly:
  coap_port: 12345
Virtual components
Shelly generation 2 devices (Pro models with firmware 1.4.0 or later) and generation 3 devices (with firmware 1.2.0 or later) allow the creation of virtual components. Virtual components are a special set of components that do not initially exist on the device and are dynamically created by the user to interact with Shelly scripts. You can add virtual components to the device configuration in the Components section in the device’s web panel.
The integration supports the following virtual components:
-
booleanintogglemode, for which aswitchplatform entity is created -
booleaninlabelmode, for which abinary_sensorplatform entity is created -
buttoninbuttonmode, for which abuttonplatform entity is created -
enumindropdownmode, for which aselectplatform entity is created -
enuminlabelmode, for which asensorplatform entity is created -
numberinfieldmode, for which anumberplatform entity inboxmode is created -
numberinslidermode, for which anumberplatform entity inslidermode is created -
numberinlabelmode, for which asensorplatform entity is created -
textinfieldmode, for which atextplatform entity is created -
textinlabelmode, for which asensorplatform entity is created
Scripts (generation 2+)
For each device script, the integration creates a switch entity that allows you to control the script. These entities are disabled by default.
Additional info
Shelly devices rely on SNTP for features like power measurement. Please check from the device Web UI that the configured server is reachable.
Troubleshooting
- Enable debug logging.
- Take necessary steps/actions to replicate the issue.
- Disable debug logging and download logs.
Known issues and limitations
- Only supports firmware 1.9 and later for generation 1 devices
- Only supports firmware 1.0 and later for generation 2 devices
- The following generation 1 devices only support firmware 1.11 and later (due to incompatible API):
- Shelly DUO
- Shelly Bulb RGBW
- Shelly Dimmer
- Shelly Dimmer 2
- Shelly RGBW2
- Shelly Vintage
- Generation 1 “Shelly 4Pro” and “Shelly Sense” are not supported (devices based on old CoAP v1 protocol)
- Before set up, battery-powered devices must be woken up by pressing the button on the device.
- For battery-powered devices, the
updateplatform entities only inform about the availability of firmware updates but are not able to trigger the update process. - Using the
homeassistant.update_entityaction for an entity belonging to a battery-powered device is not possible because most of the time these devices are sleeping (are offline).
Removing the integration
This integration follows standard integration removal, no extra steps are required.
To remove an integration instance from Home Assistant
- Go to Settings > Devices & services and select the integration card.
- From the list of devices, select the integration instance you want to remove.
- Next to the entry, select the three dots
menu. Then, select Delete.