Israel Railways
The Israel Railways integrationIntegrations connect and integrate Home Assistant with your devices, services, and more. [Learn more] will give you the next three departure times from a given location to another one in Israel rail.
Configuration
To add the Israel Railways service to your Home Assistant instance, use this My button:

If the above My button doesn’t work, you can also perform the following steps manually:
-
Browse to your Home Assistant instance.
-
In the bottom right corner, select the
Add Integration button. -
From the list, select Israel Railways.
-
Follow the instructions on screen to complete the setup.
The public timetables are coming from Israel rail.
Sensors
For each configured connection, the integration creates a set of sensors for the next three upcoming departures. The first departure sensors have no +N suffix. The second and third are labeled with +1 and +2.
-
Departure / Departure +1 / Departure +2
- Description: Scheduled departure time from the start station.
-
Platform / Platform +1 / Platform +2
- Description: Platform the train departs from at the start station.
-
Train number / Train number +1 / Train number +2
- Description: Identifier of the train operating the connection.
-
Trains / Trains +1 / Trains +2
- Description: Number of trains involved in the connection (1 for a direct connection, more when a transfer is required).
-
Departure delay / Departure delay +1 / Departure delay +2
- Description: Delay of the departure in minutes, based on real-time data from Israel Rail.
If a departure time has already passed, that route is skipped. The sensors only ever show upcoming departures.
Defining a custom polling interval
If you want to define a specific interval at which your device is being polled for data, you can disable the default polling interval and create your own polling automation.
To add the automation:
- Go to Settings > Devices & services, and select your integration.
- On the integration entry, select the
. - Then, select System options and toggle the button to disable polling.
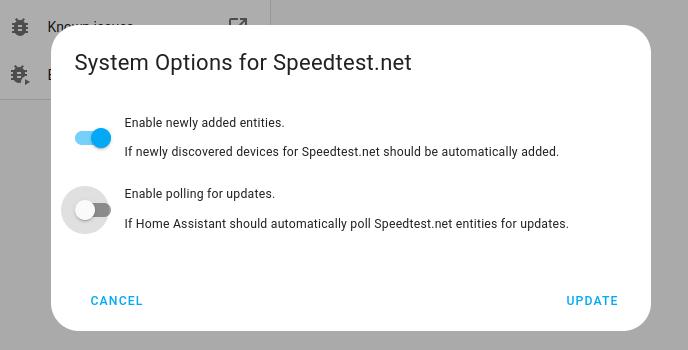
- Then, select System options and toggle the button to disable polling.
- To define your custom polling interval, create an automation.
- Go to Settings > Automations & scenes and create a new automation.
- Define any trigger and condition you like.
- Select Add action, then select Other actions.
- Select Perform action, and from the list, select the
homeassistant.update_entityaction. - Add the entities you want to poll to the Entity field. The
homeassistant.update_entityaction only supports targeting by entity. Selecting an area, device, or label is not supported.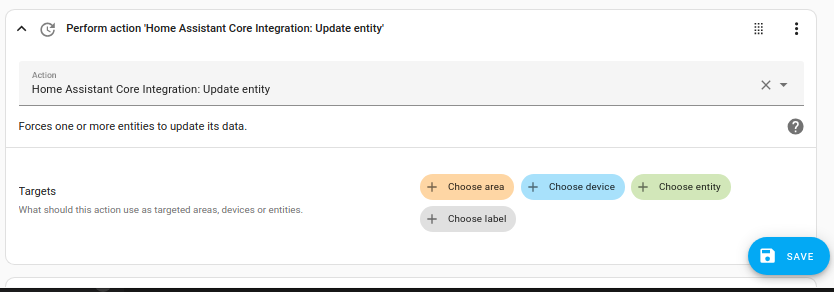
- Save your new automation to poll for data.