Onkyo
The Onkyo integrationIntegrations connect and integrate Home Assistant with your devices, services, and more. [Learn more] allows you to control Onkyo and Integra (from 2011 onward) and also Pioneer (from 2016 onward) receivers using Home Assistant. Please be aware that you need to enable “Network Standby” for this integration to work with your hardware.
Configuration
To add the Onkyo device to your Home Assistant instance, use this My button:

Onkyo can be auto-discovered by Home Assistant. If an instance was found, it will be shown as Discovered. You can then set it up right away.
If it wasn’t discovered automatically, don’t worry! You can set up a manual integration entry:
-
Browse to your Home Assistant instance.
-
In the bottom right corner, select the
Add Integration button. -
From the list, select Onkyo.
-
Follow the instructions on screen to complete the setup.
Number of steps it takes for the receiver to go from the lowest to the highest possible volume. Possible values are 50, 80, 100, 200. For older Onkyo receivers, this typically is 80; newer Onkyo receivers use 200.
The above settings can also be adjusted later. To change Host or Volume Resolution, select the three dots
Options
To define options for Onkyo, follow these steps:
-
In Home Assistant, go to Settings > Devices & services.
-
If multiple instances of Onkyo are configured, choose the instance you want to configure.
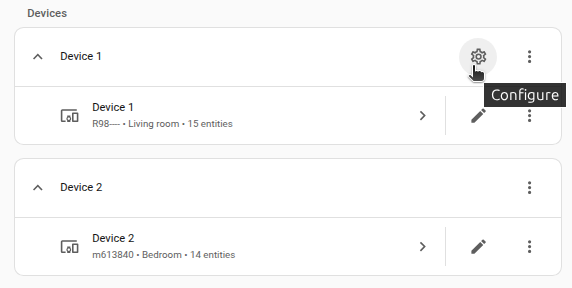
-
On the card, select the cogwheel
. - If the card does not have a cogwheel, the integration does not support options for this device.
-
Edit the options, then select Submit to save the changes.
Maximum volume limit as a percentage. Often the maximum volume of the receiver is far too loud. Setting this will set Home Assistant’s 100% volume to be this setting on the amp, i.e., if you set this to 50%, when you set Home Assistant to be 100%, then your receiver will be set to 50% of its maximum volume.
Supported functionality
Zones
If your receiver has a second or third zone available, they are displayed as additional media players with functionality similar to the main zone.
Channel muting switches
If your receiver supports channel muting, the integration creates a switch for each speaker channel. Turning a switch on mutes that channel, and turning it off unmutes it. This lets you mute individual channels independently of the main volume.
Actions
Action onkyo_select_hdmi_output
Changes HDMI output of your receiver
| Data attribute | Optional | Description |
|---|---|---|
entity_id |
no | String or list of a single entity_id that will change output. |
hdmi_output |
no | The desired output code. |
Accepted values are: ‘no’, ‘analog’, ‘yes’, ‘out’, ‘out-sub’, ‘sub’, ‘hdbaset’, ‘both’, ‘up’ which one to use seems to vary depending on model so you will have to try them out. ( For model TX-NR676E it seems to be ‘out’ for main, ‘out-sub’ for sub, and ‘sub’ for both )
Example onkyo_select_hdmi_output script
# Example onkyo_select_hdmi_output script
#
script:
  hdmi_sub:
    alias: "Hdmi out projector"
    sequence:
      - action: media_player.onkyo_select_hdmi_output
        data:
          entity_id: media_player.onkyo
          hdmi_output: out-sub
Example play_media script
The play_media function can be used in script to play radio station by preset number.
Not working for NET radio.
# Example play_media script
#
script:
  radio1:
    alias: "Radio 1"
    sequence:
      - action: media_player.turn_on
        target:
          entity_id: media_player.onkyo
      - action: media_player.play_media
        target:
          entity_id: media_player.onkyo
        data:
          media_content_type: "radio"
          media_content_id: "1"
Supported devices
Network receivers from Onkyo and Integra are supported starting with models from the year 2011. Pioneer network receivers are supported starting with models from 2016.
Troubleshooting
No entities created
Restart your receiver (power cycle).
Removing the integration
This integration follows standard integration removal. No extra steps are required.
To remove an integration instance from Home Assistant
- Go to Settings > Devices & services and select the integration card.
- From the list of devices, select the integration instance you want to remove.
- Next to the entry, select the three dots
menu. Then, select Delete.