Swiss public transport
The Swiss public transport integration will give you the next three departure times from a given location to another one in Switzerland.
The Swiss public transport API90s, which is just enough for one connection polling continuously. If more entries are needed, consider defining a custom polling interval to reduce the amount of requests.
Choose between the departure or arrival time or the connection to be displayed
The relevant time for the connection (e.g. 7:12:00 AM every morning).
Use the Stationboard
Configuration
To add the Swiss public transport integration to your Home Assistant instance, use this My button:
If the above My button doesn’t work, you can also perform the following steps manually:
-
Browse to your Home Assistant instance.
-
In the bottom right corner, select the
Add Integration button. -
From the list, select Swiss public transport.
-
Follow the instructions on screen to complete the setup.
The public timetables are coming from Swiss public transport
Set up a connection
The minimum configuration for a connection requires a start and end station (for example, “Zürich HB”).
Optionally, you can provide up to 5 additional via stations where the connection must go through.
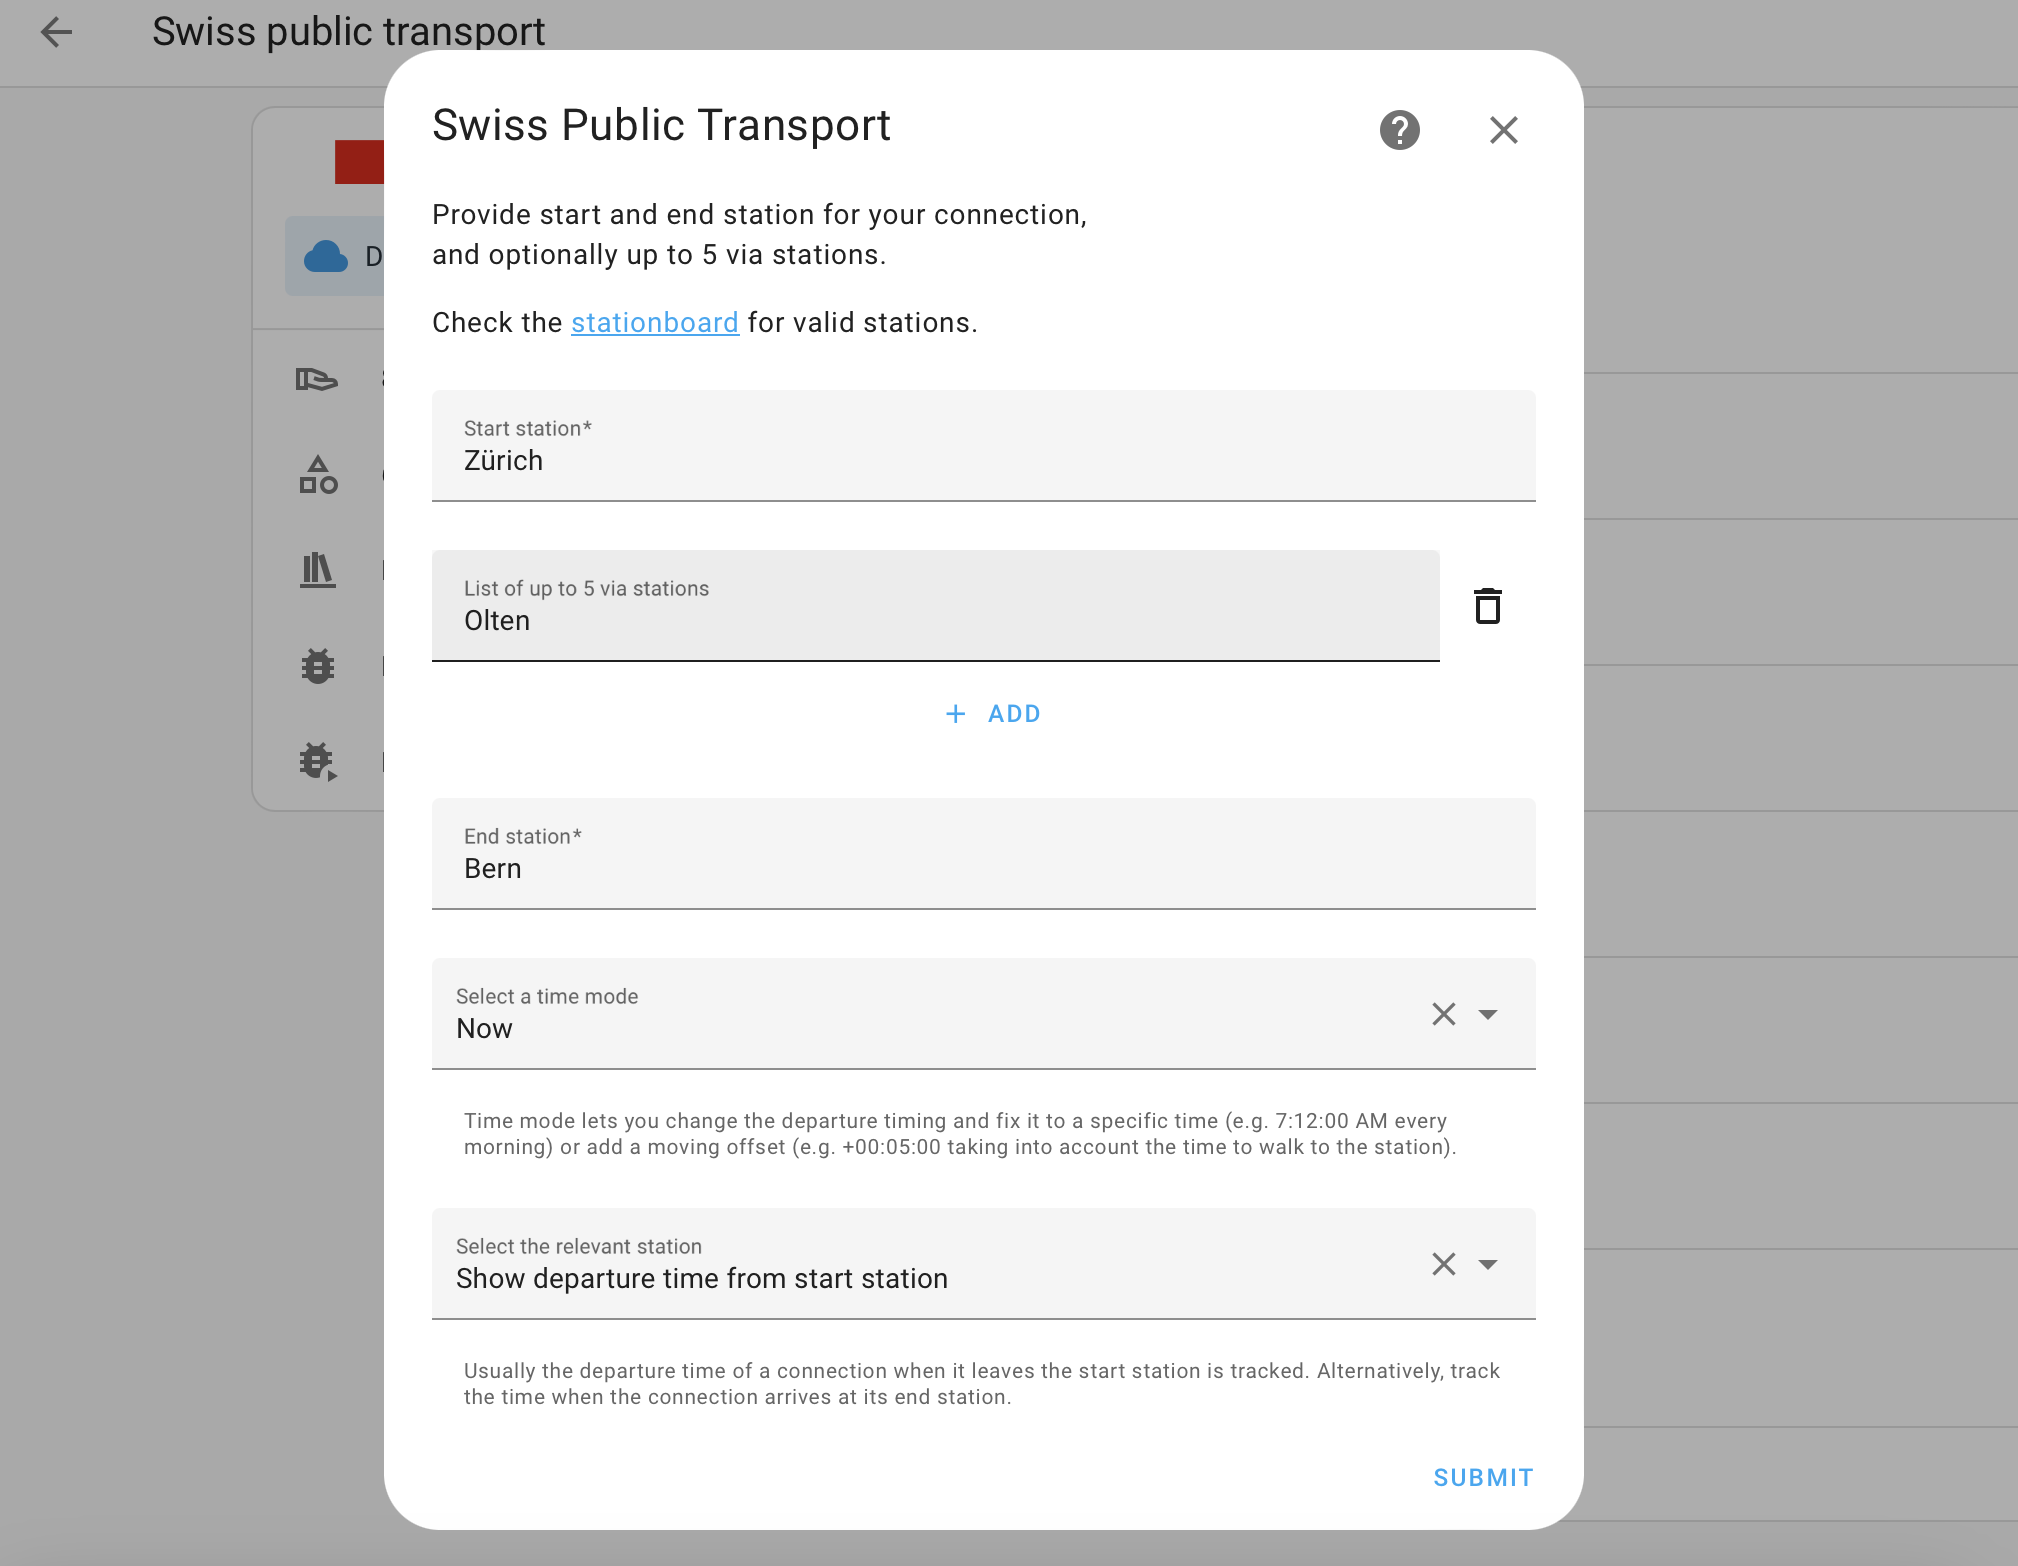
Time mode
The Time mode allows you to specify the time of the connections.
- Now (default): Provide the next connections.
- At a fixed time of day: Provide the connections that depart at a fixed time of day (for example, 18:15 in the evening)
- At an offset from now: Provide the next possible connections which depart after a specified offset (for example, 15 minutes from now, which helps account for a 15-minute walk to the station)
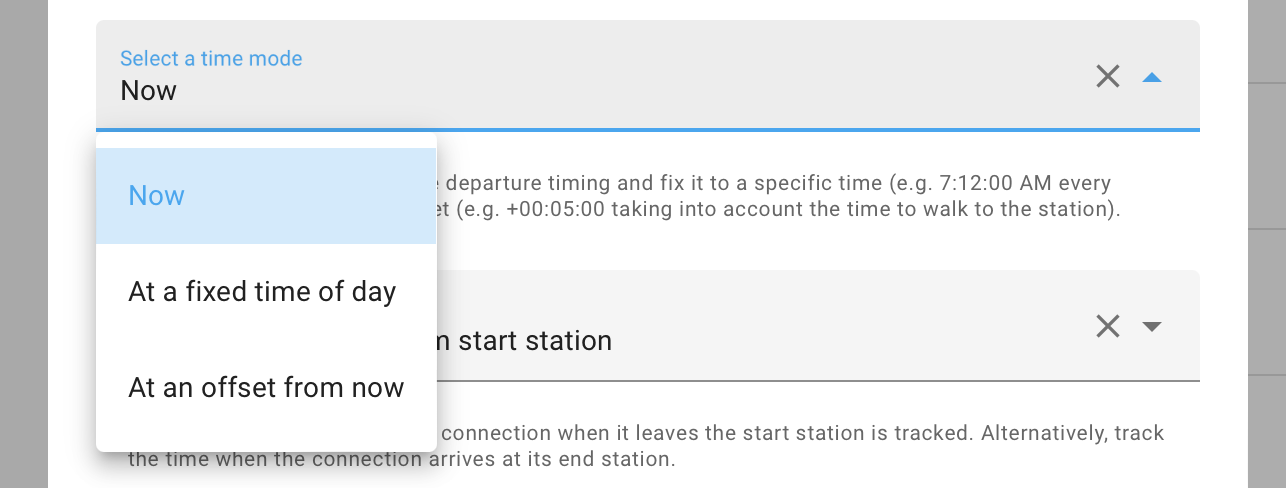
Use case: Next connection at my local bus stop
Usually, it takes some time to walk to the closest bus station from home, which can be modeled using the offset option in the Time mode dropdown, filtering out connections which are not reachable anymore. This information can then be displayed at the door or on your mobile device.
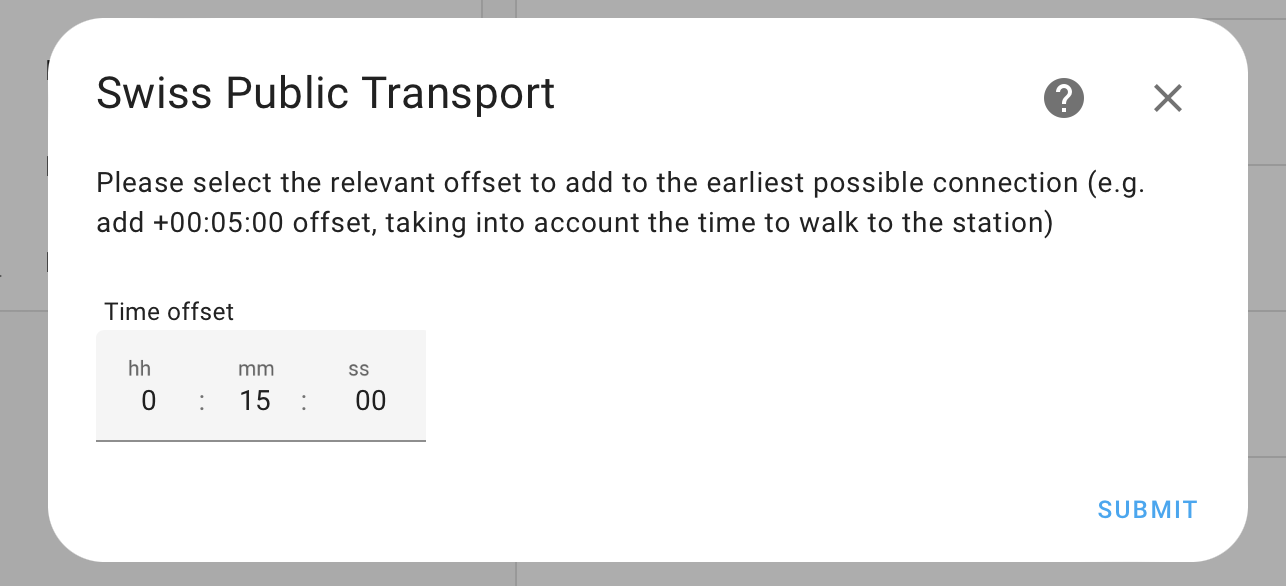
Use case: Daily train home
For people working business hours, a set-up using the fixed option in the Time mode allows you to identify the same train each day for commuting home. Set up an automation to send a push notification to get informed early.
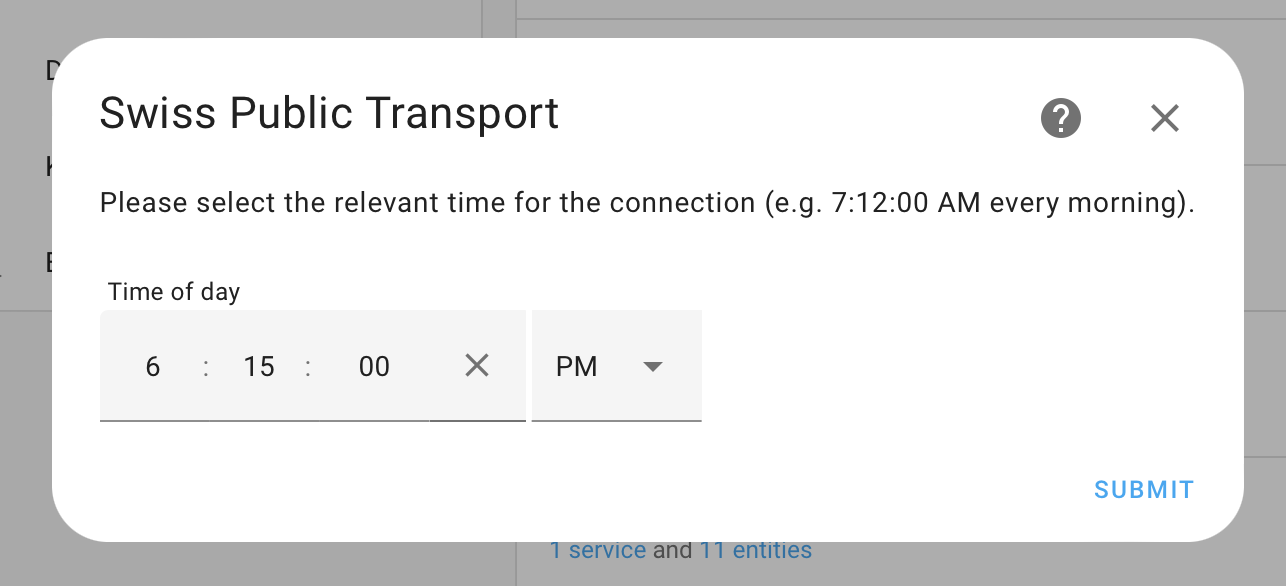
Departure versus Arrival
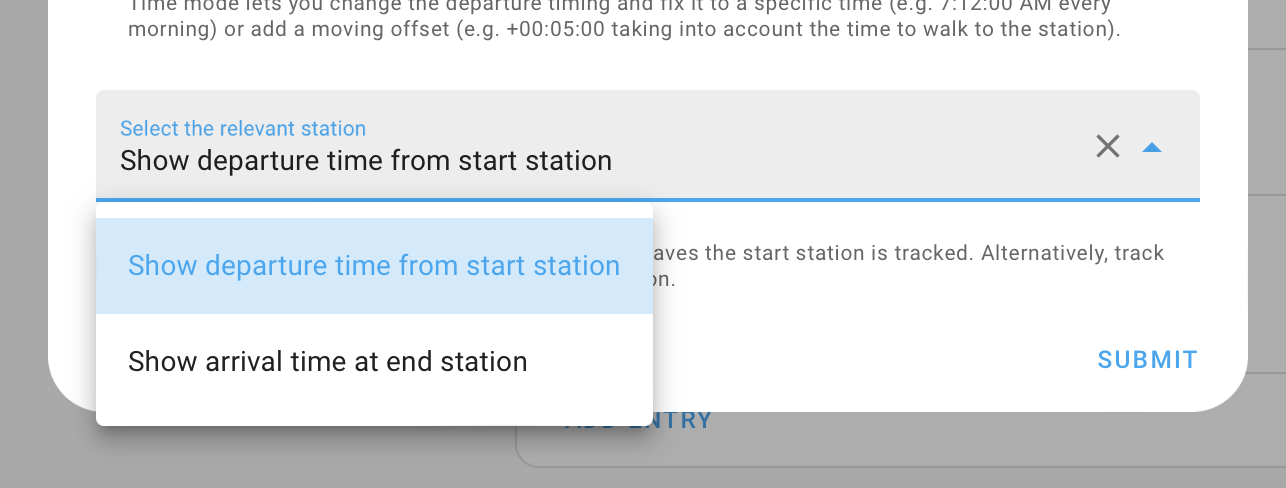
Usually, one wants to know when a connection departs (default), but in case where the opposite is needed and one wants to know when a connection arrives, select “Show arrival time at end station” in the time reference dropdown.
When configured for arrival time, the sensor will display the arrival time at the destination instead of the departure time from the start station. This is particularly useful for automations that need to trigger based on arrival times.
Use case: Inform family of train arriving late
A popular use case would be to know if your family member is running late and sending out a push notification or displaying their arrival time at home.
Actions
The Swiss public transport integration has the following action:
swiss_public_transport.fetch_connections
Action swiss_public_transport.fetch_connections
Fetch the connections for a specific instance.
| Data attribute | Optional | Description |
|---|---|---|
config_entry_id |
No | The ID of the Swiss public transport config entry to get data from. For example, in YAML: config_entry_id: zurich_geneva or in UI Instance: zurich_geneva) |
limit |
Yes | The number of connections to fetch. (default: 3, range: [1,15]) |
Defining a custom polling interval
If you want to define a specific interval at which your device is being polled for data, you can disable the default polling interval and create your own polling automation.
To add the automation:
- Go to Settings > Devices & services, and select your integration.
- On the integration entry, select the
. - Then, select System options and toggle the button to disable polling.
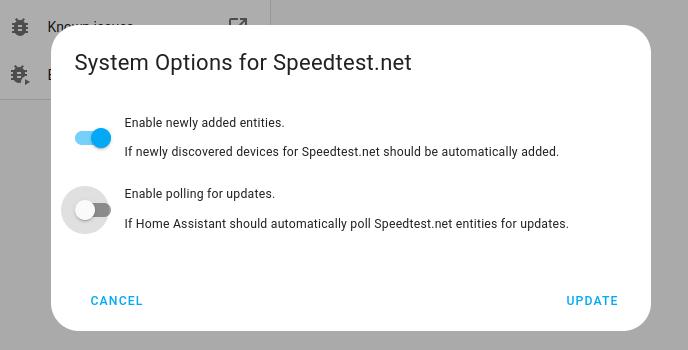
- Then, select System options and toggle the button to disable polling.
- To define your custom polling interval, create an automation.
- Go to Settings > Automations & scenes and create a new automation.
- Define any trigger and condition you like.
- Select Add action, then, select Other actions.
- Select Perform action, and from the list, select the
homeassistant.update_entityaction.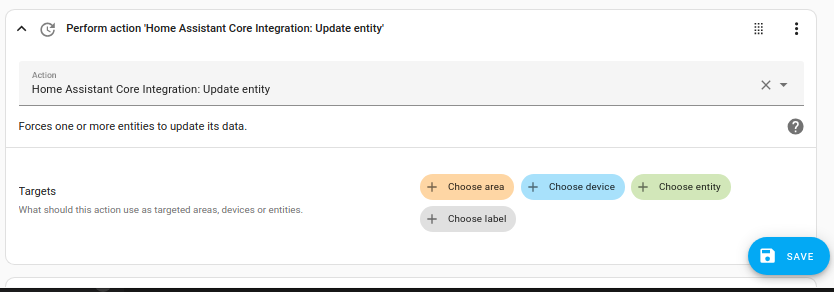
- Save your new automation to poll for data.
Removing the integration
This integration follows standard integration removal. No extra steps are required.
To remove an integration instance from Home Assistant
- Go to Settings > Devices & services and select the integration card.
- From the list of devices, select the integration instance you want to remove.
- Next to the entry, select the three-dot
menu. Then, select Delete.