iBeacon Tracker
Configuration
To add the iBeacon Tracker hub to your Home Assistant instance, use this My button:

If the above My button doesn’t work, you can also perform the following steps manually:
-
Browse to your Home Assistant instance.
-
In the bottom right corner, select the
Add Integration button. -
From the list, select iBeacon Tracker.
-
Follow the instructions on screen to complete the setup.
iBeacons are Bluetooth-enabled devices that advertise identifiers to announce their location. For example, an iBeacon attached to a trash can can be used to determine if the trash can is in the garage or on the street. Home Assistant can estimate the distance of an iBeacon device in proximity to the nearest Bluetooth adapter.
iBeacon devices will be automatically detected and added as they are discovered once the integration has been added via the UI and the Bluetooth integration is enabled and functional.
iBeacon Devices are tracked by a combination of the following data:
- UUID (universally unique identifier) is a 128-bit identifier that is generally set the same for all iBeacons at the same physical location.
- Major is an integer to differentiate between iBeacons with the same UUID.
- Minor is an integer to differentiate between iBeacons with the same UUID and Major value.
- MAC address (except for devices with a randomized MAC address)
Consider setting up your iBeacons with a schema similar to the following:
- uuid=UUID major=1000 minor=1000 Downstairs Front Room
- uuid=UUID major=1000 minor=1001 Downstairs Bathroom
- uuid=UUID major=2000 minor=1001 Upstairs Main Bedroom
- uuid=UUID major=2000 minor=1002 Upstairs Guest Bedroom
- uuid=UUID major=3000 minor=1000 Attic
iBeacon devices that do not have stable Major and Minor values are not supported. The system automatically removes iBeacon devices with unstable Major and Minor values once ten (10) or more Major and Minor values have been seen with the same UUID from an iBeacon device with a fixed MAC address.
The system will not automatically create iBeacon devices for beacons that do not broadcast their name to avoid inundating your system with transient devices.
To explicitly allow a list of UUIDs to be added even with an empty device name, add them via the integration options.
Options
To define options for iBeacon Tracker, follow these steps:
-
In Home Assistant, go to Settings > Devices & services.
-
If multiple instances of iBeacon Tracker are configured, choose the instance you want to configure.
-
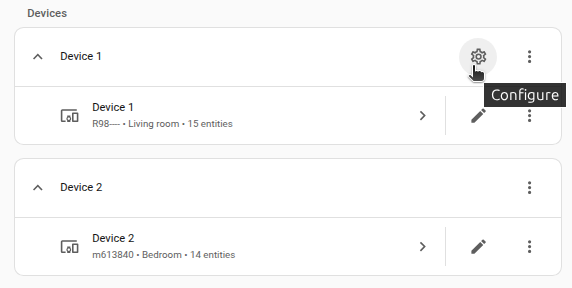
On the card, select the cogwheel
. - If the card does not have a cogwheel, the integration does not support options for this device.
-
Edit the options, then select Submit to save the changes.
Considering an iBeacon Away
Due to various factors such as individual system settings and iBeacon firmware, iBeacons will not be marked as “Away” immediately. This could take several minutes.
Fixed MAC addresses
iBeacons with a fixed MAC address will get their own set of entities for each UUID, major, minor, and MAC address combination, enabling distance and presence detection per physical device basis. In this type of setup, it is permissible to have multiple iBeacons broadcasting the same UUID, Major, and Minor combination as long as you do not exceed five devices.
Randomized MAC addresses
iBeacons with a randomized MAC address will be combined into a single set of entities once the integration discovers the same UUID, Major, and Minor combination has been seen coming from 10 or more MAC addresses. This allows distance and presence detection based on the last reporting data. When using randomized MAC addresses, only one device must broadcast the unique UUID, Major, and Minor combination.
Sensors
The integration will create an Estimated Distance sensor by default. This estimated distance assumes perfect RF conditions and line of sight between the iBeacon and the Bluetooth adapter. Estimated distance is generally only helpful to tell if the iBeacon is in the immediate vicinity, near, or far away from the adapter. If the system has multiple adapters, the adapter with the best RSSI value for the iBeacon will be the one reporting the distance. As this can change, checking the source attribute when considering the distance is essential.
To get the Estimated distance sensor to work, in most cases, it has to be calibrated in the supplier’s app. Place the device at 1m in line of sight of the Bluetooth adapter, read the signal strength in dBm, and set it in the corresponding field of the device app.
Known working devices
- Blue Charm Beacons BC-U1-USB-Powered-MultiBeacon
- Blue Charm Beacons BC011-MultiBeacon
- Blue Charm Beacons BC021-MultiBeacon
- Blue Charm Beacons BC037G-GeoPattern-iBeacon (discontinued)
- Blue Charm Beacons BC037S-SmoothPattern-iBeacon (discontinued)
- Blue Charm Beacons BC08-MultiBeacon (discontinued)
- Blue Charm Beacons BC037G-GeoPattern-iBeacon (discontinued)
- Blue Charm Beacons BC037S-SmoothPattern-iBeacon (discontinued)
- Blue SLIM ID
- Feasycom FSC-BP103B
- Feasycom FSC-BP104D
- Feasycom FSC-BP106
- Feasycom FSC-BP108
- MikroTik TG-BT5-IN (Additional sensors such as angle or impact are not compatible)
- NRF51822 iBeacon
- NRF52810 iBeacon
- Pawscout Tag
- SwiftFinder (Requires being paired to a phone first before it starts transmitting once a minute, otherwise it stays asleep)
- Teltonika EYE Teltonika EYE Sensor (Additional sensors such as accelerometer, temperature, and humidity are not compatible)
Example automation
alias: "The black trash can has left the building"
triggers:
  - trigger: state
    entity_id: sensor.black_trash_bin_estimated_distance
    to: "unavailable"
    for:
      hours: 0
      minutes: 5
      seconds: 0
  - trigger: numeric_state
    entity_id: sensor.black_trash_bin_estimated_distance
    for:
      hours: 0
      minutes: 5
      seconds: 0
    above: 20
actions:
  - action: notify.notify
    data:
      message: "The black trash can has left the building"
      title: "The black trash can has left the building"