Speedtest.net
The Speedtest.net integration uses the Speedtest.net web service to measure network bandwidth performance.
Configuration
To add the Speedtest.net integration to your Home Assistant instance, use this My button:
If the above My button doesn’t work, you can also perform the following steps manually:
-
Browse to your Home Assistant instance.
-
In the bottom right corner, select the Add Integration button.
-
From the list, select Speedtest.net.
-
Follow the instructions on screen to complete the setup.
Most Speedtest.net servers require TCP port 8080 outbound to function. Without this port open you may experience significant delays or no results at all. See note on their help page.
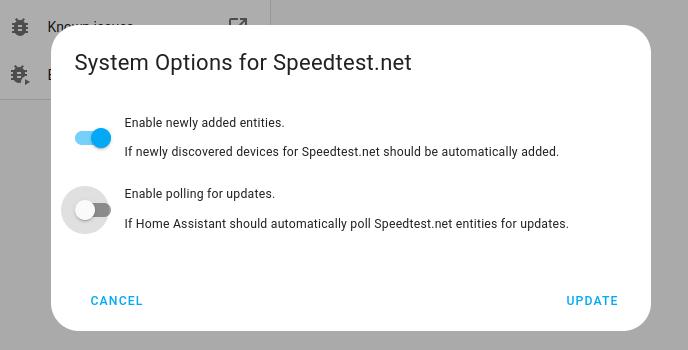
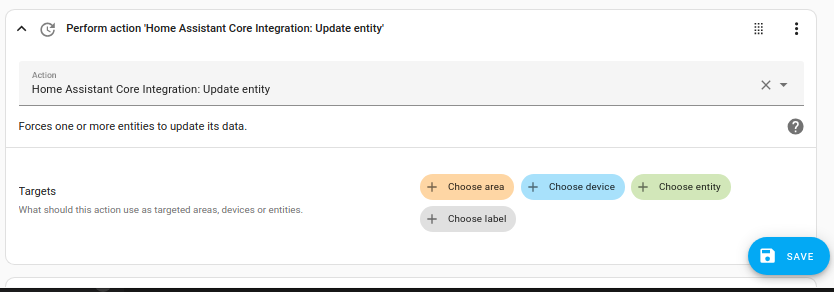
By default, a speed test will be run every hour. You can disable polling using system options and use the update_entity service to automate the speed test frequency.
If you want to define a specific interval at which your device is being polled for data, you can disable the default polling interval and create your own polling automation.
To add the automation:
- Go to Settings > Devices & Services, and select your integration.
- On the integration entry, select the three dots.
- Then, select System options and toggle the button to disable polling.

- Then, select System options and toggle the button to disable polling.
- To define your custom polling interval, create an automation.
- Go to Settings > Automations & Scenes and create a new automation.
- Define any trigger and condition you like.
- Under action, select Call service and use the
homeassistant.update_entityservice.
- Save your new automation to poll for data.
Integration sensors
The following sensors are added by the integration:
sensors:
- Ping sensor: Reaction time in ms of your connection (how fast you get a response after you’ve sent out a request).
- Download sensor: The download speed (Mbit/s).
- Upload sensor: The upload speed (Mbit/s).
This integration uses speedtest-cli to gather network performance data from Speedtest.net. Please be aware of the potential inconsistencies that this integration may display.
Examples
In this section you will find some real-life examples of how to use this integration.
Using as a trigger in an automation
# Example configuration.yaml entry
automation:
  - alias: "Internet Speed Glow Connect Great"
    trigger:
      - platform: template
        value_template: "{{ states('sensor.speedtest_download')|float >= 10 }}"
    action:
      - service: shell_command.green

  - alias: "Internet Speed Glow Connect Poor"
    trigger:
      - platform: template
        value_template: "{{ states('sensor.speedtest_download')|float < 10 }}"
    action:
      - service: shell_command.red
Notes
- When running on Raspberry Pi the maximum speed is limited by the LAN adapter. The Raspberry Pi 3+ models come with a Gigabit LAN adapter which supports a maximum throughput of 300 Mbit/s.
- Running this integration can have negative effects on the system’s performance as it requires a fair amount of memory.
- If run frequently, this integration has the ability to use a considerable amount of data. Frequent updates should be avoided on bandwidth-capped connections.
- While the speedtest is running your network capacity is fully utilized. This may have a negative effect on other devices using the network such as gaming consoles or streaming boxes.