World's most private voice assistant
This tutorial will guide you to turn your old landline phone into the world’s most private voice assistant. Pick up the phone to talk to your smart home and issue commands and get responses.
Required material
- Home Assistant 2023.5 or later, installed with the Home Assistant Operating System. If you do not have Home Assistant installed yet, refer to the installation page for instructions.
- An analog phone with an RJ11 socket
- An analog telephone adapter
Grandstream HT801
- includes a 5 V power adapter and an Ethernet cable
- RJ11 phone cable to connect the phone to the Grandstream
- Cloud assistant pipeline or a manually configured local assistant pipeline
Setting up Grandstream
- Connect the RJ11 cable from the phone to the green socket on the Grandstream.
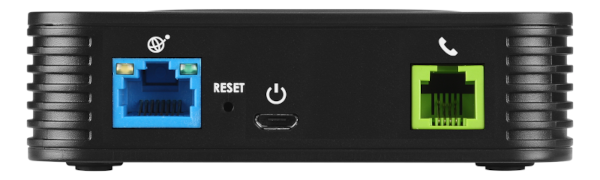
- Connect the Grandstream to your network:
- Plug the Ethernet cable into the blue socket and connect it to your router.
- Start up the Grandstream.
- Connect the power supply.
- Once the Grandstream has booted, the two LEDs for power and Ethernet light up solid blue. The phone LED won’t light up.
- Identify the IP address of the Grandstream.
- If your phone has a star * key, you can get your phone to tell you it’s IP address:
- Press *** (press the star key three times) and wait until you hear Enter the menu option.
- Press 02 and the phone will tell you its IP address.
- If your phone does not have a star * key, log onto your router to find the IP address.
- If your phone has a star * key, you can get your phone to tell you it’s IP address:
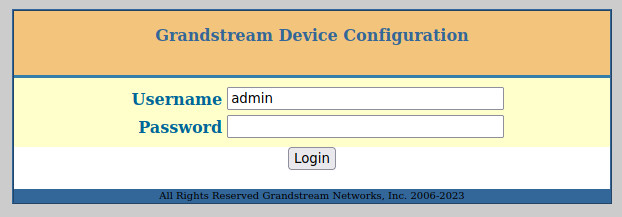
- Enter the IP address into a browser window and log onto the Grandstream Device Configuration software.
- The default credentials are:
-
Username:
admin -
Password:
admin
-
Username:
- The default credentials are:
- Open the FXS Port tab and in the Offhook Auto-Dial field, enter the Home Assistant IP address in the following format:
- *47192*168*1*100*5060

- Note: instead of 192*168*1*100*, enter the IP address of your Home Assistant instance.
- At the bottom of the page, select Apply.

- Offhook Auto-Dial means that when you pick up the phone, it directly calls Home Assistant. No need to dial.
- *47192*168*1*100*5060
Setting up the phone in Home Assistant
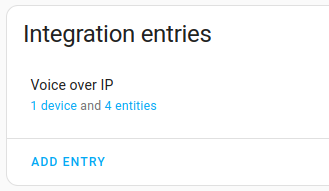
- In Home Assistant, go to Settings > Devices & Services > Add integration and add the Voice over IP integration.

- Once you see the integration, pick up the phone.
- You should now hear the message This is your smart home speaking. Your phone is connected, but you must configure it within Home Assistant.
- The integration should now include a device and entities.
- Don’t hear the voice? Try these troubleshooting steps.
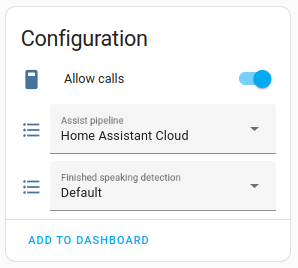
- Allow calls.
- Calls from new devices are blocked by default since voice commands could be used to control sensitive devices, such as locks and garage doors.
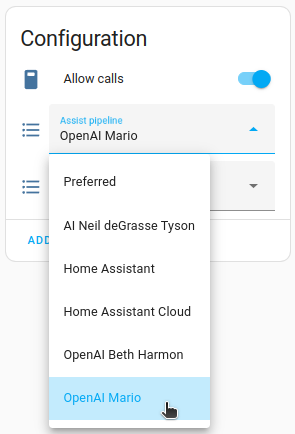
- In the Voice over IP integration, select the device link.
- To allow this phone to control your smart home, under Configuration, enable Allow calls.
- Congratulations! You set up your analog phone to work with Home Assistant. Now pick up the phone and control your device.
- Say a supported voice command. For example, Turn off the light in the kitchen.
- You can also ask a question, such as
- Is the front door locked?
- Which lights are on in the living room?
- Make sure you’re using the area name as you defined it in Home Assistant. If you have a room called bathroom, the phrase Turn on the lights in the bath won’t work.
- Your command is not supported? Add your own commands.
Give your voice assistant personality using the OpenAI integration
To reproduce this example, follow these steps:
Note: this procedure requires an OpenAI account. To just run the example, the free trial option is sufficient. No need to leave your credit card information.
-
In the Voice over IP integration, under Configuration, select the Mario assistant you just created.
-
That’s it! Pick up your phone and ask Mario a question.
-
You can repeat this with other OpenAI personalities. You can add as many OpenAI Conversation integrations as you would like.
- To add a new personality, you need to create a new API key. Then, add a new OpenAI Conversation integration with that API key.
Troubleshoot Grandstream
The test call does not work
If you’re unable to call Home Assistant, confirm the following settings in your Grandstream device’s web interface.
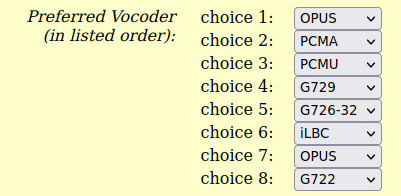
- On the FXS Port tab, check the Preferred Vocoder list.
- Make sure that OPUS is selected for one of the choices:
- Make sure that OPUS is selected for one of the choices:
- Under OPUS Payload type, make sure the value is
123. It’s the default option.
- At the bottom of the page, select Apply.
- Pick up the phone again and check if you hear the voice.
The Voice over IP integration no longer works
Symptom You were able to control Home Assistant over the phone but it no longer works. When picking up the phone, no sound is played. The debug information shows no runs.
Potential remedy
- Log onto the Grandstream Device Configuration software.
- On the Status page, check if the Hook status changes from On Hook to In Use after you picked up the phone.
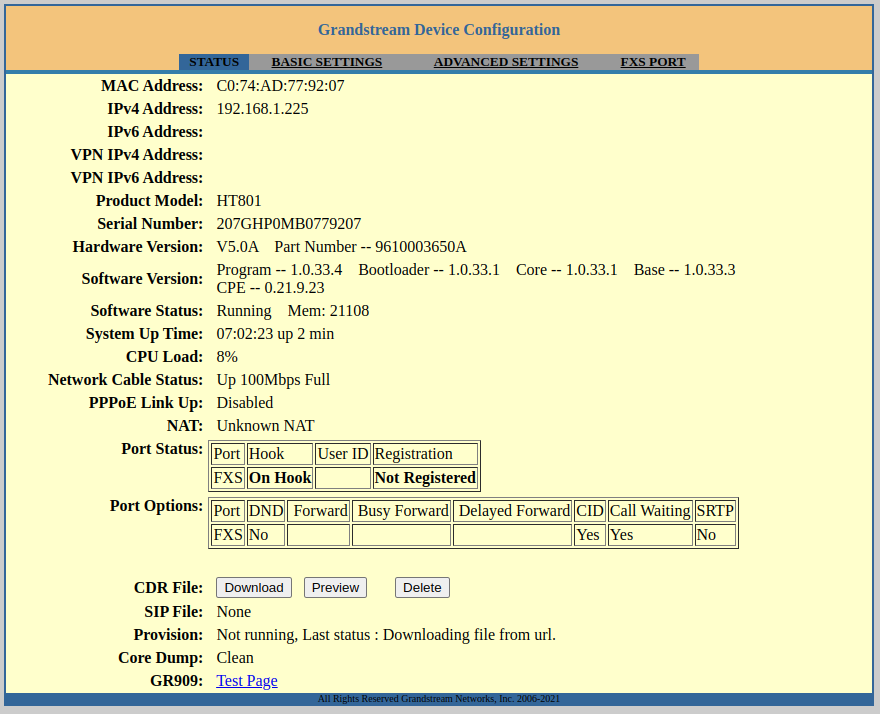
- The software is quite slow. Refresh the page and wait for a while before hanging up again.
- If the status does not change, reboot the Grandstream and try calling Home Assistant again.
Other troubleshooting steps
Are things still not working as expected?
- Checkout the general troubleshooting section for Assist.
About the analog phone
You can use any analog landline phone with an RJ11 socket.
The phone shown in the video by TheFes is a Heemaf type 1955, which was used by the Dutch telephone company PTT at the time.
The phone used during creation of this tutorial is a 1953 Tischstation Mod.29 HF-TR by Autophon AG.